How to Stabilize a Greenhouse: A 7-Point Actionable Checklist for 2025
નવેમ્બર 26, 2025
Abstract
The structural integrity of a greenhouse is a fundamental precondition for its success, directly impacting crop security and financial viability. This document provides a comprehensive examination of the principles and practices required to ensure a greenhouse remains stable against diverse and often severe environmental pressures. It explores the foundational requirements, from site selection and anchoring systems to the engineering principles governing frame construction and material choice. A significant portion of the analysis is dedicated to the proper installation and securing of greenhouse coverings, with a particular focus on the interplay between high-quality greenhouse polyethylene film and advanced fastening systems like wiggle wires and channels. Furthermore, the document investigates the aerodynamic forces at play, including both external wind loads and internal air pressure dynamics, elucidating the roles of ventilation systems, circulation fans, and automated gear motors in mitigating these stresses. The overarching argument is that a holistic and proactive approach, integrating robust construction with intelligent environmental management, is the most effective strategy for long-term greenhouse stabilization across varied global climates.
Key Takeaways
- Build a strong foundation with appropriate anchoring for your specific soil and climate conditions.
- Fortify the greenhouse frame with cross-bracing, trusses, and regular structural inspections.
- Use a quality wiggle wire and channel system to securely fasten your polyethylene film.
- Manage wind by using natural or artificial windbreaks and reinforcing the structure’s corners.
- Properly learning how to stabilize a greenhouse involves regulating internal air pressure with fans.
- Automate your ventilation with gear motors to respond proactively to changing weather.
- Conduct seasonal maintenance checks to identify and address potential weaknesses early.
Table of Contents
- The Unseen Guardian: Establishing a Robust Foundation
- The Skeleton’s Strength: Fortifying the Greenhouse Frame
- The Skin of the Sanctuary: Mastering Polyethylene Film Installation
- Taming the Tempest: Managing Wind and External Pressures
- The Breath Within: Regulating Internal Air Pressure and Flow
- The Automated Guardian: Integrating Gear Motors for Dynamic Control
- A Stitch in Time: The Philosophy of Proactive Maintenance and Inspection
- Frequently Asked Questions (FAQ)
- Conclusion
- References
The Unseen Guardian: Establishing a Robust Foundation
The conversation about a greenhouse often begins with its light-transmitting cover or the vibrant life it will soon contain. Yet, the silent, subterranean element—the foundation—dictates the structure’s entire narrative of endurance. A foundation is not merely a base; it is the physical mediator between the greenhouse and the earth, a translator of terrestrial stability to the structure above. Neglecting its importance is akin to building a ship without considering the nature of the sea. The forces it must contend with are immense and varied: the pull of gravity, the heave of frozen ground in a Russian winter, the subtle shifting of sandy soils in the Middle East, or the water-logged earth of a Southeast Asian monsoon season. Understanding how to stabilize a greenhouse begins, quite literally, from the ground up. It requires a thoughtful engagement with the specific character of your land and the climate that shapes it.
Choosing the Right Foundation Type for Your Climate
The selection of a foundation is not a one-size-fits-all decision. It is a calculated choice based on a dialogue between the intended structure, the soil composition, and the regional climate. Imagine you are a grower in the Western Cape of South Africa, where clay soils expand and contract dramatically between wet winters and dry summers. A simple, shallow foundation might shift and crack, transferring that instability directly to your greenhouse frame. In this context, a more robust solution is required.
A common starting point for smaller, temporary structures is a Slab Foundation. This involves pouring a single, thick layer of concrete across the entire footprint of the greenhouse. It provides a clean, level floor and significant weight, which helps anchor the structure. However, in regions with deep frost lines, like many parts of Russia, a simple slab can be susceptible to “frost heave,” where freezing soil expands and pushes the slab upward, potentially warping the entire greenhouse.
For more permanence and resilience, a Pier Foundation is often superior. This involves digging holes below the frost line at strategic points—typically at the corners and along the sides—and pouring concrete piers. The greenhouse frame is then anchored directly to these piers. Because the piers are rooted in soil that does not freeze, they are immune to frost heave, providing a steadfast anchor point. This method is particularly well-suited for larger, commercial-grade structures that must endure for decades.
A third option, the Trench or Perimeter Foundation, creates a continuous concrete wall around the perimeter of the greenhouse, extending below the frost line. This provides excellent stability and creates a solid base for the walls, making it a preferred choice for glass or rigid polycarbonate panel greenhouses, though it is equally effective for hoop houses covered in polyethylene film.
| Foundation Type | Best Suited For | Advantages | Disadvantages |
|---|---|---|---|
| Slab Foundation | Smaller greenhouses, mild climates, temporary or seasonal use. | Provides a level floor, good weight distribution, relatively simple to install. | Susceptible to frost heave, can crack with soil shifting, may require significant site prep. |
| Pier Foundation | All sizes, especially large commercial structures in cold climates. | Anchors below the frost line, excellent stability against wind and heave, less concrete needed. | Does not provide a floor, requires precise placement and alignment. |
| Perimeter Foundation | Permanent, heavy greenhouses (glass/polycarbonate), all climates. | Extremely stable, provides a solid wall base, immune to frost heave. | Most expensive option, labor-intensive, significant excavation required. |
The Critical Role of Anchoring Systems
The foundation provides the mass, but the anchoring system provides the grip. An anchor is the physical connection that prevents the greenhouse from becoming a kite in a gale. The type of anchor must be matched to the foundation and soil. For a slab foundation, J-bolts or L-bolts are set into the wet concrete, providing threaded posts to which the greenhouse base plates can be bolted.
In the case of pier or perimeter foundations, or for anchoring directly into soil, other methods become necessary. Ground Anchors, which look like giant corkscrews, are twisted deep into the earth. These are highly effective in cohesive soils but may offer less holding power in loose, sandy, or rocky terrain. For growers in the Pampas of South America, where deep, stable soils are common, ground anchors can be a very effective solution for hoop houses. The holding power of these anchors is immense, a testament to the simple power of friction and displacement. As an engineer from the American Society of Agricultural and Biological Engineers might explain, the pull-out resistance is a function of the anchor’s surface area and the shear strength of the soil (Von Zabel & Gheen, 2016). A correctly installed anchor engages a large cone of soil, forcing any upward pull to lift not just the anchor, but a massive weight of earth along with it.
Site Preparation and Leveling: The First Step to Stability
Before any concrete is poured or any anchor is driven, the site itself must be prepared. This is perhaps the most overlooked aspect of stabilization. A structure erected on an uneven or improperly graded site will have stress built into its very frame from the first day. The frame will not sit flush, doors will not align, and the covering will be impossible to tension evenly.
The process begins with clearing the site of all vegetation, rocks, and debris. The topsoil, rich in organic matter, is often removed and set aside, as it is prone to compression and decomposition, which can lead to settling. The subsoil is then graded to be perfectly level. This may require bringing in fill material or excavating high spots. A simple tool like a line level or a more advanced laser level is indispensable here. The goal is to create a building pad that is flat, stable, and well-drained. Proper drainage is a key part of this preparation. Grading the surrounding area to slope away from the greenhouse prevents water from pooling around the foundation, which can lead to erosion, soil saturation, and, in cold climates, exacerbated frost heave. This initial act of shaping the land is the first and most profound step in the dialogue between the builder and the environment.
The Skeleton’s Strength: Fortifying the Greenhouse Frame
If the foundation is the anchor to the earth, the frame is the greenhouse’s skeleton. It is the structure that gives the building its shape, bears the weight of the covering, and, most importantly, resists the relentless pressures of wind, snow, and gravity. The strength of this skeleton is not a matter of chance; it is a product of deliberate design choices concerning material, geometry, and ongoing care. A failure in the frame is a catastrophic failure of the entire system. Therefore, understanding the principles that contribute to a robust frame is central to the project of stabilizing a greenhouse. It involves moving beyond a simple consideration of cost and appreciating the deep engineering logic that informs a durable structure.
Material Matters: Steel vs. Aluminum and Beyond
The choice of framing material is a foundational decision that influences the greenhouse’s strength, longevity, and cost. The two most common materials in modern greenhouse construction are galvanized steel and aluminum. Each possesses a distinct set of virtues and limitations.
Galvanized Steel is the workhorse of the commercial greenhouse industry. Its primary virtue is its exceptional strength-to-weight ratio. Steel can bear significant loads, making it ideal for large-span greenhouses in regions that experience heavy snowfall, such as Russia, or high winds, like the coastal areas of South Africa. The galvanization process, which coats the steel in a layer of zinc, provides crucial protection against corrosion—a constant threat in the humid interior of a greenhouse. Think of the steel tube as a bone; its strength is inherent, but without the protective layer of galvanization, it is vulnerable to a slow, degenerative disease—rust.
Aluminum, on the other hand, is prized for its lightness and natural resistance to corrosion. It does not require a protective coating, and its lighter weight can make for easier and faster construction. However, on a pound-for-pound basis, it is not as strong as steel and is generally more expensive. For this reason, aluminum is often found in smaller, hobby-style greenhouses or as the material for specific components like glazing bars (which hold glass or polycarbonate panels) and vents, where its corrosion resistance and intricate extrusion possibilities are most valuable.
| Feature | Galvanized Steel | Aluminum |
|---|---|---|
| Strength | Very high; ideal for heavy snow and wind loads. | Good; sufficient for most applications but less than steel. |
| Corrosion Resistance | Good to excellent, dependent on the quality of galvanization. | Excellent; naturally resistant to rust. |
| Weight | Heavy; requires more labor/machinery for installation. | Lightweight; easier and faster to assemble. |
| Cost | Generally less expensive per unit of strength. | Generally more expensive than steel. |
| Lifespan | Long, but can be compromised if the galvanized coating is scratched or damaged. | Very long; not dependent on a coating for protection. |
| Primary Use | Commercial hoop houses, large-span structures. | Hobby greenhouses, glazing systems, vents, doors. |
The decision between them is a calculation of risk and resources. For a large-scale commercial grower in a challenging climate, the superior strength and lower cost of galvanized steel often make it the logical choice. For a backyard enthusiast in a milder climate, the ease of assembly and aesthetic appeal of aluminum might be more compelling.
The Geometry of Strength: Bracing and Trusses
A frame’s material is only half the story; its geometry is the other. A straight tube of steel has strength, but when arranged in a specific geometric pattern, its ability to resist forces is amplified enormously. This is the principle behind bracing and trusses.
Imagine a simple rectangular frame. If you push on one of the top corners, the rectangle will easily deform into a parallelogram. It has very little resistance to this shearing force. Now, imagine adding a single diagonal member, turning two of the corners into a triangle. The entire structure becomes vastly more rigid. This is because a triangle is the most stable geometric shape; its angles cannot change without changing the length of its sides. This simple addition is called cross-bracing.
In a greenhouse, cross-bracing is used to prevent the structure from racking or twisting under wind load. You will see these diagonal supports at the corners, along the length of the sidewalls, and often integrated into the end walls. They are the ligaments of the skeleton, holding the bones in their proper alignment.
Trusses are a more complex application of this same principle. A truss is a web-like structure of interconnected triangles used to span a large distance, such as the roof of a wide greenhouse. Instead of a single, heavy beam, a truss uses a series of smaller, lighter members (chords and webs) arranged in a triangular pattern to achieve the same, or even greater, strength. This design is incredibly efficient, maximizing strength while minimizing material weight and cost. As noted in studies on greenhouse structural design, trusses are essential for distributing loads from snow, wind, and suspended equipment evenly across the entire frame and down into the foundation (ASAE Standards, 2003). Without them, the large, open spans required for commercial agriculture would be impossible.
Regular Maintenance: Averting Structural Fatigue
A greenhouse frame is not a static object. It is in a constant state of tension, subjected to daily cycles of heating and cooling, fluctuating loads from wind, and the slow, persistent attack of humidity. Over time, these forces can lead to structural fatigue. Bolts can loosen, connections can wear, and even the smallest scratch in a galvanized coating can become a focal point for rust.
Therefore, a philosophy of proactive maintenance is essential for long-term stability. This involves a regular, systematic inspection of the entire frame. This is not a casual glance but a deliberate search for potential points of failure. Are all bolts tight? Is there any sign of the frame shifting on its foundation? Are there any areas where rust is beginning to form? Is the cross-bracing still taut?
This regular check-up is the grower’s way of listening to the structure, of identifying small problems before they cascade into catastrophic failures. A loose bolt retightened, a spot of rust sanded and treated with cold galvanizing paint—these small acts of stewardship are what ensure the skeleton remains strong, season after season, protecting the life within.
The Skin of the Sanctuary: Mastering Polyethylene Film Installation
The covering of a greenhouse—its skin—is where the structure interfaces most intimately with the elements. It is the barrier that holds warmth in and keeps weather out. For a vast number of growers worldwide, from the terraced farms of Southeast Asia to the expansive agricultural operations in South America, that skin is made of greenhouse polyethylene film. This material is a modern marvel: lightweight, relatively inexpensive, and with advanced formulations that can diffuse light, block UV radiation, and retain infrared heat. However, its effectiveness and its contribution to the overall stability of the greenhouse are entirely dependent on how it is installed and secured. A loose, flapping film is not just an inefficient insulator; it is a sail waiting for a wind, a weak point that can compromise the entire structure.
Selecting the Right Greenhouse Polyethylene Film for Your Region
Before a single tool is lifted, the correct film must be chosen. The term “polyethylene film” encompasses a wide array of products with vastly different properties. A grower in the intense sun of the Middle East has different needs than one in the lower-light, high-snow-load conditions of Northern Russia.
The first consideration is durability and lifespan. Films are typically rated for a certain number of years (e.g., 1-year, 4-year). A 4-year film contains a higher concentration of UV inhibitors, which protect the plastic from being broken down by the sun’s radiation. While more expensive initially, a longer-life film reduces the labor and material costs of frequent replacement.
Second is the consideration of light transmission and diffusion. A clear film allows maximum light transmission, which might be desirable in lower-light regions. However, a diffused film scatters the light as it passes through. This reduces shadows within the greenhouse and prevents “sunburn” on the upper leaves of plants, leading to more even growth. For high-light environments, a diffused film is almost always a better choice.
Third, properties like infrared (IR) retention and anti-drip/anti-fog coatings are vital. IR films have an additive that reflects thermal radiation back into the greenhouse at night, keeping it warmer and reducing heating costs. This is a significant advantage in any climate with cool nights. Anti-drip coatings cause condensation to form as a sheet that runs down the film rather than as droplets that can fall on plants and promote disease. Understanding these properties allows a grower to select a film that is not just a passive cover but an active tool for environmental management.
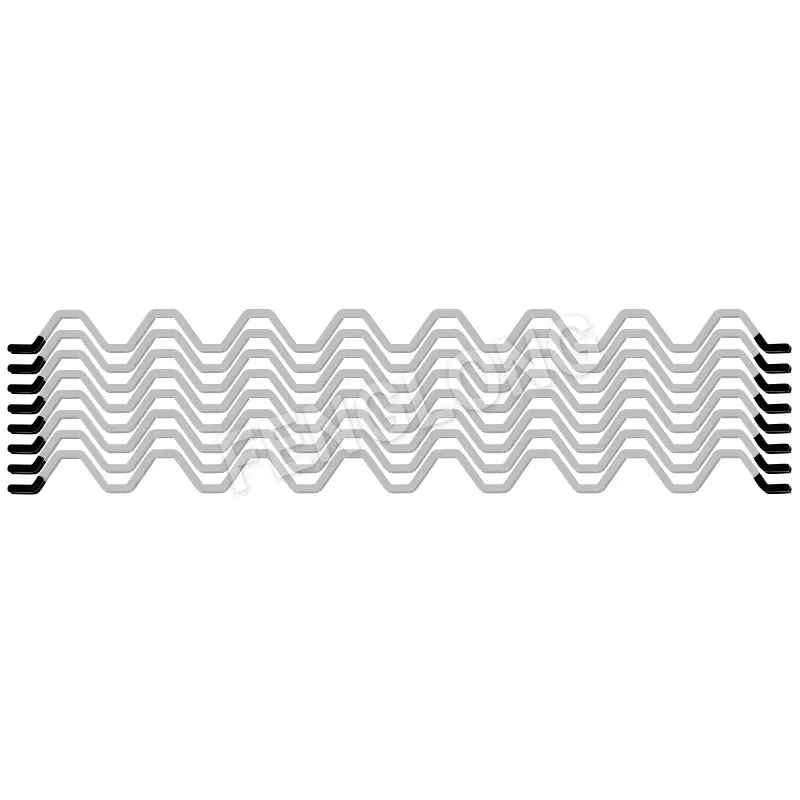
The Wiggle Wire and Channel System: A Superior Fastening Method
Once the film is selected, the question becomes how to attach it to the frame. Historically, this was done with wooden battens and nails or screws. This method is fraught with problems. It creates point-loads on the film, leading to stretching and tearing. It also punctures the film, creating thousands of potential failure points.
The modern, superior solution is the wiggle wire and channel system. This two-part mechanical system provides a continuous, secure grip on the film without puncturing it. The wiggle wire channel (also known as a lock channel or base) is an aluminum or galvanized steel extrusion that is screwed directly to the greenhouse frame members (hoops, purlins, baseboards). It provides a U-shaped track that runs the length of the frame.
After the polyethylene film is draped over the structure, the wiggle wire—a piece of high-tensile, PVC-coated steel wire bent into a zig-zag pattern—is pressed into the channel over the top of the film. The wire’s spring-like tension locks the film firmly in place along the entire length of the channel. This method distributes the holding force evenly, eliminating the stress points that cause tears. It creates a seal that is both incredibly strong and gentle on the film.
The advantages are profound. A properly installed wiggle wire system can hold the film securely even in hurricane-force winds. It allows the film to be pulled taut, which is essential for shedding water and snow and for preventing wind-induced oscillations that can damage the frame. Furthermore, it makes installation and replacement much easier. To release the film, you simply “wiggle” the wire out of the channel. This elegant solution is a perfect example of how thoughtful engineering can dramatically improve the resilience of a structure. For those new to this technology, exploring a wiggle wire greenhouse can illuminate the nuances of selecting high-quality components.
Achieving Optimal Tension with a Film Reeler
The final piece of the puzzle in film installation is achieving the correct tension. A loose film is a liability. It will flap in the wind, a phenomenon called “luffing,” which not only stresses the film but also transfers dynamic, jerking loads to the greenhouse frame. A loose film will also collect water and snow in pockets, adding immense weight that the structure may not be designed to bear.
The film should be installed to be “drum-tight.” This can be difficult to achieve by hand, especially on a large greenhouse. This is where a film reeler or stretcher becomes an invaluable tool. A film reeler is a simple mechanical device that grips the edge of the film and uses leverage or a cranking mechanism to pull it taut across the frame before it is locked into the wiggle wire channel.
The process typically involves securing the film along one side of the greenhouse first. The film is then pulled over the ridge, and the reeler is used on the opposite side to apply even, consistent tension. The best time to install film is on a calm, warm day. The warmth makes the polyethylene slightly more pliable and allows it to be stretched tight. As it cools down during the night, the film will shrink slightly, increasing the tension and resulting in a perfectly taut, glass-like finish. This tension is not just for aesthetics; it is a fundamental component of structural stability.
Taming the Tempest: Managing Wind and External Pressures
A greenhouse, by its very nature, presents a large profile to the wind. It is an obstacle in the path of moving air, and that air will exert powerful and complex forces upon it. The study of how to stabilize a greenhouse is, in large part, the study of aerodynamics. From the fierce Zonda winds descending the Andes in South America to the seasonal monsoons of Southeast Asia, wind is a primary adversary. Ignoring its power is to court disaster. Effective stabilization requires a multi-faceted approach that includes understanding the forces at play, strategically modifying the landscape, and reinforcing the structure itself against predictable stresses.
Understanding Aerodynamic Forces on Greenhouse Structures
When wind encounters a greenhouse, it does not simply push on the windward side. The fluid dynamics are far more complex. As air flows over the curved roof, its velocity increases, and according to Bernoulli’s principle, this increase in velocity corresponds to a decrease in pressure. This creates a powerful lifting force, much like the lift generated by an airplane wing. On a calm day, the air pressure inside and outside the greenhouse is equal. But in a high wind, the pressure on the roof and leeward side can drop significantly, resulting in a net outward pressure that can be strong enough to literally tear the film from the frame or even lift the entire structure off its foundation.
Research conducted by agricultural engineers has quantified these forces. Studies show that the highest negative pressures (lift) often occur not at the peak of the roof, but just past the crest on the leeward side (Katsoulas et al., 2006). The corners and edges of the structure also experience significantly higher stress concentrations due to the complex vortices that form as the wind detaches from the surface. This is why you will often see failures initiate at the corners of a greenhouse or along the roofline. An appreciation for these unseen forces is what separates a truly resilient design from a merely adequate one. The goal is not just to resist the push of the wind, but to counteract its pull as well.
The Function of Windbreaks and Natural Topography
The first line of defense against wind is not the greenhouse itself, but the landscape around it. A well-placed windbreak can reduce wind velocity by as much as 50%, dramatically lowering the force exerted on the structure. The force of wind is proportional to the square of its velocity, so halving the wind speed reduces the force by a factor of four. This is a staggering improvement for a relatively simple intervention.
A windbreak can be natural or artificial. A row of hardy, fast-growing trees or large shrubs planted upwind of the greenhouse is an ideal solution. The best windbreaks are semi-permeable; they don’t block the wind completely but rather filter and slow it down. A solid wall can create intense turbulence on its leeward side, which can sometimes be more damaging than the uninterrupted wind. A line of trees, on the other hand, gently lifts the wind over the greenhouse and reduces its speed without creating this violent turbulence. The optimal distance for planting a windbreak is typically two to five times the height of the trees.
The natural topography of the land can also be used to advantage. Siting a greenhouse on the leeward side of a hill or in a natural depression can offer significant protection. Conversely, building on an exposed hilltop or ridge is an open invitation for the wind to do its worst. Before construction begins, a thoughtful observation of the land and the prevailing wind patterns can inform a siting decision that provides a permanent, cost-free advantage in the battle against the elements.
Reinforcing High-Stress Areas
Even with a good windbreak, the greenhouse frame must be prepared to handle significant loads. Knowing that the corners and roof edges are high-stress areas allows for targeted reinforcement. This is where the principles of structural fortification come into play.
Corner Bracing is non-negotiable. As discussed previously, diagonal cross-bracing in every corner of the walls and roof prevents the rectangular bays from deforming under pressure. These braces should be securely fastened and kept taut.
Purlin Spacing is another key factor. Purlins are the members that run the length of the greenhouse, connecting the hoops or rafters. They support the covering and prevent the main frame members from flexing. The closer the purlin spacing, the stronger the roof structure will be and the better it will support the film against both downward (snow) and upward (wind lift) loads.
Storm Kits are often offered by manufacturers for high-wind areas. These kits typically include extra bracing, heavier-duty fasteners, and sometimes even steel cables and ground anchors that can be temporarily deployed over the top of the structure in advance of a major storm. They are a form of structural insurance.
Finally, the importance of the fastening system cannot be overstated. The continuous grip of a high-quality wiggle wire channel system is what holds the skin to the skeleton. In high-wind areas, it is wise to use channels on every single frame member that the film crosses—not just on the perimeter but on every hoop and purlin. This ensures that the wind load is distributed across the entire frame, rather than being concentrated on a few points of attachment. This comprehensive approach, from shaping the landscape to reinforcing the frame’s most vulnerable points, is how a grower can confidently face the tempest.
The Breath Within: Regulating Internal Air Pressure and Flow
A greenhouse is often conceived of as a sealed environment, a placid bubble protected from the outside world. This conception is misleading. A greenhouse is a breathing entity, constantly exchanging air with its surroundings. The management of this breath—the internal air pressure and flow—is a subtle but profoundly important aspect of structural stabilization. An imbalance between internal and external pressure can be as destructive as a powerful gust of wind. This is particularly true for greenhouses covered with flexible polyethylene film. Understanding how to manage the air within is a key component of learning how to stabilize a greenhouse against the invisible forces that threaten it.
The Importance of a Balanced Ventilation System
Ventilation in a greenhouse serves multiple purposes: it regulates temperature, controls humidity, and replenishes carbon dioxide for photosynthesis. It also plays a crucial role in managing air pressure. A completely sealed greenhouse on a hot, sunny day will experience a significant rise in internal air temperature. This increase in temperature causes the air inside to expand and increases the internal pressure. If this pressure is not vented, it will push outwards on the film, straining the fastening systems and the frame itself.
Conversely, a sudden drop in outside temperature can cause the air inside to cool and contract, creating a negative pressure differential (a vacuum effect) that pulls the film inwards. The most dramatic pressure changes, however, occur during high winds. As wind rushes over the structure, creating a low-pressure zone on the exterior, a well-sealed greenhouse with high internal pressure can experience a massive outward force on its covering.
An effective ventilation system provides a controlled way to equalize this pressure. This can be achieved through several means:
- Roll-Up Sides: A common and effective method where the film on the sidewalls can be rolled up or down, opening a large area for natural ventilation.
- Ridge Vents: Vents located at the peak of the roof that allow hot air, which naturally rises, to escape. These are particularly effective and can create a natural “chimney effect” ventilation when paired with side vents.
- Mechanical Fans: Large exhaust fans, typically mounted in an end wall, that actively pull air out of the greenhouse, forcing fresh air to enter through an intake vent or louver on the opposite end.
The key is that the ventilation system must be sized appropriately for the volume of the greenhouse to allow for rapid air exchange when needed. In windy conditions, slightly opening the vents on the leeward side (the side opposite the wind) can help to equalize the pressure between the inside and outside, dramatically reducing the dangerous lifting forces on the roof.
Strategic Placement and Use of Circulation Fans
While the main ventilation system manages the exchange of air with the outside, circulation fans manage the movement of air within the greenhouse. These fans, often called Horizontal Air Flow (HAF) fans, are not designed for cooling but for creating a gentle, continuous, and circular pattern of air movement throughout the space.
Their primary agronomic benefit is to create uniform temperature and humidity, preventing hot or cold spots and reducing the incidence of fungal diseases. From a structural standpoint, their role is more subtle but still important. By keeping the internal air mass in constant, gentle motion, they prevent the stratification of air and the buildup of pockets of high or low pressure. During a wind event, a well-mixed internal air mass is less prone to the kinds of pressure differentials that can stress the covering.
The strategic placement of these fans is essential to their effectiveness. Typically, they are arranged in two lines along the length of the greenhouse. One line of fans pushes air in one direction, and the second line pushes it in the opposite direction, creating a slow, circular “racetrack” of airflow. This gentle, persistent movement helps the greenhouse “breathe” more evenly, making it less susceptible to the sudden pressure shocks induced by external weather events. These fans are the circulatory system of the greenhouse, ensuring that its internal environment remains stable and homogenous.
Preventing Film “Lift-Off” with Internal Pressure Management
The catastrophic failure mode for many film-covered greenhouses is “lift-off,” where the low pressure created by wind passing over the roof combines with the internal pressure to tear the film away. This is where all the elements of stabilization converge. A strong foundation and frame, a secure wiggle wire fastening system, and a well-managed ventilation strategy all work together to prevent this.
Consider this scenario: a strong wind is blowing. The grower has wisely planted a windbreak, which slows the wind’s velocity. The greenhouse itself is built on a level pad with a strong foundation. The polyethylene film is held taut by a comprehensive system of wiggle wire channels on every frame member. As the wind passes over the roof, creating lift, the grower opens the leeward roll-up sides slightly. This action allows some of the internal air to escape, equalizing the pressure and nullifying the lifting force. Inside, circulation fans keep the air moving, preventing any static pressure buildup against the film.
In this scenario, the grower is not just passively hoping the structure will hold. They are actively managing the forces at play. They are using their understanding of aerodynamics and pressure to turn the greenhouse from a rigid, vulnerable obstacle into a responsive, breathing system that can adapt to the storm. This proactive management, facilitated by a well-designed ventilation and circulation system, is the pinnacle of the art and science of greenhouse stabilization.
The Automated Guardian: Integrating Gear Motors for Dynamic Control
In the quest to create a perfectly stable and productive greenhouse environment, the human grower is the central intelligence. However, the grower cannot be present 24 hours a day, and weather conditions can change with startling rapidity. This is where automation, specifically the integration of gear motors, transforms the greenhouse from a static structure into a dynamic, responsive system. A gear motor is a compact and powerful combination of an electric motor and a gearbox. The gearbox reduces the speed of the motor while multiplying its torque, providing the slow, powerful, and controlled force needed to operate ventilation systems and other movable components. Their integration represents a significant leap forward in a grower’s ability to proactively manage the forces that affect greenhouse stability.
How Gear Motors Enhance Ventilation and Stability
The connection between ventilation and stability, as we have explored, is rooted in pressure management. Manually operated ventilation systems, like hand-cranked roll-up sides, are effective but require constant human attention. A sudden afternoon thunderstorm or a nocturnal wind front can arrive when no one is present to make the necessary adjustments.
A gear motor automates this process. When attached to the roll-up tube of a greenhouse’s side wall, the motor can raise or lower the film with precision and power. When connected to ridge vents, it can open or close them to the exact degree required. This automation provides two key benefits for stabilization:
- Responsiveness: An automated system can react instantly to changing conditions. When linked to a weather station, the system can be programmed to, for example, partially close the windward vents and slightly open the leeward vents when wind speeds exceed a certain threshold. This active pressure management can happen automatically, day or night, providing a level of vigilance that is humanly impossible.
- Consistency: Manual adjustments can be imprecise. A gear motor, controlled by a simple thermostat or a sophisticated environmental controller, makes the same precise adjustment every time. It ensures that vents are not left accidentally open during a storm or sealed shut during a heatwave, both of which can create dangerous pressure imbalances.
By taking over the repetitive and time-sensitive task of vent adjustment, gear motors free the grower to focus on other aspects of crop management, while acting as a tireless guardian of the structure’s integrity.
Automating Roll-Up Sides and Roof Vents
The application of gear motors to roll-up sides is a common and highly effective upgrade for any hoop house. The motor is typically mounted at one end of the roll-up pipe. When activated, it rotates the pipe, neatly rolling the polyethylene film up to open the vent or unrolling it to close it. The high torque provided by the gearbox means that even very long roll-up sides (50 meters or more) can be operated by a single motor. This allows for the rapid ventilation of a very large space, which is critical for dumping heat and managing pressure.
Similarly, gear motors are used in rack-and-pinion systems to operate roof vents. The motor drives a long shaft, and pinions on the shaft engage with racks attached to the vents, pushing them open or pulling them closed. This provides the immense power needed to lift long rows of heavy vents against the force of wind. The ability to automate these large openings is fundamental to the environmental control and structural stability of large-scale commercial greenhouses, such as those found throughout the agricultural heartlands of South America and Southeast Asia. These operations depend on reliable automation from suppliers like Greenhouse Construction Materials to protect their significant investments.
Syncing Motors with Weather Sensors for Proactive Adjustments
The true power of automated gear motors is unlocked when they are integrated into a complete environmental control system. A simple system might link the motors to a thermostat, opening the vents when the temperature rises and closing them when it falls. A more advanced system, however, incorporates a wider range of sensors.
Imagine a controller connected to:
- An anemometer (to measure wind speed)
- A wind vane (to measure wind direction)
- A rain sensor
- Internal and external temperature and humidity sensors
With this data, the control logic can become incredibly sophisticated. For example, the grower could program the system with a set of rules:
- If wind speed exceeds 40 km/h, close the vents on the windward side to 20% open and open the vents on the leeward side to 30% to equalize pressure.
- If the rain sensor is activated, close all vents to prevent water from entering.
- If the internal temperature exceeds 30°C AND the wind speed is below 15 km/h, open all vents fully for maximum cooling.
This level of control transforms the greenhouse from a passive shelter into an intelligent structure that actively collaborates with the weather. It anticipates threats and adjusts its posture to mitigate them. This is the ultimate expression of how to stabilize a greenhouse: not through brute force alone, but through a combination of structural strength and intelligent, dynamic adaptation. The gear motor is the muscle that enables this intelligence to be put into physical action, safeguarding the structure and the valuable crops within it.
A Stitch in Time: The Philosophy of Proactive Maintenance and Inspection
A greenhouse, once built, is not a finished object. It is the beginning of a long relationship between the structure, the grower, and the environment. Like any relationship, it requires attention and care to endure. The forces of wind, sun, and time are relentless, constantly searching for a weakness, a loose bolt, a small tear, a spot of rust. A philosophy of proactive maintenance is the grower’s response to this reality. It is an acknowledgment that stability is not a permanent state but a process of continuous renewal. The old adage, “a stitch in time saves nine,” is nowhere more applicable than in the context of a greenhouse, where a small, overlooked problem can quickly cascade into a catastrophic failure.
Developing a Seasonal Inspection Checklist
Proactive maintenance begins with systematic observation. A casual walk-through is not enough; what is needed is a formal, seasonal checklist that guides the grower to look at the structure with a critical eye. This process should be undertaken at least twice a year, typically in the spring before the intense growing season begins, and in the autumn to prepare for the harshest weather of winter.
A comprehensive checklist would include:
- Foundation and Anchors:
- Visually inspect the foundation for any cracking or shifting.
- Check that all anchor bolts connecting the frame to the foundation are tight.
- For ground anchors, ensure they have not pulled up or loosened in the soil.
- Frame and Structure:
- Walk the entire length of the frame, both inside and out. Look for any signs of bending, twisting, or deformation.
- Check every bolt and fastener, especially at key connection points like trusses and cross-bracing. Tighten any that are loose.
- Inspect the galvanized coating on steel frames. If any scratches, chips, or signs of rust are found, sand the area clean and apply a coat of cold galvanizing compound or a suitable zinc-rich paint.
- Covering and Fastening System:
- Examine the entire surface of the greenhouse polyethylene film. Look for any small holes, tears, or areas where it has become abraded against the frame. Small holes can be repaired with specialized greenhouse repair tape.
- Inspect the wiggle wire and wiggle wire channel. Ensure the wires are still seated firmly in the channel and have not lost their tension. Check that the channel itself is still securely fastened to the frame.
- Check the tension of the film. If it has loosened over time, it may need to be re-stretched and re-secured.
- Ventilation and Automation:
- Operate all vents, both manual and automated. Ensure they open and close smoothly.
- Lubricate any moving parts, such as the mechanisms of a film reeler or the gears in a manual crank system.
- For automated systems, test the gear motors and check the wiring for any signs of wear or damage. Calibrate sensors to ensure they are reading accurately.
- Clean exhaust fan blades and shutters to ensure they operate efficiently. A dirty circulation fan or exhaust fan moves less air, compromising its ability to manage temperature and pressure.
This disciplined, recurring act of inspection is the most effective form of insurance a grower can have.
The Long-Term Value of Quality Components
During these inspections, the wisdom of investing in quality components becomes vividly clear. A cheap, thinly galvanized frame will show signs of rust much sooner. A low-quality polyethylene film without adequate UV inhibitors will become brittle and fail years before a premium film would. A poorly designed fastening system will loosen and allow the film to tear.
The stability of a greenhouse over its lifespan is the sum of the quality of its parts. A high-tensile steel wiggle wire with a thick, UV-stabilized PVC coating will retain its spring and grip for many years, whereas an uncoated or poorly coated wire will rust and fail. A well-engineered aluminum lock channel will hold its shape and grip, while a flimsy one might bend or deform under load.
This is not to say that one must always buy the most expensive option. Rather, it is an argument for evaluating components based on their long-term value and their contribution to the integrity of the total system. The initial savings on a cheaper component are often erased many times over by the costs of premature failure, which include not only the replacement of the part itself but also the potential loss of an entire crop and the labor required for repairs. The long-term stability of a greenhouse is a direct reflection of the long-term thinking invested in its construction.
Adapting Your Stabilization Strategy Over Time
Finally, a philosophy of proactive maintenance includes a willingness to adapt. A greenhouse is not isolated from changes in its environment. A new building constructed nearby might alter wind patterns. A series of unusually severe storms might reveal a previously unknown weakness in the structure. The grower’s own needs may change, requiring the installation of heavier equipment, like trellising systems or irrigation booms, which add new loads to the frame.
Stabilization is not a one-time event but an ongoing dialogue. After a major windstorm, it is wise to perform an ad-hoc inspection to see how the structure performed. Were there areas where the film flapped excessively? Did any connections loosen? This feedback is invaluable. It may suggest the need to add extra cross-bracing, install a windbreak, or upgrade to a more robust fastening system. By observing, inspecting, and adapting, the grower ensures that the greenhouse does not just survive, but evolves to become ever more resilient and steadfast in the face of a changing world.
Frequently Asked Questions (FAQ)
How do I anchor a greenhouse in very sandy or rocky soil?
For sandy soil, where traditional screw-in ground anchors may not hold well, you should use anchors with wider flukes or “deadman” anchors. A deadman anchor involves burying a horizontal object (like a concrete post or treated log) deep in the ground, to which you attach your anchor cables. For rocky soil, the best method is to drill into the rock and set threaded rods using epoxy anchoring adhesive, then bolt your frame’s base plates directly to these rods.
Can I add bracing to an existing greenhouse that seems weak?
Yes, absolutely. Retrofitting bracing is a highly effective way to improve the stability of an existing structure. You can add cross-bracing to the corners and along the sidewalls using galvanized steel tubing or even tensioned steel cables. Adding purlins between the main hoops will also significantly strengthen the roof against both wind lift and snow load.
My plastic film inflates like a balloon on windy days. What should I do?
This indicates a significant pressure difference between the inside and outside of your greenhouse. The solution is to equalize the pressure. On a windy day, slightly open the vents or roll-up sides on the leeward side (the side sheltered from the wind). This allows some of the high pressure inside to escape, reducing the “ballooning” effect and the dangerous lifting forces on the film. Ensuring your internal circulation fans are running can also help.
What is the single most important component for securing greenhouse film?
The wiggle wire and channel system is arguably the most critical component for securing film. Unlike batten tape or other methods that create pressure points, a wiggle wire system provides a continuous, firm grip along the entire edge of the film without puncturing it. This even distribution of force is essential for resisting wind damage and achieving the drum-tight tension needed for a stable and long-lasting cover.
How often should I re-tighten my greenhouse film?
Greenhouse film will naturally stretch slightly over time. You should check the tension as part of your seasonal maintenance schedule, at least twice a year. However, the best time to re-tighten is after the first few weeks of its installation and after the first major heatwave of the season. If you notice the film flapping in the wind or pooling water, it should be re-tightened immediately, regardless of the season.
Is a curved roof (hoop house) or a peaked roof (A-frame) better for wind?
A curved roof generally offers better aerodynamic performance. The smooth, rounded surface allows wind to flow over it with less turbulence and lower pressure differentials compared to a peaked roof with sharp angles. This results in less lift and lower overall stress on the structure. However, a peaked roof is often better at shedding snow. The choice depends on whether wind or snow is the primary environmental challenge in your region.
How do I calculate the snow load my greenhouse can handle?
Calculating precise snow load capacity is a complex engineering task. However, you can take steps to improve it. A stronger frame (e.g., thicker gauge steel), closer spacing of hoops/rafters, and a steeply pitched or curved roof will all help shed snow more effectively. If heavy snow is expected, you can also build temporary internal supports from lumber to help bear the weight. Always remove heavy, wet snow from your greenhouse roof as soon as it is safe to do so.
Conclusion
The endeavor of stabilizing a greenhouse transcends mere construction; it is an exercise in applied physics, agricultural engineering, and ecological foresight. We have journeyed from the foundational earth, examining the critical dialogue between soil, climate, and the anchoring systems that root the structure, to the very skeleton of the frame, where material strength and geometric ingenuity conspire to resist immense forces. We have seen how the greenhouse’s skin, its polyethylene film, must be chosen with care and secured with the elegant and powerful grip of a wiggle wire system to transform it from a vulnerability into a resilient barrier.
The discussion moved from the solid to the ephemeral, exploring the unseen world of aerodynamics. Both the external tempest and the internal breath of the greenhouse must be managed with intelligence. Windbreaks, strategic ventilation, and the constant, gentle motion from circulation fans all play their part in taming these pressures. The integration of gear motors elevates this management to an automated, ever-vigilant process, allowing the structure to adapt dynamically to the weather’s whims.
Ultimately, the path to a truly stable greenhouse is paved with a philosophy of proactive stewardship. A disciplined schedule of inspection and maintenance, a commitment to quality components, and a willingness to adapt based on observation are what ensure longevity. A greenhouse is not a fortress, but a carefully tuned instrument. By understanding how to stabilize a greenhouse in all its facets—from its foundation to its automated controls—a grower does more than protect a physical structure; they secure a space of controlled creation, a sanctuary where life can flourish, sheltered from the storm.
References
ASAE Standards. (2003). S567: Pressurized irrigation system design. American Society of Agricultural Engineers.
Katsoulas, N., Baille, A., & Kittas, C. (2006). Effect of vent opening on greenhouse microclimate. Biosystems Engineering, 93(4), 427-436.
Von Zabel, A. R., & Gheen, K. M. (2016). Soil anchor holding capacity (Publication No. 1671 1801P). U.S. Department of Agriculture, Forest Service, National Technology and Development Program.