7 Expert Secrets for Choosing & Installing Greenhouse Poly Film for Max Yields in 2025
สิงหาคม 28, 2025
Abstract
Selecting the appropriate greenhouse poly film is a foundational decision for growers aiming to optimize crop health and yield. This analysis examines the multifaceted considerations involved in choosing and implementing polyethylene coverings for controlled environment agriculture. It delves into the material science of poly film, exploring how factors such as thickness, chemical composition, and specialized additives like UV stabilizers, infrared reflectors, and anti-drip coatings directly influence the internal greenhouse environment. The investigation extends to the pivotal role of regional climate in material selection, offering tailored guidance for diverse agricultural zones from South America to Russia. Furthermore, the article provides a thorough exploration of installation methodologies, emphasizing the structural integrity afforded by systems like wiggle wire channels. It also situates the poly film within the larger ecosystem of the greenhouse, discussing its interplay with ventilation systems, circulation fans, and automated components such as gear motors. The aim is to equip both novice and professional growers with a comprehensive framework for making informed decisions that enhance productivity and sustainability.
Key Takeaways
- Film thickness and additives directly impact crop quality and energy costs.
- Match your poly film properties to your specific regional climate challenges.
- Correct installation with wiggle wires ensures film longevity and performance.
- Integrate your film choice with a complete greenhouse ventilation system.
- An anti-drip coating is paramount for disease prevention and light clarity.
- Evaluate suppliers based on technical support and product range, not just price.
- Diffused light films can significantly improve photosynthesis and yields.
Table of Contents
- The Foundation: Understanding the Science Behind Poly Film
- Decoding Additives: The Secret Ingredients for a Superior Harvest
- Climate is King: Tailoring Your Poly Film Choice to Your Environment
- The Art of Installation: Securing Your Investment with Wiggle Wire and Channel
- Beyond the Cover: Creating a Complete Greenhouse Ecosystem
- Longevity and Maintenance: Extending the Life of Your Poly Film
- Making the Right Choice: Sourcing and Evaluating Your Poly Film Supplier
The Foundation: Understanding the Science Behind Poly Film
When we begin the conversation about constructing a successful greenhouse, it is easy to get lost in the grandeur of the frame, the layout of the benches, or the sophistication of the irrigation. Yet, the very skin of the structure—the covering that stands between your precious crops and the unpredictable world outside—is arguably the most dynamic and influential component. For many growers across the globe, from the vast plains of South America to the fertile regions of Southeast Asia, that skin is a greenhouse poly film. To truly grasp its importance, we must look beyond its simple appearance as a plastic sheet and appreciate the profound science woven into its very fabric.
From Polymer Chains to Plant Protection: What is Polyethylene?
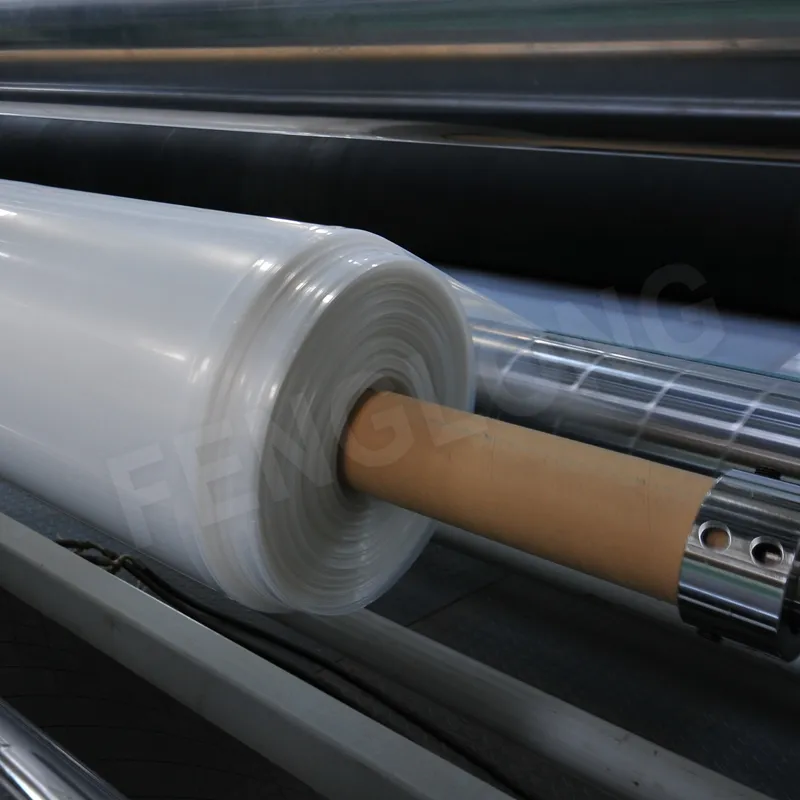
At its core, a greenhouse poly film is a product of polymer science, typically made from polyethylene. Imagine long, repeating chains of molecules, linked together like a microscopic chain-link fence. The way these chains are structured—their length, their density—determines the fundamental properties of the final film. Most greenhouse films are made from low-density polyethylene (LDPE), which gives it the flexibility needed to cover a large, curved structure without cracking.
However, a raw sheet of LDPE is not sufficient for the demanding job of a greenhouse cover. It would degrade under the sun's ultraviolet (UV) radiation in a matter of months. This is where the true innovation begins. Manufacturers introduce a complex cocktail of additives during the extrusion process, transforming a basic plastic into a high-performance agricultural tool. This transformation is what separates a cheap, temporary cover from a multi-year, yield-boosting investment. The resulting greenhouse polyethylene film becomes an active participant in managing the growing environment.
The Critical Role of Thickness (Mils/Microns) and What It Means for Your Region
One of the first specifications you will encounter when selecting a poly film is its thickness. This is usually measured in mils (one-thousandth of an inch) in some regions, or microns (one-thousandth of a millimeter) in others. While it might seem that "thicker is better," the reality is far more nuanced. The optimal thickness is a balance between durability, light transmission, and cost, and it depends heavily on your local conditions.
A thicker film, say 6 mil (150 microns), offers superior strength and longevity. It can better withstand physical stress from wind, snow, and hail. This makes it a sensible choice for growers in regions with harsh weather, such as parts of Russia or areas prone to strong storms. A thicker film also tends to have a longer lifespan, often rated for four years or more, because it contains a greater volume of the UV stabilizing additives that protect it from degradation.
Conversely, a thinner film, like 4 mil (100 microns), allows for slightly higher light transmission, which can be beneficial in areas with shorter days or lower light intensity. It is also less expensive, making it an option for temporary structures like high tunnels or for growers on a tighter budget. The trade-off is reduced durability and a shorter lifespan.
| Film Thickness | Common Lifespan | Primary Benefit | Ideal Application |
|---|---|---|---|
| 3 mil (75 micron) | 1 Year | Low Cost, High Light | Temporary high tunnels, seasonal protection |
| 4 mil (100 micron) | 1-2 Years | Good Light Transmission | Mild climates, short-term crops, overwintering |
| 5 mil (125 micron) | 2-3 Years | Balanced Durability | General purpose for moderate climates |
| 6 mil (150 micron) | 4+ Years | Maximum Durability, Longevity | Harsh weather (wind/snow), long-term structures |
| 7 mil (175 micron) | 4+ Years | Extreme Strength | Very high wind areas, maximum snow load |
Single Layer vs. Double Layer Inflation: A Cost-Benefit Analysis
Another foundational decision is whether to use a single layer of poly film or a double layer. A double layer system involves two sheets of film separated by a cushion of air, maintained by a small inflation fan. This trapped air creates an insulating barrier, much like a double-pane window in a house.
For growers in climates with significant temperature swings between day and night, such as the deserts of the Middle East or the variable climates of South Africa, the benefits of a double layer are immense. The insulation can reduce nighttime heating costs by 30-50%. This energy saving alone can often pay for the second layer of film and the inflation fan within a single season. The air cushion also adds rigidity to the structure, reducing the stress on the film from wind and preventing "flapping" that can abrade the film against the greenhouse frame.
However, a double layer is not always the best choice. It represents a higher initial cost, both for the extra film and the inflation kit. There is also a slight reduction in light transmission (typically 8-10%) due to the two layers. For growers in tropical regions like Southeast Asia, where retaining heat is not a priority and maximizing light for dense canopies is key, a single layer of high-quality poly film, combined with an excellent ventilation system, is often the more logical and economical approach.
Decoding Additives: The Secret Ingredients for a Superior Harvest
If the polyethylene itself is the canvas, then the additives are the paints that create the masterpiece. These chemical components are what elevate a simple plastic sheet into a sophisticated tool for agronomy. They are the "secret ingredients" that directly manipulate light, temperature, and moisture to create an environment where plants do not just survive, but thrive. Understanding these additives is perhaps the most important step in selecting the right poly film for your specific crops and goals.
The UV Stabilizer Imperative: Shielding Your Film and Your Plants
Without a doubt, the most fundamental additive is the UV stabilizer. Polyethylene is naturally vulnerable to degradation from the ultraviolet portion of the solar spectrum. Unprotected, it becomes brittle, yellows, and tears within a few months of sun exposure. UV stabilizers, typically Hindered Amine Light Stabilizers (HALS), are molecules that absorb or dissipate this harmful UV energy, protecting the polymer chains.
The concentration and quality of these stabilizers are what determine the rated lifespan of a poly film. A "4-year film" simply has a robust enough package of UV stabilizers to endure four years of sun exposure in a typical agricultural setting before its physical properties degrade significantly. It is a promise of durability.
Beyond protecting the film itself, UV stabilization has a direct impact on the plants. While plants need some UV light, excessive exposure can be damaging. Some specialized films, known as UV-blocking films, are designed to filter out nearly all UV-B radiation. This can have interesting effects, such as reducing the sporulation of certain fungal pathogens like Botrytis cinerea (grey mold) and disorienting pests like thrips and whiteflies, who use UV light for navigation.
Let There Be (Diffused) Light: How Light Diffusion Films Boost Growth
When sunlight passes through a standard clear poly film, it travels in a straight line, casting sharp, hard shadows. The upper leaves of the plant canopy receive intense, direct light, while the lower leaves are left in the shade. This is an inefficient use of available light.
This is where light-diffusing additives come in. These particles, embedded within the film, scatter the incoming light in multiple directions. Instead of harsh shadows, the entire greenhouse is filled with a soft, uniform, omnidirectional light. The benefits are profound. Light penetrates deeper into the plant canopy, reaching lower leaves and activating them for photosynthesis. This "canopy lighting" results in more total photosynthesis, leading to stronger stems, more uniform growth, and often, higher yields. For fruiting crops like tomatoes, peppers, and cucumbers, it can also lead to more even ripening and reduced sunscald on the fruit itself. Exploring a high-quality greenhouse diffused plastic film can be a game-changer for growers looking to maximize their crop's potential.
The Anti-Drip/Anti-Fog Coating: Preventing Disease and Improving Light
As temperatures change, moisture inside the greenhouse condenses on the cool inner surface of the poly film. On an untreated film, this moisture forms into droplets. These droplets have two major negative consequences. First, they reduce light transmission by reflecting and refracting light in random directions. A layer of condensation can reduce light levels by 15% or more. Second, and more perilously, these droplets can drip down onto the plants below. This creates a persistently wet leaf surface, which is the perfect breeding ground for devastating fungal and bacterial diseases like downy mildew and bacterial leaf spot.
An anti-drip (or anti-condensation) additive is a surfactant that is coated onto the inner layer of the film. It works by reducing the surface tension of the water. Instead of forming droplets, the condensation flattens out into a thin, transparent sheet that flows down the curve of the greenhouse roof to the sidewalls. This simple-sounding feature is monumental. It keeps light transmission high, even during humid mornings, and it eliminates the primary vector for many water-borne plant diseases, reducing the need for fungicide applications.
| Additive Type | Primary Function | Key Benefit for Growers | | :— | :— | :— | :— | | UV Stabilizer | Protects film from sun degradation | Ensures multi-year lifespan of the poly film | | Light Diffuser | Scatters direct sunlight | Improves canopy light penetration, reduces shadows, boosts yield | | Anti-Drip | Prevents water droplet formation | Increases light, dramatically reduces fungal disease pressure | | Infrared (IR) | Blocks outgoing long-wave radiation | Retains heat at night, reduces heating costs, prevents frost | | Anti-Dust | Creates a smoother outer surface | Repels dust and dirt, maintaining high light transmission | | UV Blocking | Filters specific UV wavelengths | Can help control certain pests and diseases |
IR (Infrared) Additives: Your Greenhouse's Nighttime Blanket
While a greenhouse is excellent at trapping heat during the day (the "greenhouse effect"), it can also lose that heat very quickly once the sun goes down. Heat radiates away from the soil and plants in the form of long-wave infrared radiation. A standard poly film is largely transparent to this IR radiation, allowing the heat to escape into the night sky.
An IR-additive film, often called a thermal film, contains microscopic mineral particles that reflect this outgoing IR radiation back down into the greenhouse. It acts like a thermal blanket, holding onto the day's warmth for much longer. For growers in any climate with cool or cold nights, this is a powerful tool. It can keep the greenhouse several degrees warmer overnight compared to a standard film, which reduces plant stress, prevents frost damage, and significantly cuts down on fuel consumption for heating. The energy savings can be substantial, making IR films one of the most cost-effective upgrades a grower can make.
Climate is King: Tailoring Your Poly Film Choice to Your Environment
A greenhouse is a tool for modifying the local environment, but it is not immune to it. The most successful growers I have known are those who work with their climate, not against it. The choice of poly film is a primary expression of this philosophy. A film that works wonders in the cool, damp climate of Northern Europe would be a disaster in the scorching sun of the Middle East. Selecting the right film requires a deep, empathetic understanding of your specific regional challenges and opportunities.
For the Sun-Drenched Fields of South America and the Middle East: High UV Resistance and Cooling Properties
In regions like Brazil, Colombia, Saudi Arabia, or the UAE, the sun is both a blessing and a curse. The sheer intensity and duration of sunlight provide ample energy for photosynthesis, but they also place extreme stress on the greenhouse covering. Here, the number one priority is UV resistance. A film must have the highest possible concentration of top-quality UV stabilizers to survive. Opting for a standard film in these conditions is a recipe for failure, as it will likely become brittle and fail within a single year. A 4-year, 6-mil (150-micron) film designed for high-UV environments is the baseline.
Beyond durability, managing heat is the next great challenge. While IR-additive films are for retaining heat, some advanced films now incorporate near-infrared (NIR) reflective properties. These films are engineered to allow the visible light that plants use for photosynthesis (PAR light) to pass through, while reflecting a portion of the NIR light, which is primarily responsible for heat buildup. This can keep the greenhouse several degrees cooler during the peak of the day, reducing heat stress on plants and lowering the energy demand for cooling systems like fans and evaporative pads. A well-designed ventilation system is non-negotiable in these climates, often featuring large roll-up sides operated by a manual film reeler or an automated gear motor to allow for maximum passive airflow.
Navigating the Russian Winter: Thermal Films and Snow-Load Resilience
Contrast the desert sun with the challenges faced by a grower in many parts of Russia. Here, the primary concerns are cold temperatures, low light levels during winter, and the physical weight of snow. The choice of poly film must address all three.
A double-layer, inflated system is almost mandatory. The insulating properties are paramount for minimizing exorbitant heating costs during the long, cold winters. At least one of these layers, and preferably both, should be an IR-additive (thermal) film. The combination of the air gap and the IR-blocking capability creates a powerful thermal shield, keeping the internal temperature stable and protecting crops from frost.
Durability is also key. The film must be thick and strong—6 mil (150 microns) or even 7 mil (175 microns) is advisable—to handle the significant weight of accumulated snow. The greenhouse structure itself must be designed for snow load, and the film must be installed perfectly taut using a secure method like a wiggle wire channel to prevent sagging where snow and ice can accumulate. Furthermore, a film with good light diffusion properties is highly advantageous to make the most of the limited daylight hours in winter, scattering light throughout the greenhouse to reach all parts of the plants.
Thriving in Southeast Asia's Humidity: The Importance of Anti-Drip and Ventilation
In the tropical climates of countries like Vietnam, Thailand, and the Philippines, the defining characteristic is not extreme temperature but extreme humidity. Heat is a constant, but the ever-present moisture in the air creates a perfect storm for fungal and bacterial diseases.
For growers in this region, an anti-drip feature on their poly film is not a luxury; it is a necessity. The constant condensation on the film's interior will otherwise lead to a continuous "rain" inside the greenhouse, coating leaves in a film of water that invites pathogens. A high-quality anti-drip coating is the first line of defense against diseases like downy mildew, which can wipe out a crop in days.
Because retaining heat is not a concern, a single layer of film is often sufficient. The focus shifts entirely to maximizing light and airflow. A high-light-transmission, diffused poly film is ideal. This must be paired with an aggressive ventilation strategy. Greenhouses are often designed as "tropical" structures with very high roofs and full-length roll-up sides to encourage natural convection and cross-ventilation. A reliable manual film reeler is a grower's best friend here, allowing for quick and easy adjustment of the sidewall curtains to respond to changing weather and manage humidity levels. A robust circulation fan system is also needed to keep air moving within the structure, preventing stagnant, humid pockets where diseases can take hold.
Adapting to South Africa's Diverse Climates: A Versatile Approach
South Africa presents a unique challenge because it encompasses a wide range of microclimates, from the Mediterranean climate of the Western Cape to the subtropical coast of KwaZulu-Natal and the arid interior. A grower in one region may face challenges completely different from another just a few hundred kilometers away.
This diversity calls for a versatile and thoughtful approach. A grower in the Western Cape might prioritize a film with good UV resistance for the hot, dry summers, but also some thermal properties for the cool, wet winters. A double-layer IR film could be ideal. In contrast, a grower near Durban might be more concerned with humidity and disease, making an anti-drip, single-layer film combined with excellent ventilation the better choice. In the high-altitude regions of the interior, where nighttime temperatures can plummet even after a hot day, an IR thermal film is of paramount importance to protect against frost.
The key for South African growers is to avoid a one-size-fits-all solution and instead conduct a careful analysis of their specific location's weather patterns—sun intensity, temperature ranges, humidity, and wind—before selecting a poly film.
The Art of Installation: Securing Your Investment with Wiggle Wire and Channel
You could select the most technologically advanced, climate-perfect poly film in the world, but if it is installed improperly, its benefits will be squandered. A loose, flapping film will degrade prematurely from mechanical stress, lose its insulating properties, and be vulnerable to wind damage. The art of installation is about creating a taut, secure, and continuous skin over the greenhouse frame. This is where specialized hardware, particularly the wiggle wire and channel system, demonstrates its profound value.
Why Your Attachment Method Matters More Than You Think
In the past, growers often used simple wooden lath and nails or staples to attach poly film to the greenhouse frame. This method is fraught with problems. The nails create puncture points that can easily tear. The wood can splinter, creating sharp edges that abrade the film. It is also nearly impossible to get the film uniformly tight, leading to sagging and flapping. Most importantly, this method puts immense stress on small, isolated points of the film, especially in windy conditions. A strong gust can easily rip the film away from a nail or staple.
A modern attachment system, like a wiggle wire channel (also known as a lock channel or baseboard), is designed to overcome all these issues. It is a continuous aluminum or steel channel that is mounted directly to the greenhouse frame (the bows, hip boards, and baseboards). The poly film is laid over this channel, and then a PVC-coated spring wire, the "wiggle wire," is pressed into the channel in a wiggling, up-and-down motion. This system grips the film gently but firmly along its entire length, distributing the load evenly and eliminating stress points.
A Step-by-Step Guide to Using Wiggle Wire and Wiggle Wire Channel for a Drum-Tight Fit
Achieving a professional, drum-tight installation is a skill, but it is one that can be learned. It requires patience and a methodical approach.
- Prepare the Frame: Before any film comes out, inspect the entire greenhouse frame. Cover any sharp edges, screw heads, or rough welds with a quality frame protection tape. This prevents abrasion that can wear through your film over time.
- Install the Channel: Securely fasten the wiggle wire channel to all surfaces where the film will be terminated: along the baseboards, up the end-wall arches, and along the hip boards and ridgepole if applicable. Ensure the channels are aligned and there are no gaps between sections.
- Choose the Right Day: The ideal time to pull a poly film is on a calm, overcast, and mildly warm day. Heat makes the film expand and become more pliable, making it easier to stretch. Installing on a very hot, sunny day can lead to the film becoming loose and saggy when it cools down at night. Installing on a cold day makes the film stiff and difficult to work with.
- Pull the Film: Carefully unroll the film over the greenhouse structure. Have people on both sides to guide it and prevent it from dragging on the ground or snagging on the frame. Pull it as straight and centered as possible.
- Anchor the First Side: Begin on one of the long sides of the greenhouse, typically the side opposite the prevailing wind. Start in the middle of the wall and work your way out to the corners. Lay the film over the channel, then press the wiggle wire into the channel, trapping the film. The wiggling motion is what locks it in place. Do not stretch the film too much at this stage; just make it snug.
- Stretch and Secure: Go to the opposite side of the greenhouse. Now is the time to apply tension. With several people pulling evenly along the length of the film, stretch it taut across the arch of the structure. While holding the tension, begin securing the film in the channel on this second side, again starting from the middle and working outwards. The goal is to remove all slack and wrinkles. The film should be tight enough to shed water and wind effectively but not so tight that it is strained at the connection points.
- Finish the Ends: Finally, secure the film to the end walls. This often requires some careful gathering and pleating of the material around the corners to create a neat and tight finish before locking it into the end-wall channels.
The Role of a Manual Film Reeler in Sidewall Ventilation
For many greenhouse designs, especially in warmer or more humid climates, sidewall ventilation is a primary method of temperature and humidity control. This involves creating large openings along the sides of the structure that can be opened or closed as needed. A manual film reeler, or hand-crank winch, is a simple, reliable, and cost-effective mechanism for operating these roll-up sides.
The reeler is mounted at one end of the greenhouse wall. A long pipe is attached to the bottom edge of the ventilation curtain (which is itself a sheet of poly film). The winch's guide pipe connects to this roll-up pipe. By simply turning the crank handle, the grower can roll the entire length of the sidewall curtain up or down, precisely controlling the size of the ventilation opening. This allows for rapid adjustments to changing weather—opening the sides on a hot afternoon to vent heat, and closing them in the evening to conserve warmth or protect from a coming storm. The simplicity and durability of a good film reeler make it an indispensable tool for active climate management.
Common Installation Mistakes and How to Avoid Them
- Mistake: Not preparing the frame. Avoidance: Always use frame protection tape. A tiny sharp edge can destroy a new film.
- Mistake: Installing on a windy day. Avoidance: Be patient and wait for calm conditions. A large sheet of poly film acts like a sail and can be dangerous and impossible to control in the wind.
- Mistake: Over-stretching the film. Avoidance: The film should be taut, not stretched to its breaking point. Excessive stretching, especially in the heat, can weaken the polymer structure and lead to premature failure.
- Mistake: Leaving the film loose. Avoidance: A loose film will flap in the wind (a phenomenon called "chattering"), which causes abrasion and can lead to catastrophic failure in a storm. Use the wiggle wire system to get it tight.
- Mistake: Using the wrong hardware. Avoidance: Do not try to save a small amount of money by using staples or other inferior attachment methods. Invest in a proper wiggle wire channel system; it will pay for itself in film longevity and peace of mind.
Beyond the Cover: Creating a Complete Greenhouse Ecosystem
The poly film is the boundary of the controlled environment, but it does not act in isolation. It is part of a dynamic, interconnected system. To truly unlock the potential of your greenhouse, you must think of it as a complete ecosystem where the covering, airflow, and automation work in concert. A failure to integrate these components means you are fighting an uphill battle, constantly reacting to problems instead of proactively creating an ideal growing environment.
The Symphony of Airflow: Integrating Circulation Fans for Uniform Temperature
Even in a well-insulated greenhouse, temperature stratification is a persistent problem. Hot air rises and collects at the peak of the structure, while cooler, denser air settles down around the plants. This can create temperature variations of 5°C or more between the floor and the roof. These "microclimates" lead to uneven growth, inconsistent drying of soil, and pockets of high humidity where diseases can flourish.
This is where the circulation fan plays its vital role. The most common type is the Horizontal Airflow (HAF) fan. These are not designed to bring in fresh air, but to move the air that is already inside the greenhouse. When properly placed, a series of HAF fans creates a gentle, continuous, circular pattern of air movement—a slow-motion race track of air flowing down one side of the greenhouse and back up the other.
This constant motion breaks up temperature stratification, blending the hot air at the peak with the cooler air at the bottom to create a uniform temperature from end to end and top to bottom. This ensures every plant in the house experiences the same conditions, leading to more uniform crops. The gentle breeze from a circulation fan also helps to strengthen plant stems and disrupts the humid, stagnant boundary layer of air around each leaf, making it harder for fungal spores to germinate. It is the circulatory system of the greenhouse body.
The Power of Breath: Designing an Effective Greenhouse Ventilation System
If circulation is the circulatory system, ventilation is the respiratory system. It is the process of exchanging the stale, humid, and hot air inside the greenhouse with fresh, cooler, and less humid air from the outside. An effective ventilation system is arguably the most powerful tool a grower has for controlling the daytime environment.
There are two main types of ventilation:
- Passive Ventilation: This method uses natural forces—wind and thermal buoyancy (the principle that hot air rises)—to move air. Roll-up sides operated by a film reeler, roof vents, and ridge vents are all forms of passive ventilation. A well-designed passive ventilation system can be highly effective and costs nothing to operate. Tropical greenhouse designs rely almost exclusively on this, with massive roof openings and fully retractable side walls.
- Active (Mechanical) Ventilation: This method uses fans to physically pull air out of the greenhouse, which in turn draws fresh air in through motorized shutters or other intake vents. Exhaust fans are typically mounted on one end wall, with the intake vents on the opposite wall, to pull air through the entire length of the structure. This provides more powerful and reliable air exchange, especially on hot, calm days when passive ventilation is less effective.
A complete ventilation system often combines elements of both. For example, a grower might use roll-up sides for general temperature control and then have exhaust fans linked to a thermostat that kick on automatically when the temperature exceeds a critical setpoint.
Automation and Control: The Function of a Gear Motor in Modern Greenhouses
While a manual film reeler is excellent for smaller operations or for growers who are always on-site, larger commercial greenhouses require automation to manage their systems efficiently. A gear motor is the workhorse of greenhouse automation. It is a compact but powerful electric motor combined with a gearbox that translates high-speed motor rotation into slow, high-torque output.
This slow, powerful rotation is perfect for automating ventilation and shading systems. A gear motor can be linked to the roll-up pipe of a sidewall vent, or it can operate a rack-and-pinion system to open and close large roof vents. When connected to an environmental controller, the system becomes fully autonomous. The controller, using data from temperature, humidity, and light sensors, can command the gear motor to open the vents by 20% when the temperature rises, close them when it rains, or deploy a shade cloth during the midday sun. This level of precise, automated control frees the grower from constant manual adjustments and ensures the greenhouse environment remains optimal 24/7, reacting to changing conditions far more quickly and accurately than a human ever could. This is how a greenhouse polyethylene film covering is transformed from a passive shelter into part of a responsive, intelligent growing machine.
Longevity and Maintenance: Extending the Life of Your Poly Film
Investing in a high-quality, 4-year poly film is a significant financial decision. It is not something you want to replace prematurely. While the built-in UV stabilizers provide the primary defense against degradation, your own maintenance practices play a huge part in determining whether you get the full rated lifespan—or even exceed it. Protecting your film from its enemies and performing regular upkeep is the key to maximizing your return on investment.
The Enemies of Poly Film: Sun, Wind, and Chemicals
We have already discussed the sun's UV radiation as the primary culprit in film degradation. However, there are other adversaries to be aware of.
- Wind: As mentioned, the mechanical stress from wind flapping is a major cause of premature failure. A tight installation using a wiggle wire channel is the best defense.
- Abrasion: Constant rubbing against a rough surface—a splintered piece of wood, an exposed screw head, or even a rusty metal purlin—will wear a hole in your film surprisingly quickly. This is why frame preparation is so important.
- Chemicals: This is a subtle but potent enemy. Certain chemicals, particularly sulfur and chlorine, can aggressively attack the UV stabilizers in a poly film, dramatically shortening its life. Sulfur is often used in fungicides or can be released from burning fossil fuels for heating. Chlorine can be found in some pesticides and cleaning agents. If you must use these chemicals, it is vital to select a film that is specifically rated for chemical resistance. Reputable manufacturers, like those you can learn about through a trusted greenhouse supplier, offer specialized films with advanced UV stabilization packages that can better withstand chemical exposure.
A Practical Cleaning and Inspection Schedule
A dirty poly film is an inefficient poly film. A layer of dust, pollen, or grime can reduce light transmission by a surprising amount, starving your plants of the energy they need.
- Regular Cleaning: Plan to wash your greenhouse film at least once or twice a year, typically in the spring and fall. Use a soft brush or sponge and a specialized greenhouse cleaning solution or a simple mild soap. Never use harsh detergents or abrasive cleaners, as they can damage the film's surface and any special coatings. Rinse thoroughly with clean water. For large structures, specialized cleaning equipment is available.
- Regular Inspections: Walk the perimeter and interior of your greenhouse at least once a month. Look for any small rips, tears, or punctures. Check the attachment points in the wiggle wire channel to ensure they are still secure. Look for signs of abrasion against the frame. Catching a small problem early prevents it from becoming a large, catastrophic failure during a storm.
Patching and Repairs: First Aid for Your Greenhouse Skin
Despite your best efforts, accidents happen. A falling branch, a piece of equipment, or even a determined bird can cause a tear in your poly film. Fortunately, small to moderate damage can be easily and effectively repaired.
The best tool for this job is specialized greenhouse repair tape. This is not ordinary packing tape; it is a UV-stabilized polyethylene tape with a very aggressive, weather-resistant adhesive.
To make a lasting repair:
- Clean the Area: The surface around the tear must be perfectly clean and dry. Use an alcohol wipe or similar solvent to remove all dirt and oils. The tape will not stick to a dirty surface.
- Apply Tape to Both Sides: For the strongest repair, apply a piece of tape to both the inside and the outside of the film, sandwiching the tear between them. This prevents the tear from propagating further.
- Round the Corners: When cutting your patch, it is a good practice to round the corners. A square corner creates a stress point that can encourage the tape to peel up over time. A rounded patch has no such stress points.
Carrying a roll of repair tape is essential for any greenhouse operator. A quick, 5-minute repair can save you from having to replace an entire section of film and protect your crops from the elements.
Making the Right Choice: Sourcing and Evaluating Your Poly Film Supplier
The final piece of the puzzle is choosing where to source your greenhouse materials. The supplier you choose is more than just a vendor; they are a partner in your growing success. Their expertise, the quality of their product range, and their commitment to service can be just as impactful as the technical specifications of the poly film itself. Making a discerning choice here is the capstone of a successful greenhouse project.
Beyond Price: What to Look for in a Greenhouse Supplier
It is tempting to simply choose the supplier with the lowest price per square meter. This is often a short-sighted strategy. A few dollars saved upfront can cost you dearly in the long run through premature film failure, poor crop performance, or lack of support. A superior supplier offers value that extends far beyond the price tag.
- Technical Expertise: Can the supplier's representatives answer your detailed questions? Do they understand the difference between an IR film and a diffused film? Can they recommend the right thickness and additive package for your specific climate and crop in South Africa or Russia? Look for a supplier who acts as a consultant, not just a salesperson.
- Product Quality and Transparency: A reputable supplier will provide detailed technical specification sheets for their films. These documents list the exact light transmission percentage, diffusion level, thermicity, thickness, and expected lifespan. They stand behind the quality of their products, like the films and hardware from a global leading greenhouse supplier.
- Comprehensive Range: Does the supplier offer a complete solution? You need more than just the poly film. A great supplier can provide the entire system: the wiggle wire and wiggle wire channel for attachment, the manual film reeler for ventilation, the inflation kits for double-layer setups, and even components like the circulation fan and gear motor. Sourcing everything from one place ensures compatibility and simplifies logistics.
Reading the Spec Sheet: A Grower's Guide to Technical Data
The technical data sheet is your window into the true performance of a greenhouse polyethylene film. Learning to interpret it is a vital skill. Here are some key values to look for:
- Light Transmission (PAR): This is the percentage of light in the photosynthetically active radiation spectrum (400-700 nm) that passes through the film. Look for values in the high 80s or low 90s for clear films.
- Diffusion: This is the percentage of light that is scattered. A high diffusion value (e.g., 50-75%) is desirable for most crops to reduce shadows and improve canopy penetration.
- Thermicity: This measures the film's ability to block IR radiation and retain heat. It is often expressed as a percentage of IR energy blocked. Higher numbers mean better heat retention.
- Tensile Strength and Tear Resistance: These values, measured in various units (like MPa or N/mm), indicate the film's physical toughness and resistance to ripping. Higher numbers are better, especially for windy locations.
The Value of a Comprehensive Product Range
Imagine you have decided on a double-layer, IR-diffused poly film for your new greenhouse. You will also need the lock channel and wiggle wire to attach it, an inflation fan kit to keep the layers separated, repair tape for emergencies, and perhaps a gear motor to automate your vents.
Sourcing each of these components from a different company can be a logistical nightmare. The parts might not be fully compatible. Shipping costs add up. If something goes wrong, you might have multiple companies blaming each other.
This is the immense value of partnering with a comprehensive supplier who understands the entire greenhouse system. When you can source your poly film, your wiggle wire channel, your film reeler, and your ventilation system components from a single, knowledgeable source, you are not just buying parts. You are investing in a cohesive, integrated system that is designed to work together. This holistic approach simplifies purchasing, guarantees compatibility, and provides a single point of contact for support. It empowers you to move forward with confidence, knowing you have a reliable partner dedicated to helping you build the most productive and durable growing environment possible.
FAQ
How often should I replace my greenhouse poly film? The replacement schedule depends entirely on the film's rated lifespan. A standard 1-year film needs to be replaced annually. A high-quality 4-year film, with proper installation and maintenance, should last at least four years. In high-UV regions like the Middle East, it is wise to stick closely to the manufacturer's rating. In milder climates, you might get an extra season, but watch for signs of degradation like yellowing, brittleness, or reduced clarity.
What is the main difference between polycarbonate and poly film? Polycarbonate is a rigid, hard plastic panel, while poly film is a flexible sheet polyflute.com. Polycarbonate offers superior impact resistance and a much longer lifespan (10-20 years) but is significantly more expensive and less flexible for custom-shaped structures. Poly film is more affordable, easier to install on curved frames like hoop houses, and offers more options for specialized light and thermal properties.
Can I install a double-layer poly film myself? Yes, installing a double layer is a manageable project for a dedicated grower with a few helpers. The process is similar to installing a single layer, but it is done twice. The key additional step is installing the small inflation fan that blows air between the two layers. It is important to ensure a good seal around the perimeter so the air pocket remains pressurized.
Is a diffused poly film better than a clear one? For the vast majority of crops, yes. While clear film transmits slightly more total light, diffused film distributes that light much more effectively. It reduces harsh shadows, prevents sunscald on upper leaves and fruit, and illuminates the lower canopy. This leads to more even growth, stronger plants, and often higher overall yields. Clear film might only be preferred for specific seedling production where maximizing direct light is the sole priority.
How do I clean my poly film without damaging it? Use a soft-bristled brush or a sponge with a long handle. For the cleaning solution, use a commercially available greenhouse cleaner or a simple mixture of mild soap (like a gentle dish soap) and water. Never use abrasive powders, solvents, or harsh detergents. Wash on a cool, overcast day to prevent the cleaning solution from drying on the film before you can rinse it. Rinse thoroughly with clean water from top to bottom.
What causes condensation to drip inside the greenhouse? Condensation forms when the warm, moist air inside the greenhouse comes into contact with the cooler surface of the poly film. On a standard film, the water's surface tension causes it to bead up into droplets. When these droplets become heavy enough, they drip onto your plants. This is prevented by using a film with an "anti-drip" or "anti-condensation" coating, which causes the water to flatten into a sheet and run down the sides.
Does the color of the wiggle wire matter? The color itself does not matter for performance, but the material does. Most high-quality wiggle wires are made from spring steel for strength and are coated in a thick layer of PVC plastic. This plastic coating is what protects your poly film from the sharp edges of the steel and from heat transfer if the wire gets hot in the sun. Ensure you are using a smooth, thickly coated wiggle wire.
Conclusion
With these considerations in mind, you are now equipped with a deeper understanding of the forces at play. The selection of a greenhouse poly film is not a mere purchase; it is an agricultural strategy. It is a decision that balances the physics of light, the chemistry of polymers, and the biology of plant growth against the economic realities of your operation and the climatic temperament of your region. By thoughtfully considering the material's thickness, its specialized additives, and the manner of its installation, you move from being a passive user of a product to an active architect of an optimized environment. The path to a more abundant harvest and a more resilient operation begins with this translucent skin, the carefully chosen barrier that transforms a simple structure into a powerhouse of productivity.
References
Beijing Fenglong. (2024). Greenhouse construction materials and equipment supplier. Wiggle Wires. https://www.wigglewires.com/
Polyflute. (2025). Polycarbonate sheets vs plexiglass. https://polyflute.com/2025/04/23/polycarbonate-sheets-vs-plexiglass/
SolaWrap Films. (2025). Choosing the right greenhouse plastic. https://www.solawrapfilms.com/greenhouse-plastic-blog/choosing-the-right-greenhouse-plastic
SolaWrap Films. (2025). The best polyethylene material for a greenhouse cover: A complete guide. https://www.solawrapfilms.com/greenhouse-plastic-blog/the-best-polyethylene-material-for-a-greenhouse-cover-a-complete-guide
SolaWrap Films. (2024). Picking the perfect polyethylene sheeting for your greenhouse. https://www.solawrapfilms.com/greenhouse-plastic-blog/picking-the-perfect-polyethylene-sheeting-for-greenhouses