The 2025 Buyer’s Guide: 5 Proven Steps for Installing Spring lock wire & Avoiding Costly Mistakes
September 6, 2025
Abstract
The structural integrity and environmental control of a greenhouse are fundamentally dependent on the secure attachment of its covering. This article provides a comprehensive examination of the spring lock wire system, a critical component for fastening greenhouse films. It moves beyond a superficial overview to present a detailed, pedagogical guide for its selection and installation in 2025. The inquiry focuses on the material science underpinning the lock channel and the wire, the biomechanics of the installation technique, and the long-term maintenance required to ensure durability. By analyzing the system through the lenses of agricultural engineering and material degradation, the text elucidates the principles of achieving optimal film tension and preventing premature failure. It addresses common installation errors and presents a structured, five-step methodology designed for both novice growers and professional builders. The objective is to equip the reader with the nuanced understanding necessary to make informed decisions and execute a flawless installation, thereby safeguarding the greenhouse against environmental stresses and maximizing its operational lifespan. This analysis is particularly tailored to address the unique climatic challenges of regions like South America, Russia, Southeast Asia, the Middle East, and South Africa.
Key Takeaways
- Choose materials wisely; PVC-coated spring lock wire and galvanized channels prevent rust and film tearing.
- Install the lock channel with precise alignment and secure fastening to create a solid foundation.
- Lay the greenhouse film on a calm day to avoid wrinkles and ensure even initial placement.
- Master the "wiggling" motion to insert the wire without damaging the film or your hands.
- Perform regular checks on film tension and hardware, especially after extreme weather events.
- Proper installation avoids costly repairs and ensures your greenhouse remains a protected environment.
- Final tension should be drum-tight to prevent wind flap and prolong the life of the film.
Table of Contents
- Understanding the Fundamental Role of Spring Lock Wire in Modern Greenhouses
- Step 1: Meticulous Preparation and Material Selection
- Step 2: The Precise Art of Installing the Lock Channel
- Step 3: Laying and Positioning the Greenhouse Film
- Step 4: Mastering the "Wiggle" – The Technique of Securing the Wire
- Step 5: Final Adjustments, Tensioning, and Long-Term Maintenance
- Common Pitfalls and How to Avoid Them
- Frequently Asked Questions (FAQ)
- Conclusion
- References
Understanding the Fundamental Role of Spring Lock Wire in Modern Greenhouses
To cultivate life within a controlled environment is to engage in a delicate negotiation with the forces of nature. A greenhouse stands as a testament to this negotiation—a sanctuary designed to shield vulnerable plants from the volatility of the outside world. Yet, the efficacy of this sanctuary hinges not on its grand frame but on the integrity of its skin and, more pointedly, on the method used to attach that skin to the structure. Here, we begin our exploration of the spring lock wire system, a technology that may seem modest but is, in reality, a cornerstone of modern greenhouse construction.
Imagine for a moment the immense pressures a greenhouse covering endures. It faces relentless solar radiation, the abrasive force of wind, the weight of snow, and the percussive impact of rain and hail. An inadequate fastening system will inevitably yield, leading to torn film, loss of climate control, and potential crop devastation. Historically, growers relied on methods like wooden battens or staples. While functional to a degree, these systems create concentrated stress points and puncture the very film they are meant to secure, creating initiation points for tears. Each nail or staple is a wound, a vulnerability that wind and time will cruelly exploit.
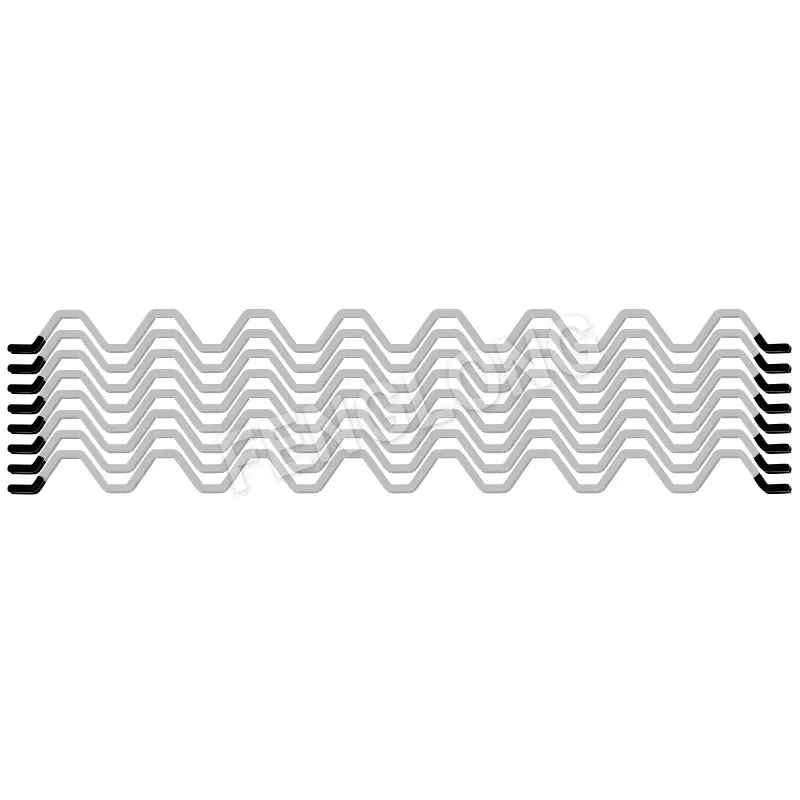
The spring lock wire system, often referred to as wiggle wire, represents a profound conceptual leap. Its design philosophy is one of continuous, distributed pressure. It consists of two interlocking components: a rigid, U-shaped base, known as the lock channel or U-channel, and a flexible, serpentine wire, the spring lock wire itself. The channel is affixed directly to the greenhouse frame. The greenhouse film is then laid over the channel, and the spring lock wire is pressed into the channel on top of the film. The wire's zigzag shape creates constant tension, securely pinching the film against the inner walls of the channel without a single puncture. This continuous grip distributes the load evenly along the entire length of the frame, eliminating the localized stress points that plague older methods. The result is a bond of remarkable strength and resilience, capable of withstanding significant force while preserving the integrity of the covering.
The Two Pillars: Channel and Wire
Let us consider the two components as partners in a crucial task. The lock channel is the anchor, the unyielding foundation. Typically crafted from aluminum or galvanized steel, its role is to provide a rigid, smooth track that will not falter under pressure. Its shape is engineered to perfectly receive the wire, creating a snug fit that prevents the film from slipping.
The spring lock wire is the dynamic element, the flexible yet firm counterpart. It is a high-tensile steel wire bent into a precise, repeating pattern. This "wiggle" is not arbitrary; it is the source of the system's genius. When pressed into the channel, each bend of the wire acts like a small spring, pushing outward against the film and the channel walls. The cumulative effect of these hundreds of tiny springs is a powerful, uniform clamping force. Often, this wire is coated in a protective layer of PVC plastic. This coating serves a dual purpose: it protects the wire from corrosion and, critically, it provides a smooth, soft surface that will not abrade or tear the delicate greenhouse film, even under the strain of high winds.
A Comparison of Fastening Systems
To fully appreciate the elegance of the spring lock wire system, it is useful to compare it directly with its predecessors. The following table contextualizes its advantages within the spectrum of available technologies.
| Feature | Spring Lock Wire System | Batten Tape / Wood Lath | Staples |
|---|---|---|---|
| Puncturing of Film | No. The film is pinched, not perforated, preserving its integrity. | Yes. Screws or nails are driven through the batten and film. | Yes. Staples are driven directly through the film. |
| Pressure Distribution | Even and continuous along the entire length of the channel. | Concentrated at each fastener point, creating stress risers. | Highly concentrated at each staple, a major point of failure. |
| Ease of Re-tensioning | Simple. The wire can be removed and re-installed to tighten the film. | Difficult. Requires removing and re-fastening all screws/nails. | Impossible. The film must be replaced or patched. |
| Suitability for Multiple Layers | Excellent. A single channel can often hold multiple wires and layers. | Possible, but becomes bulky and increases risk of tearing. | Not recommended. Difficult to align and secure properly. |
| Professional Finish | Provides a clean, taut, and professional appearance. | Can look uneven. Wood lath can warp or rot over time. | Appears unprofessional and is prone to failure. |
As the table illustrates, the spring lock wire system is not merely an alternative; it is an evolution. It addresses the fundamental weaknesses of other methods, offering a solution that is stronger, more durable, and ultimately more forgiving. It allows for adjustments, repairs, and the easy replacement of film, which is a practical necessity in the lifecycle of any greenhouse. For those seeking to build a structure that endures, understanding this system is not optional; it is foundational.
Step 1: Meticulous Preparation and Material Selection
The path to a durable and effective greenhouse begins not with a hammer or a drill, but with careful thought and deliberate choice. The materials you select are the building blocks of your structure's resilience. A decision made here, in the quiet of the planning stage, will have repercussions for years to come, echoing in the rustle of a wind-tight film or the sorrowful flap of a torn covering. The principle is simple: the strength of the entire system is dictated by its weakest component. Therefore, we must scrutinize both the lock channel and the spring lock wire with equal rigor.
Choosing the Right Lock Channel
The lock channel is the skeleton of your fastening system. It must be strong, precisely formed, and resistant to the elements. The two primary material choices you will face are galvanized steel and aluminum.
Galvanized Steel: This is the more common and often more economical choice. Steel provides exceptional strength and rigidity. However, steel's nemesis is rust. To combat this, the channels are galvanized, meaning they are coated in a layer of zinc. The quality of this galvanization is paramount. Hot-dip galvanization, where the steel is submerged in molten zinc, offers a thick, durable, and comprehensive coating that is far superior to the thinner layer provided by electro-galvanization. When inspecting a galvanized steel channel, look for a uniform, slightly rough, and continuous coating. Any gaps, scratches, or areas of discoloration are potential starting points for corrosion, which can not only weaken the channel but also stain your greenhouse film.
Aluminum: Aluminum channels offer a significant advantage: they are naturally rust-proof. This makes them an excellent choice for high-humidity environments, such as those found in coastal regions or in Southeast Asia, or for structures where absolute longevity is the primary concern. Aluminum is also lighter than steel, which can make installation slightly easier. However, it is typically more expensive and may be slightly less rigid than steel of a similar profile. If you choose aluminum, ensure it is a high-quality alloy that has not been excessively recycled, as impurities can compromise its strength.
Another consideration is the profile of the channel. Most systems use a single channel, designed to hold one or two spring lock wires. However, for applications requiring multiple layers of film—for instance, a standard film plus a shade cloth or an inflated double-layer for insulation—a double lock channel is an ingenious solution. This component features two parallel channels in a single extruded piece, allowing you to secure and remove different layers independently. This is a feature offered by forward-thinking suppliers who understand the diverse needs of modern growers. Exploring our extensive range of greenhouse components can reveal solutions tailored to such complex requirements.
Selecting the Optimal Spring Lock Wire
If the channel is the skeleton, the spring lock wire is the muscle and sinew. Its quality determines the gripping force and the safety of your film. The wire itself is made from high-tensile spring steel, engineered to flex without permanently deforming. The crucial differentiator lies in its coating.
PVC (Polyvinyl Chloride) Coated Wire: This is the gold standard for professional greenhouse construction. A thick, supple layer of PVC is applied over the steel wire. This coating is the interface between the hard steel and the soft film. A high-quality PVC coating will be UV-stabilized to prevent it from becoming brittle and cracking under years of sun exposure, a critical factor in high-insolation regions like the Middle East or parts of South America. The coating protects the film from abrasion and tearing during installation and from heat transfer from the metal wire on hot days, which can otherwise cause the film to degrade prematurely.
Uncoated or Plain Wire: While more economical, uncoated wire is a poor choice for any serious greenhouse project. It offers no protection for the film. The bare metal can easily snag or tear the covering during installation. Over time, friction from wind-induced movement will abrade the film, and any rust that forms on the wire will both weaken it and stain the covering. The small initial savings are quickly erased by the cost of premature film replacement and the risk of crop loss.
The physical properties of the wire also matter. A good spring lock wire should be difficult to bend by hand but should flex smoothly into the channel. It should have a "memory," returning to its original shape when removed. The length is typically standardized, but the quality of the bends and the consistency of the pattern are hallmarks of a superior product.
Comparative Analysis of Spring Lock Wire Types
| Feature | High-Quality PVC-Coated Wire | Uncoated / Low-Quality Wire |
|---|---|---|
| Film Protection | Excellent. The soft, smooth PVC coating prevents abrasion, snags, and tears. | Poor. Bare metal or thin coating can easily damage the film during installation and over time. |
| Durability & Lifespan | High. UV-stabilized PVC resists degradation from sunlight. The steel core is protected from rust. | Low. Prone to rusting, which weakens the wire and stains the film. Any coating will quickly become brittle. |
| Gripping Power | Consistent and reliable. The coating can help create a more uniform grip on the film. | Can be inconsistent. Rust can create rough spots that either damage the film or fail to grip properly. |
| Reusability | Highly reusable. The wire maintains its shape and the coating remains intact over many cycles. | Limited. Becomes weaker and more brittle with each use. Rust makes it difficult to handle. |
| Long-Term Cost | Lower. The initial investment is higher, but it protects the film, extending its life and reducing replacement costs. | Higher. The low initial cost is offset by frequent film replacement and potential structural failure. |
Inspecting and Preparing Your Greenhouse Frame
Before the first piece of channel is installed, you must turn your attention to the greenhouse frame itself. The channel must be mounted to a flat, continuous surface. Inspect every purlin, arch, and hip board where the channel will be attached. Are there any protruding screw heads, splinters of wood, or sharp metal edges? These imperfections can prevent the channel from sitting flush against the frame, creating gaps that will compromise the seal. Worse, they can create pressure points that will damage the greenhouse film from behind. Take the time to sand, file, or grind down any such protrusions. A smooth mounting surface is non-negotiable. This preparatory work is a form of respect for the materials you have so carefully chosen and for the integrity of the structure you are building. It is an act of foresight that pays dividends in the form of a secure, long-lasting greenhouse.
Step 2: The Precise Art of Installing the Lock Channel
With your materials selected and your frame prepared, we arrive at the first stage of construction. The installation of the lock channel is a task that rewards precision and punishes haste. Think of it as laying the foundation of a house. Any error in alignment or fastening at this stage will be magnified later, resulting in wrinkles in your film, uneven tension, or points of weakness. The goal is to create a single, unbroken frame around every opening and along every surface that will receive the film.
Aligning and Spacing the Channel
The lock channel must follow the lines of your greenhouse frame perfectly. Whether you are mounting it to a steel arch or a wooden baseboard, the channel must sit flat and straight. For long, straight runs, a chalk line is an invaluable tool. Snap a crisp line to guide your placement, ensuring the channel does not wander.
Where two pieces of channel meet, they must be butted together as tightly as possible. A gap of more than a millimeter or two can create a point where the spring lock wire does not have adequate support, potentially allowing the film to slip or tear under high stress. Imagine the channel as a railway track for the spring lock wire; any break in the track is a potential derailment. When cutting channels to length, use a fine-toothed hacksaw or a metal-cutting blade on a power saw to produce a clean, square cut. After cutting, it is crucial to deburr the ends with a metal file. A sharp edge on a cut channel is like a knife waiting to slice your expensive greenhouse film.
This meticulous attention to detail is what separates an amateur installation from a professional one. It reflects an understanding that the system works through continuity. A company that has been in the business for years, like the team you can learn about by visiting our company information page, recognizes that these small details in installation are what ensure the long-term performance of their products.
Secure Fastening Techniques
The channel must be fastened to the frame securely enough to withstand the combined forces of a tensioned film and extreme weather. The choice of fastener is critical and depends on the material of your greenhouse frame.
- For Wooden Frames: Use self-tapping screws with a wide, flat head (such as a hex-head or pan-head screw). The wide head helps distribute the clamping force and prevents the screw from pulling through the channel's pre-drilled holes. Choose a screw length that will penetrate deep into the wood for maximum holding power. A spacing of 30 to 45 centimeters (12 to 18 inches) between screws is generally sufficient, but in high-wind areas, reducing this to 20-25 centimeters is a wise precaution.
- For Steel Frames: Self-drilling, self-tapping screws (often called "tek" screws) are the most efficient option. These screws drill their own pilot hole and cut their own threads in a single action. Ensure you use screws rated for the thickness of the steel you are drilling into. Again, a spacing of 30-45 cm is standard, with closer spacing recommended for high-wind environments. Pre-drilling a pilot hole, even with self-drilling screws, can sometimes lead to a more secure and precise installation, especially with thicker steel.
When tightening the fasteners, use a drill or driver with a torque or clutch setting. The goal is to snug the channel firmly against the frame, not to overtighten. Overtightening can warp the channel or strip the threads in the frame, compromising the connection. The channel should be immobile, with no gaps or movement between it and the frame.
Navigating Corners and Curves
Greenhouses are rarely simple boxes. They have corners, curved arches, and other transitions that require careful handling.
Corners: At an outside corner, you will need to cut the two meeting channels at a 45-degree angle to create a clean mitered joint. This ensures the channel's profile remains continuous around the corner, allowing the film to be tucked in neatly and secured with the spring lock wire. For inside corners, a simple butt joint is usually sufficient. In both cases, ensure the joint is as tight as possible and free of burrs.
Curves: One of the great advantages of the lock channel system is its ability to follow the graceful curves of a hoop house or gothic arch. The channel itself is rigid, so it cannot be bent on-site. Instead, it is installed in a series of short, straight sections. The key is to use enough fasteners to ensure each section is held tightly against the curve of the arch. The small, straight segments will effectively approximate the curve. When the greenhouse film is stretched over it, the transition will be smooth. Do not leave large, unsupported gaps between fasteners on a curve, as this is where the channel will be most tempted to pull away from the frame under load.
This phase of the installation demands a methodical approach. Work your way around the structure, piece by piece, ensuring every length of channel is perfectly aligned, deburred, and securely fastened. This framework you are building is the promise of security to the film that will soon be its skin.
Step 3: Laying and Positioning the Greenhouse Film
With the lock channel providing a perfect, unbroken frame, the moment has come to introduce the most visible and vulnerable element of the greenhouse: the polyethylene film. Handling this large, unwieldy material can be challenging, but with the right technique and an appreciation for its properties, you can achieve a smooth, wrinkle-free starting position. This stage is less about force and more about finesse.
Handling and Unfolding Polyethylene Film
Greenhouse film is a sophisticated product, often composed of multiple layers, each with specific additives for UV protection, anti-drip properties, and light diffusion (Kittas et al., 2003). It is surprisingly durable for its thickness but must be treated with care. Before you even begin, inspect the ground in and around your greenhouse. Remove any sharp rocks, sticks, or debris that could puncture or scratch the film as you unfold it.
The ideal time to lay the film is on a calm, overcast, and moderately warm day.
- Wind is your greatest enemy. Even a slight breeze can turn a large sheet of film into an uncontrollable sail, making it impossible to position correctly and creating a serious safety hazard.
- Direct, hot sun can cause the film to expand significantly. If you install and tension the film while it is hot and expanded, it will contract and become overly tight when the temperature drops, putting immense stress on the film, the spring lock wire, and the greenhouse structure itself.
- Extreme cold makes the film stiffer and more brittle, increasing the risk of cracking or damage during handling.
The film will arrive from the manufacturer in a roll. Pay close attention to any markings that indicate "inside" or "outside." Many films have specific coatings, such as an anti-drip layer, that must face the interior of the greenhouse. Unrolling the film with the correct orientation from the start will save you a great deal of trouble. With the help of at least one other person (and more for larger structures), carefully lift the roll to the top of the greenhouse and unroll it down the length of the structure, allowing it to drape over the arches. Take your time, walking it out slowly to prevent snagging on any part of the frame.
Achieving Initial Tension and Placement
Once the film is draped over the structure, your goal is to achieve a general sense of its final position. You want an equal amount of excess film hanging down on all sides. Gently pull and smooth the film by hand, working from the center outwards. You are not trying to achieve final tension yet; you are simply removing the largest wrinkles and ensuring the material is not caught or folded anywhere.
Think of this process like making a bed. You first lay the sheet or blanket over the mattress, centering it before you begin tucking in the corners. You want the film to be relaxed but orderly, lying naturally over the frame. This initial positioning is critical because the first piece of spring lock wire you install will anchor the entire sheet. If the film is crooked or heavily wrinkled at this stage, it will be exceedingly difficult to correct later.
Working with Multiple Layers of Film
Many greenhouse operations, particularly those seeking better insulation or light control, utilize multiple layers of material. This could be a double layer of polyethylene film for inflation or a layer of film combined with a separate shade cloth or insect screen. The spring lock wire system is exceptionally well-suited for this.
If you are using a double lock channel, the process is straightforward. You can secure each layer into its own separate channel. This allows for independent tensioning and easy removal of one layer (like a seasonal shade cloth) without disturbing the other.
If you are using a single lock channel, you can still secure multiple layers. The standard procedure is to place both layers of film over the channel together. Then, a single piece of spring lock wire is used to fasten them simultaneously. Most high-quality spring lock systems are designed to securely hold two, and sometimes even three, layers of material with one wire. A second, "helper" wire can often be installed in the same channel to provide additional grip if needed. When doing this, ensure both layers are smooth and free of wrinkles before you begin inserting the wire. Any fold or wrinkle trapped between the layers will be a permanent feature until you remove and reinstall the wire.
This step is a dance between the installers and the material. It requires communication, patience, and a gentle hand. Rushing now will only lead to frustration and a subpar result. Take a deep breath, work with the film, not against it, and prepare for the final, satisfying act of securing it in place.
Step 4: Mastering the "Wiggle" – The Technique of Securing the Wire
This is the heart of the entire process, the moment where the system's name—wiggle wire—becomes an action. The technique for inserting the spring lock wire into the channel is a physical skill, one that combines leverage, rhythm, and a feel for the materials. A proper technique ensures a tight grip, protects the film from damage, and is surprisingly efficient once mastered. An improper technique can lead to torn film, damaged wire, and sore hands.
The Correct Insertion Angle and Motion
The key to inserting the wire is not brute force. It is a smooth, rocking motion. Grasp the end of a piece of spring lock wire. Start by hooking one end of the wire under one lip of the lock channel. Now, instead of trying to push the wire straight down into the channel, you will apply pressure at an angle, pushing the wire both down and forward along the channel.
As you apply pressure, "wiggle" the wire from side to side. This back-and-forth motion is what allows the wire to work its way into the channel. Each wiggle helps a new section of the wire slip past the channel's lip and seat itself inside. Imagine you are drawing a zigzag line with the wire inside the channel. The motion should be fluid. A good rhythm feels like a combination of pushing and rocking. Your hands should move along the channel, feeding the wire in as you go. You will feel a satisfying "click" or "snap" as the wire seats properly.
Avoid using sharp tools like screwdrivers to force the wire in. This is a common mistake that almost always results in a punctured film. If you need a tool to help, use a small, smooth, blunt object, like a specially designed installation tool or even the rounded plastic handle of a screwdriver, but never the metal tip.
Anchoring the Starting Point
Where you begin the installation matters. For a typical hoop house, a good strategy is to anchor the film along one of the baseboards first. Choose a side that is sheltered from any prevailing wind. By securing one full side first, you create an anchor point that will help you pull the film taut over the rest of the structure.
Start at one end of the channel. Secure the first 30-50 centimeters of the film firmly. Then, move to the opposite end of that same run of channel and pull the film gently taut along its length before securing the other end. With both ends of the run anchored, you can then return to the middle and work your way outwards, filling in the space between. This technique helps to prevent the accumulation of small wrinkles along the length of the channel.
Applying Consistent Pressure for a Secure Fit
As you work your way along the channel, strive for consistency in your technique. The pressure you apply should be firm but controlled. The goal is to seat the wire fully into the channel so that its top is flush with or slightly below the lips of the channel. If the wire is sitting too high, it does not have a proper grip and can pop out under stress.
Listen and feel as you work. A properly seated wire makes a distinct sound and feels solid. An improperly seated wire will feel spongy or loose. If a section doesn't feel right, it is better to pull the wire out and try again rather than to continue. A small section of poorly secured film can become the starting point for a major failure in a windstorm. The feeling of a secure installation is one of deep satisfaction, knowing that the barrier you are creating is sound. This commitment to quality is a core part of building something that lasts, a philosophy that we as a leading greenhouse supplier deeply believe in.
Techniques for Removing and Reusing the Wire
One of the most significant advantages of the spring lock wire system is its reusability. Whether you are re-tensioning the film after a season or replacing it entirely, the ability to remove the wire without damaging it or the channel is crucial.
The removal process is essentially the inverse of the installation. Start at one end of the wire. Use your fingers or a blunt tool to get under the end of the wire and pry it upwards. Once you have lifted the end out of the channel, you can pull the rest of the wire out with a motion that is, again, a reverse "wiggle." Pull the wire up and back, using a similar side-to-side rocking motion. Do not try to yank the wire straight up along its entire length; this can damage the wire and the channel.
A high-quality, PVC-coated spring lock wire can be reused many times. Its spring steel construction is designed to retain its shape. After removing it, inspect the wire. If it is not severely bent or rusted, and the PVC coating is largely intact, it can be confidently used again. This reusability is not just economical; it is also an environmentally conscious aspect of the system, reducing waste over the lifespan of the greenhouse (Bantis et al., 2021).
Mastering this physical technique is a rite of passage for any greenhouse builder. It transforms a seemingly difficult task into a rhythmic and efficient process. It is the tangible connection between the builder, the structure, and the protective skin that will nurture the life within.
Step 5: Final Adjustments, Tensioning, and Long-Term Maintenance
The spring lock wire is in place, and the greenhouse film is secure. However, the work is not yet complete. This final phase is about refinement and foresight. It involves achieving the perfect final tension, tidying up the installation, and establishing a routine for maintenance that will ensure your greenhouse remains a steadfast shelter for years to come. A well-maintained structure is a testament to the builder's craftsmanship and understanding of the forces at play.
Achieving Final, Drum-Tight Tension
So far, the film has been secured, but likely not with its final tension. The goal is to have the film stretched taut, like the surface of a drum. A tightly tensioned film is critical for several reasons:
- Wind Resistance: A loose film will flap violently in the wind. This "whipping" action, known as wind flap, causes immense stress and abrasion, dramatically shortening the life of the film. A taut film, by contrast, presents a stable, aerodynamic surface that sheds wind more effectively.
- Snow and Rain Shedding: A taut surface allows snow and rain to slide off easily. Loose, sagging film can collect pockets of water or heavy snow, which can stretch the film permanently or even cause the structure to collapse under the weight.
- Light Transmission: Wrinkles and sags in the film can create shadows and distort the light entering the greenhouse, leading to uneven plant growth. A smooth surface ensures uniform light distribution.
To achieve this final tension, you will typically work on the side opposite the one you first anchored. For a hoop house, after securing one baseboard, you move to the other. Have a helper pull down firmly and evenly on the free edge of the film while you install the spring lock wire on the second side. Work from the center of the structure out towards the ends. This allows you to pull out any remaining slack or wrinkles.
How tight is tight enough? It should be tight enough that it barely gives when you press on it and makes a low, resonant sound when you tap it. There should be no visible sags or ripples. Be cautious not to overtighten, especially if installing on a very cold day, as the film will tighten further as it warms up. The process requires a feel for the material, balancing the need for tautness against the risk of over-stressing the film.
Trimming Excess Film
Once all the film is securely locked in place and properly tensioned, you will have excess material hanging from the outside of the lock channels. This excess should be trimmed. Leaving a long, flapping skirt of film is not only untidy but can also act as a sail that catches the wind, putting unnecessary stress on the lock channel.
Using a sharp utility knife, carefully trim the excess film. A good rule of thumb is to leave a small flap of about 5-7 centimeters (2-3 inches) below the channel. This small flap helps ensure that rainwater drips away from the channel and the base of the greenhouse. It also provides a little extra material to grip if you ever need to remove the wire and re-tension the film in the future. Be extremely careful when cutting. Always cut away from the main body of the film, using the edge of the lock channel as a guide. A careless slip of the knife can slice the newly installed film, requiring an immediate patch or repair.
Regular Inspection and Proactive Maintenance
A greenhouse is a dynamic structure, constantly interacting with its environment. Its longevity depends on proactive, rather than reactive, maintenance. Establish a regular inspection schedule.
- After Every Major Storm: After any event involving high winds, heavy snow, or hail, walk around and inside your greenhouse. Look for any signs of damage. Check that all the spring lock wires are still securely seated in their channels.
- Seasonally: At least twice a year, perhaps in the spring and autumn, perform a more thorough inspection. Check the tension of the film. Polyethylene film can stretch slightly over time, and a quick re-tensioning can add years to its life. Examine the lock channels for any signs of corrosion or damage. Look at the spring lock wire itself, especially in high-stress areas like corners, for any signs of fatigue or coating degradation.
- Check Fasteners: Annually, check the tightness of the screws or bolts holding the lock channels to the frame. Temperature fluctuations and vibrations can sometimes cause fasteners to loosen over time.
This regular attention allows you to catch small problems before they become catastrophic failures. A single piece of popped spring lock wire, if ignored, can lead to a progressively larger section of film coming loose, which could result in the loss of the entire sheet in the next storm.
Climate-Specific Considerations
The principles of installation are universal, but their application must be adapted to your specific climate.
- High-Wind Regions (e.g., coastal areas, parts of the Middle East): Use the closest recommended spacing for fasteners when installing the lock channel. Consider using a double layer of spring lock wire in the channel for extra gripping power, especially on the windward side of the structure. Ensure the film is exceptionally taut.
- Heavy Snow Regions (e.g., Russia, mountainous areas): A drum-tight film is absolutely critical to shed snow effectively. A gothic arch shape is superior to a hoop house in these regions because its steeper sides help snow slide off. Ensure the underlying greenhouse frame is engineered to handle the expected snow load.
- High-Humidity/High-Rainfall Regions (e.g., Southeast Asia, parts of South America): Aluminum lock channels are a wise investment to prevent rust. Ensure the trimmed flap of film is long enough to direct water away from the structure and that the greenhouse has proper drainage at its base. The anti-drip properties of the film are especially important here.
By considering these final details, you are not just finishing a construction project. You are commissioning a high-performance system and committing to its care. This ensures that the sanctuary you have built will remain a place of controlled, predictable growth, no matter the unpredictability of the world outside.
Common Pitfalls and How to Avoid Them
The path to a successful greenhouse installation is paved with good intentions, but it is also lined with potential pitfalls. Even with the best materials, simple errors in judgment or technique can compromise the integrity of the structure. Recognizing these common mistakes is the first step toward avoiding them. Let us examine the most frequent and costly errors, treating them as lessons in what not to do.
The Peril of Improper Tension
This is perhaps the most common and consequential error. The temptation for a novice is either to be too timid, leaving the film loose, or too aggressive, overtightening it.
Loose Film: As we have discussed, a loose film is a death sentence for a greenhouse covering. It will flap and buffet in the wind, a phenomenon that engineers call "aeroelastic flutter." This constant, violent motion does not just abrade the film; it imparts dynamic, repetitive loads onto the spring lock wire, the channel, and the entire greenhouse frame (Sase, 2005). A system designed for a static load can fail quickly under such dynamic stress. The result is premature tearing of the film, often right at the edge of the lock channel, and potential fatigue failure of the hardware. To avoid this, always aim for that "drum-tight" finish. Do not be afraid to pull the film taut before locking it in.
Over-tensioned Film: The opposite error is also dangerous. Polyethylene film has a thermal coefficient of expansion, meaning it expands when hot and contracts when cold. If you install the film on a very hot day and pull it to its absolute limit, it will have no room to contract as the temperature drops overnight. This contraction can create immense tensile stress. The film may tear, the spring lock wire may be pulled out of the channel, or, in extreme cases, the lock channel itself could be warped or pulled away from the frame. The rule is to install on a day with moderate temperatures. If you must install on a very hot day, tension it firmly but not to its absolute maximum limit. If you must install on a cold day, you will need to pull it as tight as possible, knowing it will loosen slightly in warmer weather.
Damage from Incorrect Tools or Technique
The spring lock wire system is designed to be installed with a specific motion, not brute force. The use of improper tools is a frequent source of damage.
Puncturing with Sharp Tools: The sight of an installer using a screwdriver or pliers to force the wire into the channel is a painful one. This action almost invariably leads to the tool slipping and puncturing or tearing the film. A small puncture right next to the lock channel is in the worst possible location, as it will be under maximum stress and is a guaranteed starting point for a major tear. The solution is simple: never use sharp metal tools to push the wire. Use your hands, a proper installation tool, or a blunt, smooth object.
Damaging the Wire or Channel: Trying to remove the wire by yanking it straight up, or using pliers to grip and pull it, can permanently bend the wire or deform the lip of the channel. A bent wire will not seat properly or provide even pressure when re-installed. A damaged channel lip may not grip the wire securely ever again. The correct technique—a smooth, wiggling motion for both installation and removal—is not just about making the job easier; it is about preserving the components for future use.
The Hidden Costs of Low-Quality Materials
In any construction project, there is a temptation to cut costs by choosing cheaper materials. With greenhouse fastening systems, this is a false economy. The initial savings are invariably consumed by higher long-term costs.
Rusting Components: Choosing an uncoated or poorly galvanized lock channel and wire is a classic example. Rust never sleeps. It will weaken the steel, reducing its gripping power. The rust will flake off and stain your greenhouse film, reducing light transmission. The rough surface of the rust will abrade the film, causing it to fail sooner. The cost of replacing a greenhouse film even one or two years early will far exceed any initial savings on the hardware.
UV Degradation: Another hidden cost comes from choosing a spring lock wire with a low-quality or non-UV-stabilized PVC coating. In regions with high solar radiation, such as the Middle East or high-altitude locations in South America, unprotected plastic becomes brittle and cracks within a couple of seasons. As the coating flakes away, it exposes the film to the bare metal wire, leading to the same abrasion and failure modes as an uncoated wire. Investing in a high-quality, UV-stabilized coating is an investment in the longevity of your entire covering system.
Avoiding these pitfalls requires a shift in perspective. One must see the installation not as a single task to be completed, but as the creation of a long-term system. This requires patience, adherence to proper technique, and an upfront investment in quality materials that are designed to work together and withstand the test of time and weather.
Frequently Asked Questions (FAQ)
What is the difference between "wiggle wire" and "spring lock wire"?
The terms "wiggle wire" and "spring lock wire" are used interchangeably in the industry to refer to the same product. It is the serpentine, spring-steel wire that is inserted into a lock channel to secure greenhouse coverings. The name "wiggle wire" comes from its shape and the wiggling motion used during installation. "Spring lock" refers to its function: it uses spring tension to lock the film in place.
Can I reuse spring lock wire and the lock channel?
Absolutely. One of the primary benefits of this system is its reusability. High-quality, PVC-coated spring lock wire can be installed and removed many times without losing its shape or effectiveness. Likewise, aluminum or well-galvanized steel lock channels are permanent fixtures that should last for the life of the greenhouse frame. This reusability makes replacing film a much simpler and more cost-effective process compared to single-use fastening methods.
How many layers of film can I fasten with one wire?
Most standard spring lock wire systems are designed to securely hold at least two layers of material, such as a greenhouse film and a shade cloth, or two layers of film for an inflated roof. Some heavy-duty systems can hold up to three layers. To secure two layers, you simply place them both over the channel and insert one wire to lock them in. For added security, a second wire can sometimes be installed in the same channel.
What is the ideal spacing for screws when installing the lock channel?
For a standard installation, fastening the lock channel every 30 to 45 centimeters (12-18 inches) is sufficient. However, in areas known for high winds, it is highly recommended to decrease this spacing to 20 to 25 centimeters (8-10 inches) for added strength and to prevent the channel from pulling away from the frame under extreme wind loads.
My greenhouse film has wrinkles after installation. What should I do?
Minor wrinkles may disappear as the film settles and is exposed to heat from the sun. If the wrinkles are significant, it indicates the film was not tensioned evenly. The best solution is to wait for a calm, moderately warm day, remove the spring lock wire from the wrinkled section and the opposite side, and re-tension the film, pulling it smoother before re-locking the wire.
Is a PVC coating on the spring lock wire really necessary?
Yes, it is highly recommended and considered essential for any professional or long-lasting installation. The PVC coating creates a smooth, soft barrier between the metal wire and the delicate film, preventing abrasion, tears, and heat damage. It also protects the steel wire from rust, ensuring its longevity and reusability. Using an uncoated wire is a false economy that will almost certainly lead to premature failure of your greenhouse film.
How do I secure film on the curved arches of a hoop house?
You install the straight sections of lock channel directly onto the curved pipe or tubing of the arch. The channel itself does not bend. You use shorter pieces and secure them tightly with fasteners, creating a series of straight segments that follow the curve. When the film is stretched over this, it creates a smooth, continuous surface. The key is to use enough fasteners to ensure there are no gaps between the channel and the arch.
Conclusion
The construction of a successful greenhouse is an exercise in understanding systems. It is the recognition that the strength of the whole is contingent upon the quality and proper assembly of its individual parts. Within this system, the spring lock wire and its associated channel play a role that is disproportionately large for their modest size. They are the critical interface between the protective skin and the rigid skeleton, the components tasked with bearing the brunt of nature's forces.
We have journeyed through the logic of this system, from the foundational importance of material selection to the nuanced techniques of installation and the foresight required for long-term maintenance. The principles are clear: choose materials that resist corrosion and protect the film; install the channel with precision to create an unblemished foundation; handle and position the film with a respect for its properties; master the physical rhythm of inserting the wire; and, finally, achieve a taut, drum-tight finish that will shed wind and water effectively.
To ignore these principles—to opt for inferior materials or to rush through the installation—is to build a vulnerability into the very heart of your structure. It is to invite failure. But to embrace them is to do more than just build a greenhouse. It is to create a durable, resilient, and reliable environment for cultivation. It is an act of craftsmanship that respects the interplay of materials and forces, ensuring that the sanctuary you have built will stand strong, season after season, a testament to the power of thoughtful design and meticulous execution.
References
Bantis, F., Ouzounis, T., & Radoglou-Grammatikis, P. (2021). Securing the quality of specialty crops: The case of greenhouse films. Polymers, 13(16), 2813. https://doi.org/10.3390/polym13162813
Kittas, C., Baille, A., & Giaglaras, P. (2003). Influence of covering material and shading on the spectral distribution of light in greenhouses. Journal of Agricultural Engineering Research, 84(3), 331–341. https://doi.org/10.1016/S0021-8634(02)00192-3
Sase, S. (2005). Wind engineering for greenhouse structures. In G. van Straten, G. van Willigenburg, E. van Henten, & R. van Ooteghem (Eds.), Proceedings of the 8th International Conference on Mathematical and Control Applications in Agriculture and Horticulture (pp. 51-60). International Federation of Automatic Control.
Mollick, E. (2023). Using AI to make teaching easier & more impactful. One Useful Thing. oneusefulthing.org
Raths, D. (2002). Improving instruction: The primary goal of evaluation. New Directions for Teaching and Learning, 2002(89), 41–50. https://doi.org/10.1002/tl.45
University of Illinois. (2020). Learning theories: Understanding how people learn. Instruction in Libraries and Information Centers. iopn.library.illinois.edu
University of Illinois Chicago. (2023). Bloom's taxonomy of educational objectives. teaching.uic.edu