7 Steps to a Storm-Proof Greenhouse: The Ultimate Wiggle Wire Channel Guide
August 28, 2025
Abstract
The structural integrity of a greenhouse is fundamentally dependent on the efficacy of its covering attachment system. This analysis examines the wiggle wire channel system, a predominant method for securing greenhouse polyethylene film and other coverings. It posits that the system's reliability is not merely a function of its components but a synthesis of material selection, meticulous installation, and ongoing maintenance. An exploration into the mechanics of the poly lock system reveals how it distributes wind and environmental loads across the structure, mitigating stress points that lead to film failure. The discourse evaluates the comparative merits of aluminum versus galvanized steel channels, considering factors such as corrosion resistance, strength-to-weight ratio, and suitability for diverse global climates, from the arid conditions of the Middle East to the humid tropics of Southeast Asia. Proper installation protocol, including frame preparation, fastener selection, and film tensioning techniques, is presented as a critical determinant of long-term performance. The study demonstrates that a correctly implemented wiggle wire channel system is an indispensable component for ensuring the durability, security, and operational success of a modern greenhouse.
Key Takeaways
- Select channel material—aluminum or steel—based on your specific climate's humidity and UV exposure.
- Proper screw spacing during installation prevents channel warping and ensures a secure grip.
- Always install greenhouse film during moderate temperatures to achieve optimal, lasting tension.
- A well-installed wiggle wire channel is your best defense against wind and weather damage.
- Regularly inspect wires and channels for signs of wear to prevent catastrophic failures.
- Use a double channel for installing inflation kits or multiple layers like shade cloths.
Table of Contents
- Step 1: Foundational Understanding – The Mechanics of a Secure System
- Step 2: Selecting the Right Materials for Your Climate and Structure
- Step 3: Meticulous Preparation of the Greenhouse Frame
- Step 4: The Art of Channel Installation
- Step 5: Mastering the Greenhouse Film Attachment
- Step 6: Securing Multiple Layers and Accessories
- Step 7: Long-Term Maintenance and Inspection
Step 1: Foundational Understanding – The Mechanics of a Secure System
Embarking on the construction of a greenhouse is an act of profound optimism. It is the creation of a controlled world, a space where one can nurture life, independent of the whims of the external climate. Yet, that very climate—with its gusting winds, heavy rains, or oppressive sun—is a constant force testing the boundaries of this created world. The weakest point is often not the frame itself, but how the delicate skin, the greenhouse film, is attached to that skeleton. A single tear can compromise the entire endeavor. Herein lies the genius of a simple yet profoundly effective invention: the wiggle wire channel system. It is the silent guardian of your greenhouse, the connection that turns a fragile covering into a resilient shield.
What is a Wiggle Wire Channel System?
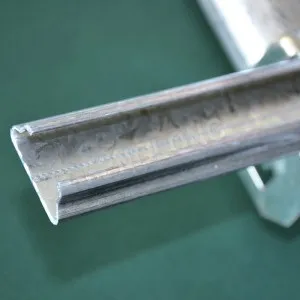
To appreciate its function, one must first understand its form. The system consists of two distinct but cooperative parts. The first is the channel, a continuous track typically forged from aluminum or galvanized steel. It presents a U-shaped or C-shaped profile, designed to be fastened directly onto the greenhouse frame—along the hip boards, baseboards, and around doors and vents. This channel is the foundation, the bedrock of the entire system.
The second component is the wiggle wire, a piece of high-tensile spring steel, bent into a repeating zig-zag pattern. This wire is almost always coated in a smooth layer of UV-stabilized PVC. The wire is designed to be pressed into the channel, sandwiching the greenhouse film firmly against the channel's interior walls. When installed, the wire's spring-like nature exerts constant, even pressure, creating a continuous, unyielding grip along the entire length of the channel. This combination is often referred to as a "poly lock" system, a name that aptly describes its primary function: to lock the polyethylene film in place.
The Physics of Grip: How It Holds Against Wind and Weather
Why is this system so much more effective than traditional methods like staples or wooden battens? The answer lies in the elegant distribution of force. Imagine a powerful gust of wind hitting the side of your greenhouse. The force on the plastic film is immense. With staples or screws and battens, that entire force is concentrated on a few small points. Each staple or screw becomes a potential failure point, a place where the film can rip. The wind pulls and worries at these points until one gives way, leading to a catastrophic "unzipping" effect that can shred an entire sheet of film in seconds.
The wiggle wire channel operates on a completely different principle. It distributes the load uniformly along the entire length of the wire. Instead of isolated points of high stress, the force is spread out over meters of continuous contact. The "wiggling" shape of the wire creates hundreds of contact points within the channel, and the friction between the wire, the film, and the channel walls creates a powerful, unified grip. The film is held not by piercing it, but by securely clamping it. Tunnel Vision Hoops' testing highlights that when gusts apply force, it transfers to the channel and its fasteners, making the channel's durability paramount to prevent it from tearing through the screws. This method prevents the initiation of tears and preserves the integrity of the greenhouse film, even under significant strain. It is a testament to how thoughtful engineering can overcome brute force.
A Global Perspective: Adapting the System for Diverse Climates
A greenhouse in the Russian Federation faces different challenges than one in the coastal plains of South Africa or the humid lowlands of Southeast Asia. A superior attachment system must be adaptable. The wiggle wire channel system demonstrates this adaptability through material choice and installation nuance.
For growers in the Middle East or parts of South Africa, the primary adversary is intense, prolonged UV radiation and high winds. Here, the UV-stabilized PVC coating on the wiggle wire is not a luxury; it is a necessity. It prevents the coating from becoming brittle and cracking, while also protecting the greenhouse film from the hot metal wire, extending its life. The channel's ability to hold the film drum-tight prevents the flapping and abrasion that wind can cause, which is a major source of wear.
Conversely, in the humid, high-precipitation environments of Southeast Asia or parts of South America, the main concern is corrosion and water ingress. The choice between aluminum and galvanized steel for the wiggle wire channel becomes a central calculation. A properly installed channel creates a seal that helps prevent water from seeping between the film and the frame, which can promote rot in wooden structures or corrosion in metal ones. The system's design allows for slight expansion and contraction of the film with temperature and humidity changes without losing its grip, a vital feature in climates with wide diurnal temperature swings.
Step 2: Selecting the Right Materials for Your Climate and Structure
The decision of what materials to use for your wiggle wire channel system is not a minor detail to be glossed over. It is a foundational choice that will have long-term consequences for the durability, maintenance, and overall success of your greenhouse. It is a choice that demands a careful consideration of your local environment, your budget, and the specific demands of your structure. As a global leading greenhouse supplier, we have observed how regional conditions dictate the optimal material choices for growers worldwide.
Aluminum vs. Galvanized Steel Channels: A Material Deep Dive
The channel is the backbone of the poly lock system, and the two dominant materials used for its construction are aluminum and galvanized steel. Each possesses a unique set of characteristics, and neither is universally superior; the "better" choice is entirely contextual.
| Feature | Aluminum Channel | Galvanized Steel Channel |
|---|---|---|
| Corrosion Resistance | Inherently excellent. Forms a passive oxide layer that prevents rust. Ideal for high-humidity, coastal, or rainy climates. | Good, but dependent on the quality and thickness of the zinc coating. Scratches or cuts can expose the steel to rust over time. |
| Strength & Rigidity | Lighter weight but generally less rigid than steel. May require closer screw spacing to prevent flexing under heavy load. | Heavier and significantly stronger/more rigid. Less prone to bending or deforming during installation or under stress. |
| Weight | Significantly lighter, making it easier to handle and install, especially for a single person or on tall structures. | Heavier, which can make installation more laborious. Adds more weight to the overall greenhouse structure. |
| Cost | Typically more expensive upfront due to the higher cost of the raw material and manufacturing processes. | Generally more cost-effective, making it a popular choice for large-scale commercial or budget-conscious projects. |
| Thermal Conductivity | High. It can get very hot in direct sun, potentially increasing wear on the greenhouse film where it makes contact. | Lower thermal conductivity than aluminum, meaning it transfers less heat to the film. |
| Best Use Case | Coastal regions, high-humidity areas (Southeast Asia), high-end hobby greenhouses, structures where weight is a concern. | General purpose applications, high-wind areas where rigidity is key (South African plains), large commercial operations, budget-focused builds. |
For a grower in a coastal part of Brazil, the salt spray and high humidity make aluminum the logical, albeit more expensive, choice. Its natural resistance to corrosion ensures a much longer lifespan without the risk of rust staining the film or weakening the channel. For a large-scale farmer in an arid, windy region of Russia, the superior strength and lower cost of a quality galvanized wiggle wire lock channel might be the more pragmatic decision, provided the galvanization is thick and durable.
The Importance of Wiggle Wire Coating
The wiggle wire itself might seem like a simple component, but the quality of its coating is paramount. Most high-quality wiggle wires are made from spring steel, which provides the necessary tension, but they are coated in a layer of PVC (polyvinyl chloride). This coating serves several purposes.
First, it creates a smooth, forgiving surface that protects the greenhouse film. An uncoated steel wire, especially one with imperfections, can have sharp edges that can easily puncture or abrade the film during installation or as the film shifts with temperature changes. The PVC acts as a protective buffer.
Second, the coating provides protection for the wire itself. The spring steel core is susceptible to rust, and the PVC coating seals it from moisture. This is particularly important at the ends of the wire, which are often cut to size on-site.
Third, the PVC is typically UV-stabilized. Without this stabilization, the sun's radiation would quickly degrade the plastic, making it brittle and causing it to crack and flake off. This would expose the raw wire and negate the protective benefits of the coating. When selecting a wiggle wire, always ensure it has a thick, smooth, and UV-stabilized coating. It is a small detail that dramatically extends the life of both the wire and the expensive greenhouse film it holds.
Single vs. Double Channel: When to Double Up
Most wiggle wire channels come in a single-track profile, designed to hold one wiggle wire securing one or two layers of film. This is sufficient for the vast majority of applications. However, a double channel profile is also available. This product features two U-shaped channels side-by-side in a single extrusion. So, when is this more complex profile necessary?
The primary use for a double wiggle wire channel is for creating an insulated, inflated double-layer poly roof. In this setup, two sheets of greenhouse film are laid over the structure. The outer edges of both sheets are secured in one of the channels. The inner edges are secured separately in the second, parallel channel. This creates a sealed air gap between the two sheets of film. A small inflation fan then pumps air into this gap, creating an insulating cushion of air that can significantly reduce heating costs in colder climates, such as those found in Russia or higher altitude regions of South America.
A double channel is also incredibly useful for layering different types of coverings. For example, a grower might want a permanent insect screen installed on their greenhouse, with a layer of polyethylene film over it that can be removed during the hottest months. The double channel allows the insect screen to be secured in one track and the poly film in the other, making installation and removal of the outer layer simple without disturbing the inner layer. The same principle applies to layering shade cloth over the primary greenhouse film for seasonal heat and light reduction. The versatility of the double channel offers advanced environmental control options for the serious grower.
Step 3: Meticulous Preparation of the Greenhouse Frame
The performance of a wiggle wire channel is not determined in isolation. It is part of a system, and its effectiveness is deeply intertwined with the quality of the surface to which it is mounted. A common mistake, especially for first-time builders, is to rush this preparatory stage, viewing it as a simple prelude to the "real" work of installing the channel and film. This is a profound error in judgment. The preparation of the greenhouse frame is a foundational act that dictates the ease of installation, the security of the grip, and the ultimate lifespan of both the channel and the greenhouse film. Taking the time for meticulous preparation is an investment that pays dividends for years to come.
Ensuring a Clean and Smooth Surface
Before a single piece of channel is put in place, the mounting surfaces on the greenhouse frame—the hip boards, baseboards, door frames, and any other structural members—must be inspected and prepared. These surfaces need to be as flat and smooth as possible.
Why does this matter? Any protrusions, such as nail heads, splintered wood, or sharp metal burrs, create pressure points under the channel. When the channel is screwed down over these imperfections, it can be slightly deformed. More significantly, these points can press through the channel's base and into the greenhouse film when it is installed. Over time, wind-induced vibration and temperature fluctuations will cause the film to rub against these points, leading to premature wear and eventual tearing.
The preparation process involves a careful survey of all mounting surfaces. For wooden frames, this means ensuring all boards are straight and free of large splinters. Sanding down any rough spots is a worthwhile effort. For metal frames, it involves checking for weld spatter, sharp edges from cuts, or old screw fragments. Filing or grinding these areas smooth is essential. The surface should be clean, free of dirt, grease, or debris that could prevent the channel from sitting flush against the frame. A flat, clean surface ensures the channel has a solid foundation, allowing it to perform its function without compromise.
Strategic Placement: Mapping Your Channel Layout
Where you place the wiggle wire channel is just as important as how you install it. The goal is to create a continuous, unbroken perimeter of attachment around every section of greenhouse film. This requires a strategic plan before the first screw is driven.
Walk around your greenhouse frame and visualize where each sheet of film will begin and end. The channel must be installed along these lines. Common locations include:
- Baseboards: A continuous channel running along the base of the greenhouse walls on all sides. This is the primary anchor point for the wall and roof coverings.
- Hip Boards (or Ridge Poles): On a gable-roof greenhouse, the hip board (the board connecting the top of the side wall to the roof rafters) is a critical location for the channel. It secures the top edge of the wall covering and the bottom edge of the roof covering.
- End Walls and Bows: For hoop houses or high tunnels, the channel must be installed along the entire perimeter of the end wall frames and often along each bow where separate sheets of plastic are joined.
- Around Openings: Every door, window, and ventilation fan needs to be framed with a wiggle wire channel. This ensures the film is sealed tightly around these openings, preventing drafts and energy loss.
Mapping this out beforehand helps you calculate the total length of channel needed and ensures you create a complete, airtight seal. A gap in the channel system is a point of weakness that the wind will inevitably find and exploit.
Pre-Drilling: A Non-Negotiable Step for Structural Integrity
While it might be tempting to use self-tapping screws to drive the channel directly into the frame, pre-drilling the holes for your fasteners is a superior method that enhances the longevity and strength of the installation.
For wooden frames, pre-drilling prevents the wood from splitting, especially when fastening near the edge of a board. A split in the wood severely compromises the holding power of the screw. A screw in split wood can easily pull out under the load of a wind-whipped greenhouse film.
For metal frames, particularly those made of steel, pre-drilling is often a necessity. While self-tapping screws (often called Tek screws) are designed for metal, pre-drilling with a smaller pilot bit makes their installation much easier and more precise. It reduces the force needed to drive the screw, preventing the screw head from stripping or the drill from skittering across the metal surface and scratching the channel.
The most important reason for pre-drilling, however, is accuracy. It allows you to establish the perfect spacing for your screws—typically every 40-60 centimeters, and closer in high-wind areas—before you begin fastening the channel. This ensures a uniform, secure attachment along the entire length, preventing any section of the wiggle wire channel from bowing or lifting under load. It is a deliberate, measured approach that stands in stark contrast to the haste of simply driving screws, and it results in a far more robust and professional installation.
Step 4: The Art of Channel Installation
With the frame prepared and the layout mapped, the process of physically attaching the wiggle wire channel begins. This stage is where precision and technique converge. It is a task that rewards patience and a steady hand. The goal is not simply to affix the channel to the frame, but to do so in a way that creates a seamless, strong, and perfectly aligned base for the greenhouse film. A poorly installed channel, even one made of the best materials, will compromise the entire system. It is in the details of alignment, fastening, and cornering that the difference between an adequate installation and an excellent one is found.
Perfect Alignment and Spacing
The first rule of channel installation is that sections must meet end-to-end perfectly. When you reach the end of one piece of channel and begin the next, there should be no significant gap between them. A gap of more than a few millimeters creates a discontinuity in the gripping surface. This small, unprotected section of film becomes a stress point and a potential place for a tear to start. It also breaks the weather seal, allowing wind and rain to penetrate behind the film. The ends of the channel should be butted up tightly against one another to form a continuous, uninterrupted track.
Equally important is the spacing of the fasteners. As mentioned, a typical spacing is every 40 to 60 centimeters. However, this is a general guideline. In regions known for high winds, like the coast of South Africa or the open steppes of Russia, that spacing should be reduced to 30 centimeters or even less. The fasteners are what transfer the load from the channel to the greenhouse frame. Insufficient fasteners mean that each individual screw has to bear a greater share of the load, increasing the risk of the channel tearing away from the frame during a storm. Consistent, appropriate screw spacing is a form of insurance against wind damage.
Fastening Techniques for Wood and Metal Frames
The type of fastener used must be appropriate for the frame material. Using the wrong screw is a guarantee of future failure.
-
For Wooden Frames: The best choice is a high-quality galvanized or stainless steel wood screw. The length should be sufficient to penetrate deep into the structural member, not just the surface sheathing. A screw with a wide head or a separate washer is ideal, as it distributes the clamping force over a larger area of the channel's surface, preventing the screw head from pulling through the softer aluminum or deforming the channel.
-
For Metal Frames: Self-tapping screws, commonly known as Tek screws, are the industry standard. These screws have a drill-bit tip that can bore through metal, followed by threads that tap into the hole they have just created. It is vital to choose a Tek screw rated for the thickness of the metal you are drilling into. Using a light-gauge screw on a heavy-gauge steel frame will result in broken or stripped screws. As discussed, pre-drilling with a pilot bit can make installation much smoother and more accurate, even when using self-tapping screws.
Regardless of the frame type, the screws should be driven until they are snug, but not over-tightened. Over-tightening can strip the threads in the frame material, crush a metal tube, or dimple and deform the wiggle wire channel itself. A deformed channel will not hold the wiggle wire correctly, creating a weak spot in the grip.
Navigating Corners and Curves with Precision
Greenhouses are not always simple rectangular boxes. They have corners, and many designs, like hoop houses or high tunnels, are defined by their curves. The wiggle wire channel must follow these contours perfectly.
-
For 90-Degree Corners: The most professional method for navigating an outside corner (like the corner of a door frame) is to miter the two pieces of channel at a 45-degree angle. This allows them to meet perfectly, creating a continuous track without any gaps. For an inside corner, the two pieces can simply be butted up against each other. Attempting to bend a channel at a sharp 9-degree angle will cause it to kink and deform, ruining its profile.
-
For Curved Surfaces: Attaching a wiggle wire channel to the bow of a hoop house requires a different technique. The channel must be gently and progressively bent to match the curve of the hoop. This can be done by making a series of small, incremental bends by hand or by pressing it against the hoop itself. Another effective method, especially for aluminum channels, is to make a series of shallow cuts (kerfs) on the inside flanges of the channel with a hacksaw or angle grinder. These cuts remove small amounts of material, allowing the channel to bend easily without kinking. The channel is then screwed down securely, with fasteners placed closer together to ensure it holds the curve permanently. This meticulous work ensures the film is held securely even on the most challenging of shapes. Following these steps with care and precision reflects a deep understanding of our commitment to quality and structural integrity.
Step 5: Mastering the Greenhouse Film Attachment
This is the moment of transformation. The frame is prepared, the wiggle wire channel is installed, and now the structure is ready to receive its skin. Installing the greenhouse film is often seen as the most challenging part of the build, a process that can feel like wrestling a giant, uncooperative sail on a windy day. However, with an understanding of the material's properties and a systematic technique, it can be a smooth and rewarding process. Success hinges on three key elements: timing, technique, and tension. Getting these right ensures a drum-tight finish that is both aesthetically pleasing and structurally sound.
Timing and Temperature: The Best Conditions for Pulling Poly
Polyethylene film, like most plastics, is subject to thermal expansion and contraction. It expands when it is warm and shrinks when it is cool. This property is not a flaw; it is a physical reality that must be worked with, not against.
If you install the film on a very hot, sunny day, the plastic will be in its most expanded state. You will pull it tight and secure it with the wiggle wire. But as the temperature drops overnight, the film will shrink. This shrinkage can place enormous stress on the film and the wiggle wire channel, potentially leading to tears or pulling the channel away from the frame.
Conversely, if you install the film on a very cold day, it will be in its most contracted state. You will pull it tight, but when the sun comes out and the day warms up, the film will expand and become loose and saggy. A loose film is highly vulnerable to wind damage; it will flap and billow, causing abrasion against the frame and placing dynamic, jerking loads on the attachment points.
The ideal time to install greenhouse film is on a calm, overcast day with moderate temperatures, typically between 10°C and 21°C (50°F and 70°F). This represents a happy medium for the plastic's thermal state. Installing under these conditions allows you to achieve a tight fit that will remain properly tensioned through a wide range of temperatures, minimizing both the risk of overtightening from shrinkage and sagging from expansion.
The "Wiggle" Technique: A Step-by-Step Guide
The actual act of inserting the wire into the channel is a physical skill that is easy to learn. The name "wiggle wire" is descriptive of the motion required.
- Start at an Anchor Point: Begin at one corner or end of the channel. Tuck the end of the greenhouse film into the channel, leaving a few centimeters of excess material.
- Insert the Wire: Place the end of the wiggle wire into the channel over the film. Press the first bend of the wire firmly into the channel until it clicks into place.
- The Wiggling Motion: Hold the wire at a low angle to the channel. Instead of trying to push it straight in, use a side-to-side "wiggling" or rocking motion as you apply downward pressure. This motion allows the curved sections of the wire to find their way into the channel sequentially, efficiently capturing the film.
- Work in Sections: Continue this wiggling motion down the length of the channel. Your hands will quickly develop a feel for the right amount of pressure and the right rhythm. It is often helpful to have one person pull the film gently taut ahead of the person installing the wire.
- Securing the End: Once you reach the end of the channel or need to cut the wire, you can use bolt cutters or heavy-duty wire cutters. Be sure to file any sharp burrs from the cut end to prevent it from snagging or tearing the film later.
This technique ensures the wire is seated deeply and securely within the channel, providing the maximum possible grip on the film.
Achieving Drum-Tight Tension Without Tearing
The goal is a film surface that is taut like the head of a drum. A tight film sheds water and snow effectively and resists wind with minimal movement. However, there is a fine line between "taut" and "too tight." Over-stretching the film can thin it, weaken it, and make it prone to tearing, especially around the wiggle wire channel.
Achieving the right tension is a process of gradual, even pulling. It is almost always a two-person job.
- First, Secure One Side: Lay the film over the structure and secure one entire side completely using the wiggle wire channel. This is your anchor side.
- Pull from the Opposite Side: Move to the opposite side of the greenhouse. One person should pull the film gently and evenly, while the other prepares to install the wiggle wire. Do not pull from one single point; grasp a wide section of the film and pull with broad, steady pressure. The goal is to remove all wrinkles and slack from the sheet.
- Tack in the Middle: Once the film is taut, have the second person install a short section of wiggle wire in the middle of the channel on the opposite side. This "tacks" the film in place.
- Work Outwards: From that central tack point, continue to pull the film taut and install the wiggle wire, working out towards the corners. This method ensures that the tension is distributed evenly across the entire sheet of plastic.
By following this systematic approach—securing one side, pulling from the opposite, tacking in the middle, and working outwards—you can achieve a professional, drum-tight finish without placing excessive stress on any single point of the film.
Step 6: Securing Multiple Layers and Accessories
A modern greenhouse is often more than just a frame and a single layer of plastic. It is a sophisticated system for environmental control. This can involve multiple layers of film for insulation, as well as specialized coverings like shade cloth or insect netting. Furthermore, key components like roll-up sides for ventilation must be seamlessly integrated. The versatility of the wiggle wire channel system shines in these more complex applications, allowing for the secure and orderly attachment of multiple layers and the integration of essential hardware.
Installing Double-Layer Inflated Poly Systems
For growers in climates with cold winters, such as those across much of Russia and elevated parts of South America, reducing heating costs is a major economic driver. A double layer of polyethylene film with an inflated air space between is one of the most effective ways to improve a greenhouse's thermal efficiency. This trapped layer of air acts as a powerful insulator, dramatically cutting heat loss.
The installation of such a system is made straightforward with the use of a double wiggle wire channel.
- Placement: The double channel is installed along the entire perimeter where the two layers of film will be secured (typically at the baseboards and hip boards).
- Layering: The two separate sheets of greenhouse film are laid over the structure.
- Securing the First Layer: The first layer of film (usually the inner layer) is tucked into one of the two channels and secured with wiggle wire, following the standard installation procedure.
- Securing the Second Layer: The second layer of film (the outer layer) is then pulled taut and secured in the adjacent, parallel channel with its own, separate wiggle wire.
- Inflation: This creates two distinct, independently secured layers of film with a sealed air gap between them. A small, high-static-pressure inflation fan is then installed, which connects to the air gap via a flexible tube, pumping in outside air to keep the layers separated and the insulation barrier intact.
The double channel ensures that each layer is held securely and allows for one layer to be replaced without disturbing the other.
Incorporating Shade Cloth and Insect Netting
In regions with intense solar radiation, like the Middle East and much of Africa, shade cloth is not an option but a necessity to prevent crops from scorching. Similarly, in many agricultural zones, insect netting is the first line of defense against pests. A wiggle wire channel provides a simple and robust method for attaching these materials.
-
Single Channel Layering: It is possible to secure two, or sometimes even three, layers in a single wiggle wire channel. For instance, a layer of greenhouse film and a layer of shade cloth can be placed together into the channel and secured with a single wiggle wire. This is a cost-effective solution, but it can make the wiggle wire more difficult to install due to the increased thickness of the material. It also means that to remove the shade cloth at the end of the season, you must also release the main greenhouse film.
-
Double Channel Separation: A more elegant and flexible solution is to again use a double channel. The primary greenhouse film is secured in one track, and the shade cloth or insect net is secured in the other. This allows for the seasonal removal of the shade cloth without ever compromising the weather-tight seal of the main film. It provides maximum flexibility for managing the greenhouse environment throughout the year.
Working with Roll-Up Sides for Ventilation
Natural ventilation is a key strategy for temperature and humidity control in many greenhouse designs, especially in high tunnels. Roll-up sides are a popular and effective way to achieve this. These systems involve a roll bar (a metal pipe) at the bottom of the greenhouse wall covering. When this pipe is turned with a crank or film reeler, the film rolls up the pipe, opening the side of the greenhouse for air exchange.
The wiggle wire channel is integral to this design. The top edge of the roll-up side panel is secured in a wiggle wire channel located on the hip board. The sides of the roll-up panel are also often secured in vertically mounted channels on the end bows. This fixes the top and sides of the film securely, while leaving the bottom edge free to be attached to the roll bar. The channel provides a durable and fixed anchor point from which the rest of the ventilation system operates. This integration of the poly lock system with mechanical hardware like a ventilation system demonstrates its central role in the overall functionality of the structure.
Step 7: Long-Term Maintenance and Inspection
The construction of the greenhouse is not the end of the story; it is the beginning of its operational life. Like any well-engineered system, a greenhouse requires periodic inspection and maintenance to ensure its continued integrity and performance. The wiggle wire channel system, despite its durability, is not exempt from this. Environmental stressors, UV degradation, and the simple passage of time can take their toll. A proactive approach to maintenance, centered on routine checks and timely repairs, is the key to maximizing the lifespan of your investment and preventing a minor issue from escalating into a major, costly failure.
Routine Checks: What to Look For
At least twice a year—ideally before the stormiest season and again before the season of highest heat and UV exposure—a thorough walk-around inspection should be conducted. This is not a casual glance but a detailed examination of the entire film attachment system.
- Wiggle Wire Inspection: Look closely at the wiggle wires. Are they all fully seated in the channel? Sometimes, after periods of high wind or significant temperature swings, a wire can work its way partially out of the track. Press on them with your thumb; they should feel firm and unmoving. Check the PVC coating for signs of cracking, peeling, or discoloration, which can indicate UV degradation. A compromised coating can lead to film abrasion.
- Channel Inspection: Examine the channel itself. Look for any signs of deformation, dimpling from over-tightened screws, or corrosion (especially on steel channels in coastal or humid areas). Ensure the butted joints between channel sections are still tight and have not separated. Check that all fastening screws are still snug and have not backed out.
- Film-to-Channel Interface: This is the most critical area. Look for any small tears, punctures, or signs of abrasion on the greenhouse film right where it enters the channel. This is the highest stress area. Catching a small rip here and patching it with greenhouse repair tape can prevent it from growing and compromising the entire sheet.
Retensioning and Repairs: Addressing Issues Before They Escalate
Over time, even a perfectly installed film can lose some of its tension. If you notice sagging or flapping, it may be time to retension the film. This process is much easier than the initial installation.
To retension, you only need to remove the wiggle wire from one side of the sagging section (for a roof, this would be one of the hip boards or baseboards). Do not remove the entire wire. Pull the film taut again to remove the slack, and then reinstall the wiggle wire using the same "wiggling" technique. This can often be done by a single person and can add years to the life of the film by preventing wind-induced wear.
If you find a damaged section of wiggle wire (e.g., one that is bent or has a badly degraded coating), it should be replaced. Simply pull out the old section of wire, cut a new piece to length, and install it. Similarly, if a section of the channel is damaged beyond repair, it can be un-screwed and replaced. Making these small, targeted repairs promptly is far less costly and labor-intensive than replacing an entire sheet of film that has been shredded because of a single point of failure.
Preparing for Seasonal Extremes
The maintenance schedule should be guided by the local climate. For growers in regions with hurricane or typhoon seasons, a pre-storm inspection is not just recommended; it is essential. This involves double-checking every inch of the wiggle wire channel system, tightening any loose screws, and patching any small tears in the film. Ensuring the film is as tight as possible before a major wind event is the best defense.
For those in regions with heavy snowfall, like parts of Russia, the concern is load-bearing. While the wiggle wire channel provides a strong grip, an immense weight of wet, heavy snow can stretch the film. Before winter, ensure the film is tight so that it will shed snow effectively. Inspect the greenhouse frame itself to ensure it can support the anticipated snow load, as the failure is often in the structure, not the film attachment.
This cycle of inspection, maintenance, and seasonal preparation transforms the greenhouse from a static structure into a managed system. It ensures that the silent guardian—the wiggle wire channel—remains strong, secure, and ready to face whatever the elements may bring.
FAQ
What is the difference between a wiggle wire channel and a poly lock? The terms are often used interchangeably to describe the same system. "Wiggle wire channel" specifically refers to the metal track, while "poly lock" is a more general term for the entire system, including both the channel and the wiggle wire that "locks" the polyethylene film in place.
Can I reuse wiggle wire? Yes, high-quality, PVC-coated wiggle wire can typically be removed and reinstalled multiple times. However, you should inspect it before reusing. If the wire has become bent or deformed, or if the PVC coating is cracked or peeling, it is best to replace it to avoid damaging your new greenhouse film.
How far apart should I space the screws when installing the channel? A general rule of thumb is to place a screw every 40-60 centimeters (about 16-24 inches). In areas subject to high winds, it is highly recommended to decrease this spacing to 30 centimeters (12 inches) or even closer for maximum holding power.
Can I install a wiggle wire channel on a curved surface like a hoop house? Absolutely. This is one of the system's strengths. The channel can be made to follow the curve of a hoop or bow. This is often done by screwing one end down and then gently bending the channel against the frame as you fasten it. For tighter curves, making shallow relief cuts (kerfs) on the inside flanges of the channel can help it bend without kinking.
How many layers of plastic can one channel hold? A standard single channel can securely hold one or two layers of greenhouse film. For thicker materials or more than two layers (e.g., film plus a shade cloth), the grip may be less secure. For applications requiring two distinct layers, such as an inflated double-poly roof, using a dedicated double channel is the recommended professional practice.
Why is my greenhouse plastic ripping near the channel? Tearing near the channel is almost always due to one of a few issues: the film was pulled too tight during installation; the film was installed on a very hot day and over-tightened when it cooled; there is a sharp edge on the frame or channel itself causing abrasion; or the wiggle wire used was uncoated or had a damaged coating that cut the film.
Is aluminum or steel channel better for coastal areas? For coastal areas with high humidity and salt spray, aluminum is unequivocally the better choice. Aluminum is naturally resistant to rust and corrosion, whereas a galvanized steel channel, once its zinc coating is scratched or compromised, will begin to rust. This rust can weaken the channel and stain the greenhouse film.
Conclusion
The examination of the wiggle wire channel system reveals a truth applicable to many fields of human endeavor: profound outcomes are often the result of simple, well-executed principles. The security of a multi-thousand-dollar greenhouse investment can rest upon the integrity of this unassuming metal track and spring wire. It is not merely a component but the nexus of the structure, the point where the rigid frame and the flexible covering become a unified, resilient whole. Its effectiveness is not inherent in the product alone but is actualized through a conscious and knowledgeable process. This process begins with a rational assessment of materials in the context of a specific climate, continues through the meticulous preparation and precise installation of the channel, and extends into a life cycle of diligent maintenance. By understanding the physics of its grip and respecting the nuances of its application, a grower transforms the wiggle wire channel from a piece of hardware into a steadfast assurance against the elements, securing not just a plastic film, but the potential for growth and productivity that lies within.
References
Tunnel Vision Hoops. (2022, May 18). Testing and comparing plastic attachment channels. tunnelvisionhoops.com
Wiggle Wires. (2024). Greenhouse construction materials and equipment supplier. wigglewires.com
YouTube. (2017, December 1). Poly track better then wiggle wire for greenhouse build. youtube.com