
2025年のための6ステップ・エキスパートガイド:ウィグル・ワイヤー・チャンネルをグローワーズ・ソリューションに取り付ける方法
12月 8, 2025
要旨
ウィグル・ワイヤー・ロック・チャンネル・システムは、現代の温室建設における極めて重要な技術要素であり、ポリエチレンフィルムや代替被覆材を温室の骨組みに固定するための、安全かつ極めて効率的な手段を提供する。このシステムは、アルミニウムまたは亜鉛メッキスチール製の堅牢なベースチャンネルと、バネのようなスチールワイヤーから構成されています。#39;システムの有効性は、これらの部品間の機械的相互作用から発せられ、パンクを与えることなく、被覆材に連続的な高摩擦グリップを発生させる。このメカニズムにより、耐候性の高い密閉性が確保され、強風、集中豪雨、気温の大幅な変化といった悪条件から作物を守ることができる。素材の選択、特にPVC被覆鋼線と裸の亜鉛メッキ鋼線の選択は、温室用フィルムの寿命に大きく影響します。特に薄いフィルムの場合、コーティングされたワイヤーの方が摩耗に対する保護が優れています。綿密なフレーム準備、正確なチャンネルアライメント、正しいワイヤー挿入技術など、設置プロセスにおける適切な方法論は、世界中の多様な気候においてシステムの性能と耐久性を最大限に引き出すために最も重要である。
要点
- Wiggle Wire ChannelsをGrowers Solutionに適切に取り付けることで、耐候性に優れた確実なシールが実現します。
- 磨耗を防ぎ、使用寿命を延ばすために、より薄いフィルムにはPVC被覆ワイヤーを選択する。
- 優れた強度を実現するため、太く編まれたプラスチックには亜鉛メッキ鋼線を選択する。
- 温室用フィルムは、最適な張りを持続させるために、暖かく穏やかな日に施工する。
- 強風に耐えられるよう、チャンネルがフレームにしっかりと固定されていることを確認してください。
- 作物の保護を保証するために、システムに摩耗の兆候がないか定期的に点検する。
- 高品質の換気システムと組み合わせることで、総合的な環境制御が可能になります。
目次
- ウィグルワイヤーロックチャンネルシステムを理解する:基礎的な概要
- ステップ1:綿密な計画と素材の選択
- ステップ2:温室フレームの設置準備
- ステップ3:ロック・チャンネルの取り付け方
- ステップ4:温室用ポリエチレンフィルムの被覆と位置決め
- ステップ5:ウィグル・ワイヤーの挿入テクニックをマスターする
- ステップ6:最終検査、調整、長期メンテナンス
- 他の温室コンポーネントとのシステムの統合
- よくある質問(FAQ)
- 結論
- 参考文献
ウィグルワイヤーロックチャンネルシステムを理解する:基礎的な概要
温室の構造的完全性は、その骨組みの単純な機能ではなく、その保護スキンの取り付け方法によって大きく左右される。この被覆は、多くの場合、温室用ポリエチレンフィルムであり、意図的に栽培された内部環境と、しばしば気まぐれな外の気候を隔てる主要な障壁となる。ウィグル・ワイヤー・ロック・チャンネル・システムは、単なる部品としてではなく、この重要な任務を達成するためのエレガントで極めて効果的な哲学として、この文脈で登場する。その有用性を真に理解するには、まずシステムを構成要素に分解し、その機能を支配する物理的原理を理解しなければならない。このシステムは、特に南アフリカの高地帯の突風からロシアの冬の豪雪まで、厳しい天候と戦わなければならない地域において、信頼性、使いやすさ、そして深い強度が強く求められることから生まれたものである。
フレームに張られた広大なビニールシートに働く力について考えてみよう。風はフィルムを押し付ける正圧だけでなく、フィルムを引き離そうとする強力な負圧(吸引力)を発生させる。雨や雪は大きな重さとなり、素材に負担をかける下向きの力を生み出す。太陽の熱はフィルムを膨張させ、夜や冬の寒さはフィルムを収縮させる。ファスナー・システムは、一度だけでなく、毎日毎日、これらすべての動的な力と格闘しなければならない。単純なステープルや木製バテンを使用する古い方法では、局所的なストレスポイントが生じ、決定的なことにフィルムに穴を開けてしまう。これらの穴は固有の弱点となり、しばしば暴風雨の最初の故障点となる。これとは対照的に、ウィグル・ワイヤー・ロック・チャンネルは、チャネルの全長にわたって荷重を均等に分散します。デリケートなフィルムに優しく、かつ非常に粘り強い連続的なグリップを作り出します。
システムの解剖学チャンネル対ワイヤー
その核となるのは、ロック・チャンネルとウィグル・ワイヤーという、2つの異なる、しかし切り離すことのできないコンポーネントの二重奏である。
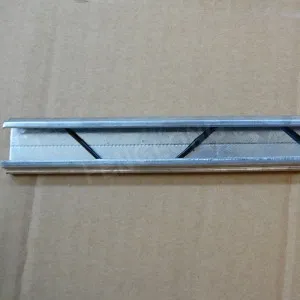
チャネルは、しばしばUチャネルまたはベースチャネルと呼ばれ、システムの静止した基礎要素です。押し出し成型された金属の長さで、アルミニウムや亜鉛メッキ鋼が一般的です。このプロファイルは単純な「U」ではなく、対応するウィグル・ワイヤーを受け止め、確実に保持するように設計された内部カーブやリップがあり、注意深く設計されています。専門のサプライヤーが指摘するように、高品質のチャンネルには、セルフドリリングねじをガイドする中央の溝などの機能が組み込まれていることが多い。 wigglewires.com.チャンネルは、温室のフレーム(腰板、幅木、プラスチックフィルムの終端が必要な端壁フレーム)に直接ネジで固定します。これは、フィルムとワイヤーをセットする永久的なトラックを形成します。
ウィグル・ワイヤーはスプリング・ワイヤーやジグザグ・ワイヤーとしても知られ、アクティブでダイナミックな部品である。連続的なジグザグ・パターンに曲げられた高張力スプリング・スチールです。このワイヤーが、このシステムの名前の由来であり、ユニークで効果的な機能性でもある。温室用フィルムがチャンネルの上に敷かれると、ウィグル・ワイヤーがフィルムの上からチャンネルに押し込まれる。ワイヤーが本来持っているバネのような性質によって外側に膨らみ、フィルムをチャンネルの内壁に押し付ける。この "くねくね "が交互に複数の接触点を生み出し、巨大な摩擦を発生させてフィルムをしっかりと固定する。ポリエチレン・フィルムと遮光布のような複数の素材を、まったく同じチャンネルに固定することができるのだ。
材料科学:アルミニウムとスチールが支配的な理由
ウィグル・ワイヤー・ロック・チャンネル・システムに使用する材料の選択は、恣意的なものではなく、農業環境の厳しい現実に根ざした熟慮された決定です。耐久性、耐腐食性、生強度が、これらの部品に求められる第一の美点です。
チャンネルは、アルミニウムか亜鉛メッキ鋼のどちらかから作られるのが一般的だ。アルミニウムは軽量で、錆や腐食に非常に強く、切断や穴あけが容易である。特に、塩水噴霧が常に腐食の脅威となる東南アジアの湿度の高い気候や南米の沿岸地域では、その固有の長寿命が高級な選択肢となります。亜鉛めっき鋼板は、鋼鉄に亜鉛の保護層をコーティングしたもので、より経済的でありながら、優れた強度と高度な耐食性を備えています。亜鉛メッキ処理は犠牲バリアとして機能し、下地の鋼鉄を錆から保護しますが、コーティングに深い傷がついたり、不適切に取り扱われたりすると、この保護が損なわれる可能性があります。大半の用途では、どちらの素材も優れた性能を発揮しますが、最終的な選択は、予算と特定の環境問題のバランスで決まることがよくあります。
ウィグル・ワイヤー自体は高張力スプリング・スチールから作られています。この特殊な合金により、設置中にたわみ、その後スプリングバックして、チャンネル内に一定の揺るぎない圧力をかけることができるのです。ウィグル・ワイヤーの最も重要な違いは、そのコーティングにあります。
| ワイヤータイプ | 主要素材 | コーティング | ベスト・ユースケース | 主な利点 | 主な検討事項 |
|---|---|---|---|---|---|
| PVC被覆ウィグル・ワイヤー | 高張力鋼板 | ポリ塩化ビニル(PVC) | より薄いフィルム(例:6ミル)、単層アプリケーション、高価値作物 | 摩擦と磨耗を減らし、フィルムの寿命と透明度を長持ちさせる。 | コーティングは、強い紫外線に長年さらされると劣化する可能性がある。 |
| 亜鉛メッキ・ウィグル・ワイヤー | 高張力鋼板 | 亜鉛(亜鉛メッキ) | 厚いプラスチック織物(例:9-12 mil)、高ストレス領域、低予算用途 | 強度と耐久性に優れ、イニシャルコストが低い。 | プラスチックに対しては粗くなり、薄膜の早期摩耗を引き起こす可能性がある。 |
に詳しい。 実践的バイヤーガイドこの選択は、大きなトレードオフを意味する。PVCコーティングされたくねくねワイヤーは、温室用フィルムに対してより滑らかで優しい。プラスチック・コーティングはソフトな緩衝材の役割を果たし、日々の温度サイクルによるフィルムの膨張・収縮に伴う摩擦や摩耗を軽減します。このようなサイクルを何千回と繰り返すうちに、コーティングされていない粗いワイヤーによる摩擦が徐々にフィルムを摩耗させ、微細な傷ができて弱点になることがあります。滑らかなPVC表面はこの磨耗を軽減し、標準的な6ミルの温室用ポリエチレンフィルムの寿命を大幅に延ばす(Giacomelli & Roberts, 1993)。したがって、ほとんどの標準的な単層温室用途、特に中東の多くの地域で見られるような日中の温度変化が大きい気候では、コーティング・ワイヤーは優れた長期投資となる。
しかし、コーティングされていない亜鉛メッキ・ワイヤーの方が望ましい状況もある。非常に耐久性が高く、厚い(9ミル以上)ポリエチレン織布フィルムを使用する場合、素材自体の耐摩耗性がはるかに高くなります。このような場合、把持強度のわずかな向上と亜鉛メッキ・ワイヤーの低コストにより、より理にかなった選択となります。また、金属とタフ・プラスチックが直接接触することで、わずかに攻撃的なグリップが得られるため、最大限の強度が絶対的な優先事項である用途でも好まれます。思慮深い栽培者は、ワイヤーのコストと、それを固定するためのフィルムのコストと寿命を比較検討しなければならない。多くの場合、より高価で手間のかかるフィルムを保護する方が、経済的にも農業的にも賢明な判断となる。
確実なグリップの物理学:その仕組み
ウィグル・ワイヤー・ロック・チャネルの真の天才は、基礎物理学をエレガントかつ効果的に応用した点にある。このシステムは、紫外線にさらされると故障する可能性のある化学接着剤や、固有の弱点を生み出すパンクチャーには頼らない。その代わりに、摩擦と分散圧力に完全に依存している。
ウィグル・ワイヤーがフィルム上の溝に押し込まれると、様々な力が作用する。まず、スプリング・スチール製のワイヤーは、自然に元の広い形状に膨張しようとします。この膨張は、チャンネルの壁に対して一定の外向きの力を及ぼす。第二に、ワイヤーのジグザグ模様が、交互に連続する圧力ポイントを作り出す。それぞれの "くねくね "の頂点がフィルムをチャンネルの片側にしっかりと押し付け、次の "くねくね "の谷がフィルムを反対側にしっかりと押し付ける。
この交互の圧力が蛇行した蛇行経路を作り出し、フィルムを効果的に閉じ込める。フィルムを引き抜くには、水路の1メートルごとに数十カ所で発生する膨大な累積摩擦に打ち勝たなければならない。これはホッチキスや釘とは根本的に異なる点で、突風の全力が単一の小さな侵入点に集中する。ウィグル・ワイヤー・システムでは、同じ風力が設置場所の全長にわたって分散されるため、一点に過度のストレスがかかることはありません。この力の分散が、破れを防ぎ、洗練されていない方法で取り付けられたフィルムが千切れてしまうような突風にも耐えうることを保証しているのです。その結果、非常に強いだけでなく、完全にリバーシブルで、必要なときにフィルムを簡単に取り外して張り直すことができる固定システムが完成したのです。
ステップ1:綿密な計画と素材の選択
ウィグルワイヤーロックチャンネルシステムの成功は、ドリルやハンマーではなく、静かな熟考と入念な計画から始まります。温室プロジェクトの具体的なニーズと適切な資材を熟考してマッチングさせるこの初期段階こそが、長持ちする構造物の真の基礎となるのです。ここでの選択を誤ると、温室のカバーが早期に破損し、作物が失われる可能性があり、高価な交換の必要性に苛まれることになるからです。このプロセスでは、構造物、その意図する目的、そしてそれが耐えなければならない気候の現実を総合的に評価することが求められます。
温室の構造と気候の評価
プランニングの最初の行為は、温室のフレームそのものを綿密に、そして批判的に検討することである。木製か、スチール製か、アルミ製か。フレームの性質は、ロックチャンネルの取り付けに使用するファスナーの選択に直接影響します。外周の幅木、屋根ラインに沿った腰板、ドア、通気口、端壁周辺のフレームなど、フィルムを固定しなければならない場所を正確に特定する必要があります。温室用ポリエチレン・フィルムの終端部はすべて、ウィグル・ワイヤー・ロック・チャンネルの候補となります。
同時に、ほぼ気象学的な観点から、その土地の気候も考慮しなければならない。中東や南米の強烈な日差しが照りつける地域の生産者にとっては、フィルムやPVCコーティングなどのプラスチック部品の劣化を早める可能性のある極端な紫外線と高温が最大の懸念事項かもしれない。この場合、高品質の紫外線安定フィルムと、放熱性と耐食性に優れたアルミニウム製チャンネルを選択するのが賢明でしょう。ロシアなど積雪の多い地域の栽培農家にとって、最大の関心事は重量である。重く湿った雪が積もった状態でも、垂れ下がったり破れたりすることなく、しっかりとフィルムを保持できるような頑丈なシステムでなければならない。そのため、より丈夫で厚いフィルムを選び、荷重を効果的に分散させるために、ロック・チャンネルを非常に近い間隔(おそらく12インチ(30cm)ごと)で固定することになるかもしれない。南アフリカ沿岸部やアルゼンチンの広大な平原など風の強い地域では、風による隆起が最大の敵となる。ここでは、ウィグル・ワイヤー・ロック・チャンネル・システム全体の完全性が試され、チャンネルをフレームに確実に取り付けることが最も重要です。
正しいウィグル・ワイヤーの選択コーティングと非コーティング
構造的、気候的な背景を明確に理解した上で、次に検討するのはウィグル・ワイヤーそのものの選択である。前述したように、主にPVC被覆ワイヤーと裸の亜鉛メッキ鋼線のどちらかを選択することになります。これはどちらが普遍的に優れているかという問題ではなく、特定の用途にどちらが適しているかという問題である。これは、関係する素材についての微妙な理解を必要とする決定である。
コア・トレードオフについてもう一度考えてみよう。PVCコーティングは、温室用フィルムを摩耗から守る犠牲的で平滑な層を提供する。日々の温度サイクルによってフィルムが膨張・収縮する際、フィルムはワイヤーと擦れます。このようなサイクルを何千回と繰り返すうちに、粗くコーティングされていないワイヤーによる摩擦でフィルムが徐々に摩耗し、弱い部分ができてしまいます。滑らかなPVC表面はこの摩耗を軽減し、標準的な6ミルのポリフィルムの寿命を大幅に延ばします(Sanford, 2011)。したがって、ほとんどの標準的な単層温室用途、特に温度変化の大きい気候では、コーティング・ワイヤーは、システム全体の健全性を保つための長期的な投資として優れている。
しかし、非コーティングの亜鉛メッキワイヤーがより合理的な選択となる状況もある。非常に耐久性が高く、厚い(9ミル以上)ポリエチレン織布フィルムを使用する場合、素材自体の耐摩耗性がはるかに高くなります。このような場合、把持強度のわずかな向上と亜鉛メッキワイヤーの低コストにより、より論理的な選択肢となります。また、金属と金属が直接接触する(または金属とタフプラスチックが直接接触する)ことで、わずかに攻撃的なグリップが得られるため、最大限の強度が絶対的な優先事項である用途でも好まれます。思慮深い生産者は、ワイヤーのコストと、それが固定するためのフィルムのコストと寿命を天秤にかけなければならない。ほとんどの場合、より高価で手間のかかるフィルムを保護する方が、経済的に賢明な判断となる。
適切なロック・チャンネル・プロファイルの選択
ほとんどのロック・チャンネルは、一見すると似ているように見えるが、そのデザインや材質の微妙な違いが、性能や寿命に大きな影響を与えることがある。主な素材は、アルミと亜鉛メッキ鋼の2種類です。どちらを選ぶかは、計画段階でのもうひとつの重要な決定ポイントです。
| 特徴 | アルミニウム・ロック・チャンネル | 亜鉛めっきスチール・ロック・チャンネル |
|---|---|---|
| 耐食性 | 自然に保護酸化被膜を形成する。湿度の高い地域や沿岸部に最適。 | 良い。深い傷によって損なわれる可能性のある亜鉛コーティングに依存している。 |
| 重量 | 軽量で、特に長距離走行や頭上への設置が容易。 | 重い。頑丈さは感じられるが、取り付けが面倒になる可能性がある。 |
| コスト | 一般的にイニシャルコストは高い。 | より経済的で、大規模なプロジェクトや予算重視のプロジェクトによく選ばれる。 |
| 熱伝導率 | 高い。熱を素早く放散するので、暑い気候ではちょっとした利点になる。 | アルミニウムよりも保温性が高いが、ほとんどの場合、その差はわずかである。 |
| インストール | 金属は柔らかく、穴あけや切断が容易で、より寛容である。 | より硬い金属を使用するため、ドリルで穴を開けたり切断したりするためには、より多くの労力と優れた工具が必要となる。 |
素材だけでなく、チャンネル自体の形状も異なります。チャンネルによっては、フィルムやシェードクロスを何層にも重ねやすいように、幅を少し広く設計しているものもあります。また、断熱性を高めるためにポリの空気層を二重にする必要がある場合に最適な、二重ハンプのデザインで、2つの独立したチャンネルを横に並べたものもあります。チャンネルを選ぶ際は、以下のような信頼できる業者から調達するのが賢明です。 総合的な製品ラインアップ 標準的なウィグル・ワイヤーとシームレスに動作するように設計され、高品質で適切に処理された材料から作られていることを確認するために、専門小売店から入手できます。プロファイルは、フィルムとの鋭利な接触点を作らないよう、内部エッジが滑らかであるべきです。
材料量の計算:実践ガイド
プランニングの最終段階は、シンプルだが重要な測定と計算の練習である。プロジェクトに必要なチャンネルとワイヤーの総延長距離を計算しなければならない。そのためには、フィルムの終端となるすべての面を測定する必要がある。メジャーを使って、両方の幅木、両方の腰板(またはトンネルのフープの全長)、端の壁の全周の長さを注意深く測ります。ドアや換気口の周りの枠を考慮することを忘れない。これらの数値を合計して、全長を求めます。
総面積が決まったら、5-10%のコンティンジェンシーを注文に追加するのがベスト・プラクティスです。この余分な材料は、計算ミスや切断の失敗、輸送中や設置中に破損する可能性のある部分に対応するものです。少量の追加注文が届くのを待つためにプロジェクト全体を途中で中断するよりも、少量の材料が余っている方が、混乱もコストもはるかに少なくて済みます。
ウィグルワイヤーは通常、特定の長さ(例えば、6フィートまたは2メートルのセクション)で販売されています。ロック・チャンネルも標準的な長さで販売されています(6.5フィート、10フィート、2メートルのセクションなど)。どちらも同じ長さが必要です。留め具については、チャンネルの長さ方向に18~24インチ(45~60cm)ごとにビスを打つのが確実な目安です。風の強い場所では、この間隔を30cmに縮めると、より確実で強固な取り付けが可能になります。チャンネルの全長をインチ単位で計算し、選択した間隔で割って、必要なネジの数を決めます。このように慎重に計算することで、設置の日が来たときに、作業を中断することなく、効率的に作業を完了するために必要なものがすべて揃っていることを保証します。
ステップ2:温室フレームの設置準備
資材の選定と数量の確認が終わると、焦点は計画という抽象的な領域から、準備という具体的で満足のいく作業へと移る。最終的な施工の質(農作物と雹の間に立ちはだかるもの)は、この段階で投入された注意と細部へのこだわりに正比例する。きれいで、滑らかで、適切にマーキングされたフレームは、耐久性があり、耐候性のあるシールが構築されるための不可欠な基盤です。この準備作業により、ウィグルワイヤーロックチャンネルが平らに、正確に、確実に設置され、妥協することなくその重要な機能を果たすことができるのです。
表面クリーニングと検査
最初の仕事は、チャンネルを取り付ける温室フレームの表面を完璧にきれいにし、ゴミがないことを確認することです。これは、腰板、幅木、端壁フレームにも当てはまります。時間の経過とともに、これらの表面には汚れ、おがくず、古いペンキのしずく、釘の頭の出っ張り、さらにはカビなどが蓄積する可能性があります。このような出っ張りは、どんなに小さくても、ロック・チャンネルがフレームに対して完全に平らになるのを妨げます。平らでないチャンネルは隙間ができ、不均一な応力を受ける可能性があります。
硬めのブラシか布で、すべての取り付け面を力強く拭き取る。木製のフレームの場合は、腐りや割れ、虫食いなどの兆候がないか点検する絶好の機会でもある。柔らかく腐った木に打ったスクリューは、ほとんど固定力がなく、故障の原因になります。木材が損傷している部分は、修理するか、交換してから作業を進めるべきである。金属フレームの場合は、取り付け部分の構造的完全性を損なうような大きな錆や腐食がないかチェックする。粗い箇所や溶接ビードを軽くサンディングすることで、チャンネルのより滑らかで均一な表面を作ることができる。この簡単な清掃と点検は、システムの長期的な信頼性と耐候性において、わずかな時間の投資で莫大な利益をもたらします。
高精度のマーキングとアライメント
正確さがこのステップの原則です。ウィグル・ワイヤー・ロック・チャンネルを正しく機能させるためには、まっすぐ連続したラインに設置する必要があります。チャンネルが波打っていたり、ずれていたりすると、見た目がプロらしくないだけでなく、より重大なこととして、温室用フィルムに不均一な張力が生じます。その結果、シワができ、水が溜まったり、強風で破れやすくなったりします。
この作業に最も効果的な道具はチョークラインだ。幅木や腰板のような長くまっすぐな部分には、チョークラインが完璧で明確なガイドとなる。チョークラインの一端を走り始めに鋲で留め、もう一端までピンと伸ばしてフレームにパチンと止めるだけだ。こうすることで、くっきりとした完璧な直線が残る。アーチや複雑なカーブが多い端の壁の場合、この作業にはより注意が必要です。柔軟性のあるメジャーを使い、カーブに沿ってチャンネルを配置するガイドとなる印を何度もつける必要があるかもしれません。目標は、ギザギザの直線ではなく、滑らかで公正な曲線を作ることです。
マーキングの際は、温室用ポリエチレンフィルムの最終経路をイメージしてください。ポリエチレンフィルムがフレーム部材のエッジを越えて溝内にスムーズに巻き込まれるように、溝を配置する必要があります。例えば、腰板の場合、チャンネルは一般的に上部または外側の面に取り付け、屋根のプラスチックが上に垂れて固定できるようにします。野地板の場合は、外側の面に取り付けます。フィルムがどのようにチャンネルに入るか、その形状をよく考えておくことで、後で悔しい失敗をしたり、穴を開け直したりする必要がなくなります。
プレドリル:正確さと容易さのためのステップ
最近のセルフ・タッピング・スクリューの多くは、木材や軽量鉄骨に直接打てるように設計されているが、ロック・チャンネル・ファスナー用の穴をあらかじめ開けておくことは、いくつかの説得力のある理由から強く推奨されている。プロの職人技の証です。
第一に、事前穴あけは最大限の精度を保証する。ドリル・ビットの先端を印のついたチョーク・ライン上に正確に置くことは、同じライン上でねじを打ち始めるよりもはるかに簡単です。ネジは、特に硬い表面では、材料に食い込み始めると「歩く」、またはほんのわずかなインチをさまよう傾向があります。下穴をあけることで、ネジが意図した場所に正確に入り、溝がガイドと完全に一致することが保証されます。
第二に、下穴を開けることで木材が割れるのを防ぐことができる。これは、木製のフレームを扱い、板の端に近いところにネジを取り付ける場合に特に重要です。下穴を開けずに大口径のビスを打つと、木の繊維が無理に引き離され、割れが生じて接続が極端に弱くなることがある。下穴をあけることで、外側に過度な圧力をかけることなく、ネジ山をかみ合わせることができます。下穴は、ネジの軸(ネジ山ではない)の直径よりもわずかに小さくし、しっかりと固定できるようにします。
第三に、金属フレームの場合、下穴あけは推奨されるだけでなく、絶対に必要な場合が多い。セルフ・タッピング・スクリューは細い鋼材には対応できるが、太い鋼管やアングル・アイアンに打ち込むと、苦戦したり、焼き切れたり、折れたりする。金属用に特別に設計されたビットで下穴を開けると、ネジを打つプロセスが大幅に速く、より少ない負担になり、それはネジとドリルの両方の摩耗や損傷を軽減します。この小さな一手間を加えることで、チャネルの取り付けは、イライラする可能性のある作業から、スムーズで正確かつ効率的な作業に変わります。
ステップ3:ロック・チャンネルの取り付け方
ロック・チャンネルの取り付けは、システムが温室構造に物理的な形を与え始める瞬間である。強度と精度の両方が要求される作業です。チャネルの各セクションはしっかりと固定され、次のセクションと完璧に位置合わせされ、フレームの輪郭をスムーズに移動しなければなりません。これが固定システムの骨格であり、その強度がシステム全体の自然の力に対する抵抗力を決定するのです。
ファスナーの選択耐久性のためのねじ
ファスナーの選択は重要な決断です。釘やステープルは手っ取り早い選択肢のように思われるかもしれませんが、この用途に必要な保持力と寿命には欠けます。ウィグル・ワイヤー・ロック・チャンネルの設置に最適なのは、言わずと知れたネジです。ネジは、強風の吸引力に耐えるために不可欠な、優れた引き抜き抵抗を提供します。
理想的なねじは、六角頭の高品質で耐食性のあるセルフタッピンねじである。ヘックスヘッドは、プラスまたはスクエアドライブヘッドよりもはるかに肯定的な係合を提供し、ドリルでナットドライバービットを使用することができます。これにより、ビットが「カムアウト」したり、ネジの頭を剥がしたりする可能性が低くなり、特に硬い材料に打ち込むときに便利です。ネジの長さは、溝を通過し、フレーム部材に深く食い込むのに十分な長さにする。一般的なルールは、スクリューが木材または金属フレームに少なくとも1~1.5インチ(2.5~3.8cm)埋め込むことです。材質としては、ステンレス・スチール・スクリューが究極の耐食性を備えていますが、高品質のセラミック・コーティング・スクリューや溶融亜鉛メッキ・スクリューも、長年にわたって信頼できるサービスを提供する、より経済的で優れた選択肢です。
チャンネルのステップ・バイ・ステップの設置プロセス
フレームを準備し、ファスナーを選択すれば、取り付けは計画的に進めることができる。
- 最初のピースを置く: ロック・チャンネルの最初のセクションを取り、チョーク・ライン・ガイドに合わせて注意深くフレームに置きます。あらかじめ下穴を開けておけば、位置合わせはほぼ自動的にできるはずです。
- 最初のネジを取り付けます: チャンネルの一端をネジ一本で固定する。最終的な位置合わせのためにチャンネルを少し回せる程度に緩めておく。
- もう一方の端を合わせ、固定する: チャンネル・セクションの一番端まで移動する。チョークラインに正確に合わせ、2本目のネジを取り付ける。これでチャンネルは正しい位置に固定された。
- 中間ネジを埋める: チャンネルの両端を固定した状態で、残りのビスを決められた間隔(例:18インチごと)で取り付けていきます。各ネジを打ち込む際、締めすぎに注意し、しっかりと固定すること。締めすぎると、穴が剥がれたり(特に木材の場合)、アルミ・チャンネルが変形したりすることがあります。これは避けたいことです。目標は、チャンネルが歪むことなく、フレームに対して平らでしっかりと固定されることです。
- バットジョイントはきつく: 水路のあるセクションが終わると、次のセクションがそのセクションに直接突き当たるようにする。セクション間に大きな隙間があってはならない。連続した途切れのないチャンネルは、連続した途切れのないシールのために非常に重要です。1/8インチ(3mm)以下のわずかな隙間は許容範囲ですが、それ以上だと弱点ができたり、設置中にウィグル・ワイヤーが引っかかったりする可能性があります。
- このプロセスを繰り返す: 温室の必要な面をすべて覆うまで、この作業をセクションごとに続ける。ガイド線に従い、突き合わせ部分をしっかりと固定する。
このシステマティックなアプローチにより、ウィグル・ワイヤー・ロック・チャネルの全行程がまっすぐで、丈夫で、フィルムを受け取る準備が整っていることが保証されます。
チャンネルを使ったコーナーとカーブのナビゲーション
温室は単純な直線でできているとは限らない。角があり、フープハウスやゴシックアーチのような多くのデザインは、曲線によって定義されます。ウィグル・ワイヤー・ロック・チャンネルは、このような輪郭に沿うことができなければなりません。
端壁のコーナーなど、外側のコーナーの場合、最も簡単な方法は、2つのチャンネルを45度の角度で切断し、きれいなマイター・ジョイントを形成することです。こうすることで、プロフェッショナルな外観になり、ウィグル・ワイヤー用の連続したトラックができる。マイター・ソーか、マイター・ボックス付きの手ノコが、この角度のカットを正確に行うのに最適なツールです。
コーナーの内側には、チャンネルをコーナーにはめ込むだけでよい。片方のチャンネルをコーナーまで通し、もう片方のチャンネルはコーナーにぴったり合うようにカットする。
フープハウスのような緩やかなカーブは、驚くほど簡単だ。アルミやスチールのチャンネルには十分な柔軟性があり、半径の広いカーブに合わせて曲げることができる。チャンネルをカーブしたフレームに取り付ける際、ネジ止めの間隔を狭くすれば(カーブの間隔は12インチにするとよい)、チャンネルは自然にフープの弧に沿うようになる。膝の上でチャンネルを軽く曲げて始めることもできますが、ほとんどの作業はネジが行います。非常にきつい半径のカーブの場合、チャンネルをより鋭く曲げるために、チャンネルの背面と側面に短い直線状の切り込み(カーフ・カット)を入れる必要があるかもしれない。これは、チャンネルが過度に弱くならないように注意しながら行う必要がある。目標は常に、ウィグル・ワイヤーが通る滑らかで連続した道を維持することである。
ステップ4:温室用ポリエチレンフィルムの被覆と位置決め
この段階は、このプロジェクトにおける重要かつ深い満足感をもたらす変革である。これまでは木や金属で骨組みを作るだけだった温室が、今まさに皮を剥がされようとしているのだ。温室用ポリエチレン・フィルムの大きな、しばしば扱いにくいシートの取り扱いと位置決めは、力技よりもテクニック、タイミング、忍耐力がはるかにものをいう作業だ。適切に張られたフィルムは、そのドラム缶のような表面が美しいだけでなく、構造的に優れ、水や雪を逃がしやすく、風による破壊的なひらひらの影響を受けにくい。
温室用ポリエチレンフィルムの取り扱いについて
温室用フィルムは、一旦設置されるとその耐久性には目を見張るものがありますが、取り扱い過程では驚くほどダメージを受けやすいものです。穴が開いたり、傷がついたり、破れたりしやすいので、最初から完全性が損なわれてしまいます。フィルムを広げ始める前に、温室周辺をよく観察することが大切です。地面には鋭利な石や工具、尖った枝など、フィルムを広げたり引っ張ったりする際に傷つけそうなものがあれば取り除いてください。
フィルムを広げるときは、清潔な芝生の上で行うか、周囲が砂利や砂地の場合は一時的に防水シートを敷いてください。例えばコンクリートの車道でフィルムを広げると、何百もの小さな擦り傷ができ、フィルムの透明度と寿命が短くなります。フィルムは、多くの場合、インストールプロセスを支援するために、メーカーによって特定の意図的な方法で折り畳まれています。この面を下にして貼る」「この面は太陽に向ける」など、パッケージに記載されているラベルや指示には十分注意してください。多くのプロ仕様のフィルムには「内側」と「外側」が指定されており、外側の層には強化された紫外線防止剤や防塵特性が含まれている(Plastics Industry Association, 2020)。逆さまに設置すると、フィルムの寿命が極端に短くなる可能性がある。
フィルムを温室のフレームに引っ掛ける作業は、通常少なくとも2人、大きな構造物ではそれ以上の人数が必要だ。目標は、フィルムを引きずるのではなく、フレームの上に「浮かせる」ことです。金属製や木製のフレーム、特に新しく取り付けたロックチャンネルや露出したネジの頭をフィルムが引っ張ると、傷や引っかかりが生じ、すぐに弱点となります。温室の両脇に人を配置し、フィルムをそっと引っ張り上げ、棟を越えてください。少し風が強い日でも、これは非常に難しく、危険でさえあります。
インストールのタイミング温度の役割
グロワーズ・ソリューションにウィグル・ワイヤー・チャンネルを取り付ける作業に理想的な日は、穏やかで、曇り空で、暖かい日である。プロフェッショナルで長持ちする仕上がりを実現するには、こうした大気の条件がそれぞれ重要な役割を果たします。
風だ: 風はフィルム設置の際の最大かつ最も容赦のない敵である。大きなプラスチックシートは、制御不能な巨大な帆のような働きをします。時速10マイル(時速16キロ)のそよ風でさえ、フィルムの制御を不可能にし、フィルムやフレームを損傷する重大なリスクと、施工者の真の安全上のリスクを生じさせます。風の強いときにフィルムを貼ろうとするのは無駄な行為であり、絶対に避けるべきです。風との戦いに負けるくらいなら、早朝によく見られるような穏やかな日を待つ方がはるかにましです。
温度だ: 温度の役割はより微妙だが、同様に深い。それはポリエチレンの熱的性質に直接関係している。ほとんどの素材がそうであるように、ポリエチレンフィルムは暖かくなると膨張し、寒くなると収縮する。とても寒い日にフィルムを設置してきつく引っ張ると、最初の暖かく晴れた日には素材が膨張するため、必然的に緩んでたるんでしまう。このたるみによって、フィルムの下に風が入り込み、フィルムがバタついたり、早期に摩耗したりするのだ。逆に、より有利なことに、暖かい日にフィルムを取り付けてぴったりと引っ張れば、一晩中や季節の変わり目で気温が下がるにつれて、フィルムは自然に縮んできつくなる。このセルフ・テンション効果こそが、長持ちするドラムタイト仕上げを実現する秘訣なのだ。最良の結果を得るには、周囲温度60°F~75°F(15°C~24°C)を目指してください。極端な暑さの中で施工すると、フィルムが伸びすぎて素材が薄くなり、早期故障につながることがあります。
適切な緊張を得る:長寿の秘訣
フィルムをフレームにかけ、テンションをかけ、仮止めする繊細な作業が始まる。その目的は、Wiggle Wire Lock Channelに永久に固定する前に、フィルムからたるみと大きなしわをすべて取り除くことです。
まず、温室の長辺(腰板や幅木など)の中央にフィルムを固定します。フィルムを固定するために、長さ1フィートほどの短い仮のワイヤーを使います。まだワイヤーを全長取り付けてはいけません。温室の反対側に移動し、フィルムを軽く、しかししっかりと引っ張り、温室の横幅のたるみを取り除きます。フィルムはぴったりしているはずですが、絶対的な限界まで伸びているわけではありません。手で少し押せる程度にします。反対側にもフィルムを張ります。
これで張力の中心「ベルト」ができた。この中央のポイントから、左右交互にコーナーに向かって外側に向かって張ります。フィルムを斜め下に引っ張り、シワを伸ばす。この動作は、絵画のキャンバスを伸ばすのに似ている。中心から外側に向かって作業し、表面全体に均等な張力を作るのだ。数メートルおきに、小さな針金でフィルムを仮止めする。
この作業には時間をかけてください。こまめに後ずさりして、フィルムを遠くから見てください。大きなしわやたるみがありませんか?もしそうなら、その部分の仮鋲を外し、張り直してください。このような調整は、ウィグル・ワイヤーが完全に固定された後よりも、今の方がはるかに簡単です。この忍耐強く理路整然としたやり方が、アマチュアの仕事とプロの仕事を分けるのです。こうすることで、最終的な被覆は滑らかで、タイトで、プロフェッショナルなものとなり、今後何年にもわたって天候に耐えることができるのだ。しっかりとしたフィルムは、雨や雪を効率よく通し、風による振動も少ないため、材料の摩耗も騒音も抑えることができます。
ステップ5:ウィグル・ワイヤーの挿入テクニックをマスターする
フィルムがフレームに固定される瞬間である。ロック・チャンネルにウィグル・ワイヤーを挿入することで、システムが作動し、その有効性と強度を決定づける、しっかりとした連続的なグリップが生まれる。コンセプトはシンプルだが、技術には一定の感覚とリズムが必要で、それは練習によって習得される。この動作をマスターすることで、フィルムを傷つけたりワイヤーと格闘したりすることなく、素早く確実な取り付けが可能になる。これは、グロワーズ・ソリューションにウィグル・ワイヤー・チャンネルを取り付ける方法を習得するための最終段階です。
ウィグル」モーション:詳細な内訳
このプロセスは力ずくで行うものではない。単にワイヤーをチャンネルにまっすぐ押し込むのではない。そうしようとすると、非常に難しく、膨大な手の力が必要になり、フィルムが破れる危険性がある。正しいテクニックは、梃子と力学を利用しながら、ワイヤーをチャンネルに徐々に送り込むロッキングまたは "ウィグリング "モーションである。
- 片端から始める: Begin at one end of a run of lock channel where the film is already draped and properly tensioned.
- Angle the Wire: Hold a section of wiggle wire and insert the first few inches into the channel at a low, shallow angle, almost parallel to the film.
- The First Push: Use the thumb of one hand to push the starting end of the wire down into the channel to anchor it. This is your starting point.
- Rock and Push: Now, begin the characteristic motion that gives the wire its name. Place your thumbs on the top of the wire. Push down and forward on one of the upper "humps" of the wiggle wire. As it seats into the channel, rock your pressure onto the next hump, pushing it down and in. Continue this fluid motion—rocking from side to side and applying steady downward pressure—along the length of the wire. Your hands should "walk" the wire into the channel.
- Listen and Feel: As the wire seats correctly into the channel, you will often feel and sometimes hear a satisfying "click" or "snap" as it locks into the channel's groove. The motion should become fluid and rhythmic. You are essentially using the zig-zag shape of the wire to lever itself into the channel.
- Overlapping Sections: Wiggle wires are typically sold in 6-foot (or 2-meter) sections. When you reach the end of one piece, start the next piece by overlapping the last few inches of the previous one. The end of the new wire should be inserted under the beginning of the next one to create a seamless, uninterrupted connection. This overlap is critical; it ensures there are no gaps in the holding pressure.
It is an excellent idea to practice this motion on a spare piece of channel and a scrap of film before working on the greenhouse itself. Getting a feel for the right amount of pressure and the correct angle will make the actual installation go much more smoothly and quickly. Some professional installers find that wearing tight-fitting work gloves can improve their grip and protect their hands from fatigue.
Securing Multiple Layers: Poly Film and Shade Cloth
One of the most significant and practical advantages of the Wiggle Wire Lock Channel system is its ability to securely fasten multiple layers of material within a single channel. This is a common requirement when installing both a primary greenhouse polyethylene film and an exterior shade cloth, or when creating an air-inflated double layer of poly for improved insulation in colder climates.
The process is nearly identical to securing a single layer, which speaks to the system's robust design. You simply lay all the layers of material over the channel together. For an installation involving a poly film and a shade cloth, lay the poly film down first, ensuring it is smooth, then lay the shade cloth directly on top of it. Smooth out both layers as much as possible to avoid trapping any wrinkles between them. Then, insert the wiggle wire through both layers into the channel using the exact same rocking motion described above.
The channel and wire are engineered to handle the extra thickness. The spring steel wire will compress and press both layers firmly against the channel walls, creating a secure grip on both. It is remarkable how securely the system can hold two or even three layers of material. This versatility is invaluable for growers who need to adapt their greenhouse coverings to changing seasons, for example, by adding a shade cloth for the hot summer months and removing it for the winter. This system works in perfect concert with an associated フィルムリーラー, which can be used for roll-up side walls, allowing for dynamic ventilation control.
Common Mistakes to Avoid During Insertion
While the process is robust and forgiving, a few common errors can compromise the quality of the installation or cause unnecessary frustration. Being aware of them is half the battle.
- Stretching the Film with the Wire: Do not use the wiggle wire itself as a tool to stretch the film. The film should already be properly tensioned and held in place with temporary tacks before you begin the final wire insertion. Trying to pull the film tight as you install the wire will result in uneven tension, wrinkles, and may even tear the film at the point of insertion.
- Not Seating the Wire Fully: It is crucial that the wire is pushed all the way into the channel. If it is only partially inserted, it will not provide the intended holding power and may pop out under a significant wind load. A properly seated wire should be recessed within the channel and you should not be able to easily pull it out with your fingers. If you can, it needs to be pushed in further.
- Using Damaged Wire: Do not use wiggle wire that is bent out of shape, kinked, or significantly rusted. A damaged wire will not exert even pressure and can create a point of failure. It can also have sharp edges or points that could puncture the delicate greenhouse film. Always use new, high-quality wire for the best and most reliable results.
- Forgetting to Overlap: Leaving a gap between sections of wiggle wire creates a small, unsecured spot in the film. While it may seem insignificant, this spot can catch the wind and begin to flap violently. This flapping puts immense stress on the surrounding areas and can eventually lead to a tear that propagates along the film. Always overlap the ends of the wire sections by at least 4-6 inches (10-15 cm).
By being mindful of these potential pitfalls and employing the correct, fluid technique, the installation of the wiggle wire becomes the final, satisfying step in creating a secure, weatherproof, and professional-grade envelope for the greenhouse.
ステップ6:最終検査、調整、長期メンテナンス
The installation of the Wiggle Wire Lock Channel is not truly complete when the last piece of wire is snapped satisfyingly into place. The final, and arguably most professional, phase involves a thorough inspection, any necessary minor adjustments, and an understanding of the long-term maintenance required to ensure the system's longevity and peak performance. A greenhouse is a dynamic structure, constantly interacting with its environment, and a small amount of proactive care can prevent large problems down the road, protecting the significant investment in the structure and, more importantly, the crops within.
Conducting a Thorough Post-Installation Check
Once the film is fully secured, take the time to conduct a detailed walk-around and inspection of the entire greenhouse. This is a critical quality control step that should not be skipped in the excitement of finishing the main build.
First, examine the film itself with a critical eye. Look for any wrinkles or slack areas that may have been missed during the tensioning process. Small wrinkles can often be worked out by temporarily removing a section of wiggle wire, pulling the film taut with your hand, and re-inserting the wire. Look closely at the film where it enters the channel. Are there any signs of tearing, undue stress, or pinching?
Second, inspect the Wiggle Wire Lock Channel itself. Run your hand along the length of the channel (wearing gloves is recommended) to feel for any sections of wiggle wire that are not fully seated. If you find a high spot, it means the wire is not fully engaged. Use a small block of wood and a mallet to gently but firmly tap it down until it is flush with the rest of the wire. Check that all butt joints between the channel sections are tight and that there are no sharp edges exposed that could chafe the film over time.
Third, look at the overall structure from a distance. Does the film appear uniformly tight and smooth? The surfaces should be taut like a drumhead, reflecting light evenly. This initial inspection is your best opportunity to correct any minor imperfections before they are "set" by time and temperature changes, ensuring your growers solution is perfect from day one.
Seasonal Adjustments and Re-tensioning
Even with a perfect initial installation, a greenhouse film may require minor adjustments over its lifespan. The constant cycle of expansion and contraction due to temperature changes, combined with the stresses of wind and precipitation, can cause the film to lose a small amount of tension, particularly over its first year of service.
It is a sound agricultural practice to inspect the film tension seasonally, especially after the first few months of service and after any significant storm events. If you notice an area has become loose or has started to flap in the wind, re-tensioning is remarkably straightforward with the wiggle wire system. This is one of its greatest strengths when compared to more permanent fastening methods like batten boards.
To re-tension a section, you will need a simple tool to remove the wiggle wire. A flat-head screwdriver or a specialized wiggle wire removal tool can be used. Insert the tip of the tool under one end of the wire and gently pry it up and out of the channel. Once you have a starting piece out, you can often pull the rest of an entire section out by hand. With the wire removed, pull the film tighter to remove the slack, and then re-install the wiggle wire using the same technique as before. This ability to easily adjust and "tune" the skin of the greenhouse is invaluable for maintaining peak performance and maximizing the life of the film.
Extending the Lifespan of Your Wiggle Wire Lock Channel System
The Wiggle Wire Lock Channel system is designed for exceptional durability, but a few simple maintenance practices can help it last even longer, protecting your investment for decades.
- Keep it Clean: Periodically, and especially when you are changing out the greenhouse film after its rated lifespan, take the opportunity to clean out the lock channels. Over the years, dust, dirt, pollen, and small bits of debris can accumulate inside the channel. A quick pass with a stiff brush or a blast of compressed air will ensure the channel is clean and ready to provide maximum grip for the new film.
- Inspect for Corrosion: While aluminum and properly galvanized steel are highly corrosion-resistant, it is still wise to inspect the channels periodically, especially in harsh coastal or industrial environments. Look for any signs of advanced rust on steel channels, particularly around screw holes or deep scratches where the zinc coating may have been compromised. A light touch-up with a cold galvanizing spray can help arrest any corrosion that has started.
- Mind the Wire Coating: For PVC-coated wiggle wires, be aware that the PVC coating will eventually degrade from prolonged, intense UV exposure. After many years of service (typically 8-10 years or more), the coating may become brittle and start to flake off. While the underlying spring steel wire will still function, it will have lost its protective, anti-abrasion quality. When you replace your greenhouse film after its rated lifespan (usually 4-6 years), inspect the condition of your wiggle wire. If the coating is significantly cracked or flaking, it is a wise and relatively small investment to replace the wire at the same time to ensure maximum protection for your new film. As a company dedicated to quality, we understand the importance of durable components, a value reflected in our story and values.
By adopting this mindset of diligent inspection and proactive maintenance, the Wiggle Wire Lock Channel system will serve as a reliable and steadfast component of your greenhouse for many years, providing the secure seal necessary for successful and profitable growing.
他の温室コンポーネントとのシステムの統合
A greenhouse is not merely a collection of parts, but an integrated system where each component must work in harmony with the others to create a controlled environment. A secure Wiggle Wire Lock Channel installation is the foundation, but its full potential is realized when it is properly coordinated with the greenhouse's environmental control systems. The integrity of the seal it creates directly impacts the efficiency of ventilation, heating, and cooling, making it a cornerstone of modern protected agriculture.
Coordination with Roll-up Sides and Ventilation Systems
Many modern greenhouses, from small high tunnels in a backyard to large commercial operations spanning hectares, utilize roll-up sides for natural ventilation. This is a cost-effective and highly efficient way to regulate temperature and humidity, purging hot air and bringing in fresh, CO2-rich air for the plants. The Wiggle Wire Lock Channel plays a crucial dual role in this common setup.
First, the fixed portion of the wall film, located above the roll-up section, is securely terminated using the lock channel. This creates a durable, fixed anchor point from which the roll-up portion operates. Second, the bottom edge of the roll-up curtain itself is often attached to the roll bar (typically a metal pipe) using a Wiggle Wire Lock Channel. This provides a strong, continuous attachment along the entire length of the pipe, preventing the fabric from ripping away from the bar under the stress of repeated rolling or high winds.
The effectiveness of any greenhouse ventilation system, whether it is a passive roll-up side or a fan-based mechanical system, depends on a relatively airtight structure. Unwanted air leaks, which can occur with poorly fastened films, undermine the ability to control airflow. A properly sealed greenhouse allows a circulation fan to move air efficiently, creating a uniform environment without "short-circuiting" through unintended gaps. The continuous, gap-free seal provided by the Wiggle Wire Lock Channel system is therefore not just about weatherproofing; it is about creating the controlled envelope necessary for an effective ventilation strategy (Sanford, 2011).
The Role of the Film Reeler in a Wiggle Wire Setup
A film reeler, or gearbox, is the manual or automated mechanism that drives a roll-up side. It provides a mechanical advantage, allowing a grower to easily raise and lower a long, heavy section of greenhouse wall with a simple hand crank or the push of a button. The connection between this system and the wiggle wire is symbiotic. The Wiggle Wire Lock Channel provides the secure anchor points for the fixed film and the roll-up bar, while the film reeler provides the controlled movement.
When planning a roll-up side, it is important to consider the forces involved. The reeler and its associated gear motor will be applying significant torque to the roll bar. The film, securely attached to this bar by a wiggle wire channel, must be able to withstand these forces without tearing or pulling out. The distributed grip of the wiggle wire is far superior to individual screws or clamps in this application, as it spreads the load evenly along the entire length of the pipe. This synergy between the secure fastening of the wiggle wire and the mechanical advantage of the film reeler creates a robust, reliable, and user-friendly ventilation system.
Ensuring Compatibility with Gear Motors and Circulation Fans
For larger or automated greenhouses, a gear motor is often used to power the film reeler. These motors need to be programmed with upper and lower limits to prevent them from over-rolling and damaging the film or the structure. The secure termination point created by the Wiggle Wire Lock Channel at the top of the roll-up wall serves as a reliable physical stop and an unambiguous reference point for setting these electronic limits.
Furthermore, the overall airtightness achieved with a wiggle wire installation makes the entire environmental control system more efficient. A circulation fan running in a leaky greenhouse is like trying to cool a house with all the windows open. It is constantly fighting against uncontrolled air exchange, wasting energy and failing to create a uniform environment. By minimizing these leaks, the Wiggle Wire Lock Channel allows the circulation fan and the broader ventilation system to work as designed, maintaining consistent temperatures and humidity levels with less energy consumption. This creates a healthier environment for plant growth and a more profitable operation for the grower. The thoughtful integration of these various high-quality greenhouse products, from the channel to the fan, is the hallmark of a well-designed and productive growing structure.
よくある質問(FAQ)
Can I use Wiggle Wire Lock Channel on a wooden greenhouse frame? Yes, absolutely. The system is highly versatile and works exceptionally well on wooden frames. You will need to use appropriate wood screws to attach the lock channel to the baseboards, hip boards, and end-wall framing. It is highly recommended to pre-drill pilot holes to prevent the wood from splitting and to ensure the screws hold securely.
How many layers of plastic can I secure with one wiggle wire? Most standard Wiggle Wire Lock Channel systems are designed to securely hold two layers of 6-mil greenhouse film. Many can even accommodate a third, thinner layer, such as a light shade cloth. This makes it ideal for creating an air-inflated double-layer poly roof for insulation or for securing a primary film and a shade cloth simultaneously.
What is the difference between PVC-coated and galvanized wiggle wire? PVC-coated wiggle wire has a smooth plastic coating that reduces friction and abrasion on the greenhouse film, extending its lifespan. It is the recommended choice for thinner films (under 8-mil). Galvanized wire is bare, zinc-coated steel. It is slightly stronger and more economical but can be abrasive on thinner films. It is best suited for use with thicker, more durable woven plastics.
How do I install the channel around a curve or corner? For gentle curves, like those on a hoop house, the channel can be bent to conform to the arc as you screw it into the frame. For sharp, 90-degree outside corners, it is best to make a miter cut on two pieces of channel at 45-degree angles to form a clean joint. For inside corners, you can simply butt one channel up against the other.
How often should I replace my wiggle wire? The lock channel itself should last for many decades. The wiggle wire has a very long lifespan as well. However, if you are using PVC-coated wire, the coating may become brittle and degrade after 8-10 years of sun exposure. It is good practice to inspect the wire whenever you replace your greenhouse film and replace the wire if the coating is cracking or flaking off to provide the best protection for your new film.
What spacing should I use for the screws when installing the lock channel? For standard conditions, a screw every 18 to 24 inches (45-60 cm) is sufficient. In areas known for very high winds, it is wise to increase the fastening density by placing a screw every 12 inches (30 cm) to provide maximum holding strength and prevent the channel from being pulled from the frame.
Is a Wiggle Wire Lock Channel system reusable? Yes, the entire system is designed for reusability. The wiggle wire can be removed, and the film can be adjusted, repaired, or replaced. The wire can then be re-inserted to secure the new film. This is a major advantage over single-use fastening methods.
Can I install a Wiggle Wire Lock Channel by myself? Installing the channel itself can be a one-person job. However, pulling the large greenhouse film over the structure and tensioning it properly typically requires at least two people, and more for larger greenhouses. It is much easier and safer with help.
結論
The Wiggle Wire Lock Channel system, in its elegant simplicity, offers a profound and effective solution to one of the most fundamental challenges in greenhouse construction: the creation of a durable, weatherproof, and reliable seal. Its design, which relies on the sound principles of distributed pressure and friction rather than on creating destructive punctures, represents a significant advancement over traditional fastening methods. Through a careful and considered process of planning, material selection, and meticulous installation, this system provides growers across the varied and demanding climates of South America, Russia, the Middle East, and South Africa with the security needed to protect their crops from the unpredictable forces of the elements.
The journey from a bare frame to a fully skinned and protected greenhouse is one that rewards precision and care. From preparing the frame surfaces to mastering the unique rocking motion of the wire insertion, each step contributes to the ultimate integrity of the final structure. The system's inherent ability to easily accommodate multiple layers, navigate complex curves, and allow for future adjustments makes the Wiggle Wire Lock Channel an exceptionally versatile and economical choice for both amateur horticultural enthusiasts and large-scale commercial operations. By understanding the principles behind the system and integrating it thoughtfully with other critical components like the ventilation system and film reeler, a grower can create a truly efficient and resilient controlled environment, fostering the optimal conditions for growth and ensuring the longevity of their valuable investment.
参考文献
Giacomelli, G. A., & Roberts, W. J. (1993). Greenhouse covering systems. HortTechnology, 3(1), 50–58.
Plastics Industry Association. (2020). Plastics engineering handbook of the Society of the Plastics Industry, Inc. (5th ed.). Springer.
Sanford, S. (2011). Comparing greenhouse ventilation systems. University of Wisconsin-Extension. Retrieved from
Wigglewires.com. (2025). The 2025 expert guide to Wiggle Wire Lock Channel: 6 steps for a weatherproof seal. Wigglewires. https://www.wigglewires.com/the-2025-expert-guide-to-wiggle-wire-lock-channel-6-steps-for-a-weatherproof-seal-article/
Wigglewires.com. (n.d.-a). Greenhouse construction materials and equipment supplier. Retrieved May 13, 2025, from https://www.wigglewires.com/
Wigglewires.com. (n.d.-b). Wiggle wire channel. Retrieved May 13, 2025, from https://www.wigglewires.com/wiggle-wire-channel-category/