
Guía experta sobre perfiles de fijación y alambre elástico para invernaderos de arco: 7 pasos para lograr un sellado a prueba de tormentas en 2025
23 de diciembre de 2025
Resumen
La integridad estructural de un invernadero tipo túnel depende fundamentalmente de la eficacia de su sistema de fijación de la cubierta. Este documento ofrece un análisis exhaustivo del sistema de canales de sujeción y alambre elástico, un método predominante para fijar el film de polietileno y otras cubiertas flexibles a las estructuras de los invernaderos. Un análisis de la mecánica del sistema revela cómo este crea una sujeción continua de alta fricción que distribuye la carga del viento de manera uniforme, mitigando los puntos de tensión que provocan el fallo prematuro del film. El texto evalúa la ciencia de los materiales que subyace a los componentes, comparando el aluminio y el acero galvanizado para los canales de fijación, con consideraciones sobre la resistencia a la corrosión, la solidez y la idoneidad para diversos climas del mundo. Del mismo modo, examina las variaciones del alambre elástico, incluyendo el calibre y las cualidades protectoras de los recubrimientos de PVC. El texto describe metódicamente el proceso de instalación, desde la preparación del armazón hasta el tensado final de la película, haciendo hincapié en las técnicas que garantizan un sellado duradero y resistente a la intemperie. El objetivo es dotar a los productores profesionales y a los aficionados de los conocimientos detallados necesarios para una selección e implementación adecuadas, maximizando así la vida útil de la cubierta del invernadero y protegiendo los cultivos en su interior.
Puntos clave
- Elija perfiles de aluminio con cierre para zonas costeras o húmedas a fin de evitar la corrosión.
- Utilice alambre para resortes recubierto de PVC para proteger el plástico del invernadero contra desgarros y daños causados por el calor.
- Coloca cinta de fieltro sobre las soldaduras y los bordes afilados del bastidor antes de fijar los perfiles.
- Consigue un acabado profesional y sin arrugas colocando la lámina en un día tranquilo y con clima templado.
- Instale correctamente el canal de cierre y el alambre elástico de los túneles de plástico para garantizar un sellado resistente a las tormentas.
- Inserte el alambre elástico en ángulo, realizando un movimiento de «oscilación» para que quede bien ajustado.
- Revise periódicamente el sistema para detectar cables sueltos o daños, especialmente después de las tormentas.
Índice
- Comprender la relación fundamental: el canal de bloqueo y el resorte de alambre
- Decidir con acierto: cómo elegir los materiales adecuados para tu clima y tus objetivos
- Los cimientos: preparación minuciosa de la estructura del invernadero tipo túnel
- El arte de la instalación: fijación del canal de cierre
- El evento principal: colocación y ajuste del plástico para invernadero
- Dominar el «wiggle»: fijar la película con alambre elástico
- Toques finales: inspección, tensado y mantenimiento a largo plazo
- Preguntas frecuentes
- Conclusión
- Referencias
Comprender la relación fundamental: el canal de bloqueo y el resorte de alambre
Emprender la construcción o el mantenimiento de un invernadero de arco implica tomar una serie de decisiones, cada una de las cuales es fundamental para el éxito futuro del espacio de cultivo. Entre ellas, el método elegido para fijar la cubierta flexible del invernadero a la estructura rígida reviste una importancia primordial. El sistema de canal de bloqueo y alambre con resorte, a menudo denominado sistema de «alambre flexible», representa una evolución significativa en la tecnología de los invernaderos. Su adopción generalizada no es casual; es el resultado directo de su rendimiento superior a la hora de crear una sujeción continua, segura y suave del material de recubrimiento. Para apreciar su valor, primero hay que comprender la elegante simplicidad de su mecánica y el profundo impacto que tiene en la longevidad de la estructura y en la salud de las plantas que alberga.
La mecánica del sistema: un concepto sencillo para un agarre firme
En esencia, el sistema consta de dos componentes que se acoplan entre sí. El primero es el canal de fijación, un perfil base fabricado normalmente en aluminio o acero galvanizado. Este canal presenta una forma de «U» o «C» diseñada específicamente. Se fija directamente a los elementos estructurales del armazón del invernadero: los zócalos, los travesaños, los laterales enrollables y los arcos de las paredes finales. Piense en ello como la creación de una guía o riel continuo alrededor de todo el perímetro de cada sección que se va a cubrir.
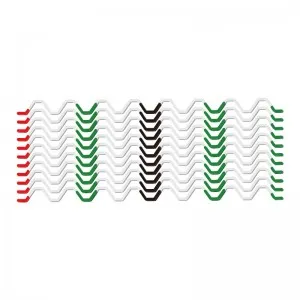
El segundo componente es el alambre elástico, un trozo de alambre de acero de alta resistencia doblado en forma de zigzag o «ondulado». Este alambre está diseñado para encajar perfectamente dentro del canal de fijación. La magia ocurre durante la instalación. Una vez que el plástico del invernadero se coloca sobre el armazón y se tira de él para que cubra el canal de fijación, el alambre elástico se presiona dentro del canal sobre el plástico. La naturaleza elástica del alambre hace que se expanda hacia afuera, presionando el film contra las paredes internas del canal. La forma en zigzag crea múltiples puntos de contacto, generando una fricción inmensa a lo largo de toda la longitud. Esta acción fija el film firmemente en su lugar, no perforándolo, sino sujetándolo con fuerza. Una sola guía puede sujetar una o incluso varias capas de material, como una capa de lámina primaria y una malla de sombreo secundaria, utilizando dos alambres elásticos separados en el mismo canal. El resultado es un sellado continuo y uniforme que es notablemente resistente al aleteo provocado por el viento y a las fuerzas de tracción.
¿Por qué no limitarse a grapas o listones? Una lección sobre durabilidad y tensión
Antes de la llegada de sistemas como el canal de fijación y el alambre elástico, los productores recurrían a métodos más rudimentarios. Una técnica habitual era el sistema de listones de madera, en el que se colocaba una tira delgada de madera sobre el plástico y se clavaba o atornillaba al armazón de madera del invernadero. Otro método, especialmente para estructuras de aficionados, consistía simplemente en utilizar una grapadora. ¿Por qué estos métodos han dejado de utilizarse en aplicaciones profesionales o de alto nivel?
La respuesta está en la distribución de la tensión. Las grapas y los tornillos crean puntos localizados de alta tensión. Cada elemento de sujeción perfora el plástico, creando un pequeño orificio que constituye un punto de partida natural para un desgarro. Cuando sopla el viento, hace que el plástico se agite. Este movimiento de agitación concentra una fuerza inmensa en esos diminutos puntos perforados. Imagina una bandera ondeando al viento; la tela se deshilacha primero en los puntos de sujeción. De la misma manera, el plástico de invernadero fijado con grapas se desprendera inevitablemente de los sujetadores, a menudo en la primera tormenta importante.
Los listones de madera ofrecen una ligera mejora al distribuir la fuerza a lo largo de una línea. Sin embargo, siguen presentando problemas. La madera puede expandirse y contraerse con la humedad, lo que provoca una tensión desigual. Los sujetadores siguen siendo puntuales, y la madera en sí misma puede tener astillas o bordes ásperos que desgastan la película con el tiempo. Además, tanto las grapas como los listones hacen que reemplazar la película sea una tarea laboriosa, que requiere la remoción de innumerables sujetadores y que a menudo resulta en daños al marco.
El sistema de canal de fijación y alambre con resorte soluciona estas deficiencias. Al crear una sujeción continua, distribuye la carga del viento de manera uniforme por todo el perímetro. No hay perforaciones. Las superficies lisas del canal y el alambre, a menudo recubierto de PVC, no dañan el plástico. El sistema permite un fácil desmontaje y reinstalación, lo que hace que el reemplazo estacional del plástico o la adición de malla de sombreo sea una tarea sencilla. Es, en esencia, un cambio de una filosofía de «perforación» a una de «sujeción», un cambio que ha aumentado drásticamente la confiabilidad y la vida útil de los recubrimientos de los invernaderos de arco.
El impacto en el ambiente de su invernadero y en la salud de sus cultivos
Una cubierta bien fijada no es solo una cuestión estructural, sino una necesidad hortícola. La función principal de un invernadero es crear un entorno controlado y modificado que resulte más favorable para el crecimiento de las plantas que el exterior. Este control depende totalmente de la integridad del sellado de la estructura.
Una malla suelta o con huecos permite una fuga de aire considerable. Durante el frío invierno ruso, esto significa que se escapa el preciado calor, lo que obliga a los sistemas de calefacción a funcionar constantemente con un gran gasto y crea puntos fríos que pueden atrofiar o matar las plantas. En un clima cálido y húmedo como el del sudeste asiático, significa que el aire caliente se infiltra en la estructura, haciendo que los esfuerzos de enfriamiento sean inútiles y favoreciendo las enfermedades fúngicas. El intercambio de aire descontrolado hace imposible mantener niveles constantes de temperatura y humedad, que son fundamentales para el desarrollo saludable de las plantas y una cosecha de alto rendimiento.
Además, las grietas en el recubrimiento son puertas abiertas para las plagas. Los insectos y otros animales pequeños pueden entrar fácilmente a través de una sección de malla rasgada o mal sellada, lo que introduce un vector de enfermedades y daños a los cultivos que puede resultar difícil y costoso de controlar. El sistema de canal de cierre y alambre con resorte, cuando se instala correctamente, crea un sellado casi hermético. Impide el intercambio de aire incontrolado, lo que permite un control preciso del clima interno. Constituye una barrera física contra las plagas. Al garantizar que el plástico del invernadero esté tenso y completamente intacto, este sistema de sujeción se convierte en un guardián silencioso de sus cultivos, protegiéndolos no solo del viento y la lluvia, sino también de las sutiles fluctuaciones ambientales y las amenazas biológicas que pueden socavar los esfuerzos de un productor. La inversión en un sistema de sujeción de calidad es, por lo tanto, una inversión en la productividad y la rentabilidad mismas de la operación del invernadero.
Decidir con acierto: cómo elegir los materiales adecuados para tu clima y tus objetivos
El proceso de toma de decisiones para un sistema de canal de bloqueo y alambre con resorte no termina con la elección del sistema en sí. Los materiales específicos con los que están fabricados los componentes determinarán su rendimiento, vida útil e idoneidad para su entorno particular. Un productor que se encuentre en la costa de Sudáfrica, con aire salino, tendrá prioridades diferentes a las de un productor que se enfrente a las fuertes cargas de nieve de una región templada. Comprender las propiedades del aluminio frente al acero, y los matices de los diferentes recubrimientos de alambre, es el primer paso para construir un invernadero de arcos verdaderamente resistente y duradero.
El gran debate: canales de fijación de aluminio frente a acero galvanizado
El canal de cierre, como base del sistema, debe ser robusto y duradero. Los dos materiales más comunes que se utilizan para su construcción son el aluminio y el acero galvanizado. Cada uno posee un conjunto de características propias que lo hacen más o menos adecuado para determinadas aplicaciones. Es fundamental tener en cuenta las condiciones locales.
| Característica | Perfil de aluminio con cierre | Perfil en U de acero galvanizado |
|---|---|---|
| Resistencia a la corrosión | Excelente. El aluminio forma de forma natural una capa protectora de óxido, lo que lo hace ideal para entornos con alta humedad, costeros y salinos. No se oxida. | Es bueno, pero tiene una vida útil limitada. La capa de zinc (galvanización) se corroe de forma sacrificial para proteger el acero. Los rayones o los extremos cortados pueden convertirse en puntos de óxido. Su vida útil es más corta en condiciones de humedad o salitre. |
| Resistencia y rigidez | Bien. Es lo suficientemente resistente para la mayoría de las aplicaciones, pero más flexible que el acero. Se puede doblar para adaptarse a las curvas del arco de un invernadero tipo túnel con mayor facilidad. | Excelente. El acero es más resistente y rígido, y ofrece una mayor resistencia a la flexión o la deformación bajo cargas pesadas, como las causadas por vientos fuertes o la nieve. |
| Peso | Muy ligero. Su reducido peso facilita su manejo e instalación, especialmente al trabajar en altura o con tramos largos. | Pesado. El acero es considerablemente más denso y pesado, lo que puede hacer que su instalación resulte más exigente físicamente. |
| Coste | Mayor costo inicial. El aluminio suele ser una materia prima más cara que el acero. | Coste inicial más bajo. El acero galvanizado suele ser la opción más económica, lo que lo convierte en una opción popular para proyectos a gran escala en los que el costo es un factor determinante. |
| Conductividad térmica | Alto. El aluminio transmite el calor rápidamente, lo que puede provocar puntos de calor en el plástico del invernadero en un día soleado, lo que podría acelerar la degradación del plástico en el punto de contacto. | Menor. El acero transmite el calor más lentamente que el aluminio, lo que reduce el riesgo de que se formen puntos calientes que puedan dañar la película plástica. |
Entonces, ¿cómo se elige? Un enfoque empático, poniéndose en el lugar del material, puede resultar útil. Imagínese que es el perfil de fijación. Si lo colocaran en un invernadero de arco en una región costera húmeda de Brasil, querría ser de aluminio. La humedad constante y la sal del aire atacarían sin piedad el recubrimiento de zinc de un perfil de acero, pero, al ser de aluminio, usted permanecería intacto. Por el contrario, si te instalaran en una estructura en una región con fuertes nevadas, tal vez preferirías ser de acero. Tu rigidez inherente proporcionaría la estructura necesaria para resistir el aplastamiento o la deformación por el peso.
Para muchos cultivadores de Oriente Medio, donde el sol intenso y el calor son los principales retos, la menor conductividad térmica del acero podría suponer una ventaja, aunque la mayor resistencia a la corrosión del aluminio también es un argumento de peso, sobre todo si se utilizan sistemas de enfriamiento por evaporación. Para un constructor aficionado o alguien que trabaje solo, el peso ligero del aluminio es una ventaja práctica significativa. En última instancia, la elección es una cuestión de equilibrio entre durabilidad, resistencia y presupuesto, todo ello teniendo en cuenta las condiciones del entorno local.
Análisis del alambre de resorte: recubrimientos, calibre y vida útil
El alambre elástico es el componente activo del sistema, la pieza que se «mueve» y se bloquea. Aunque pueda parecer una simple pieza de metal doblada, su diseño y composición son de gran importancia. La calidad del alambre afecta directamente a la seguridad de la sujeción y al buen estado del plástico de su invernadero.
El alambre en sí es casi siempre de acero para resortes con alto contenido de carbono y alta resistencia a la tracción, elegido por su capacidad para flexionarse durante la instalación y luego mantener su forma y presión hacia afuera durante muchos años. Los principales factores que lo distinguen son su recubrimiento protector y su diámetro, o calibre.
| Tipo de cable | Descripción | Ventajas | Desventajas | Ideal para |
|---|---|---|---|---|
| Galvanizado liso | Acero para resortes estándar con un recubrimiento de zinc para prevenir la oxidación. | El precio más bajo. | El recubrimiento de zinc puede ser abrasivo para la película. Con el tiempo, puede aparecer óxido, lo que mancha la película y debilita el alambre. | Proyectos con un presupuesto ajustado en climas secos y templados. |
| Recubierto de PVC | Alambre de acero para resortes galvanizado que posteriormente se recubre con una capa de plástico de PVC flexible y resistente a los rayos UV. | Ofrece una superficie lisa que reduce la fricción y protege la película. El recubrimiento actúa como una segunda barrera contra el óxido. Reduce la transferencia de calor del metal a la película. Mayor vida útil. | Costo inicial más elevado que el del alambre galvanizado simple. | En todos los climas, especialmente en aquellos con altos niveles de radiación UV, temperaturas extremas o humedad. Es el estándar profesional para maximizar la vida útil de la película. |
El recubrimiento de PVC es una innovación especialmente bien pensada. Imagínese el plástico de un invernadero en un día de calor abrasador. Un alambre metálico sin recubrimiento, calentado por el sol, puede presionar contra el plástico y hacer que este se estire, se debilite y se degrade prematuramente. El recubrimiento de PVC actúa como aislante, protegiendo el film de esta tensión térmica concentrada. También crea una superficie más lisa, lo cual es vital. Cuando se tensa una lámina de polietileno de 6 milésimas de pulgada, lo último que se desea es arrastrarla sobre una superficie áspera y abrasiva que pudiera causar un microdesgarro. El recubrimiento liso de PVC permite que el film se deslice hasta su lugar sin sufrir daños. Para obtener más información, a Guía práctica para compradores puede ofrecer una visión más detallada sobre estas opciones de materiales.
El calibre (diámetro) del alambre también es importante. Un alambre más grueso (por ejemplo, 2,3 mm frente a 2,0 mm) suele ejercer una mayor fuerza hacia afuera, lo que proporciona un agarre más seguro, algo que resulta ventajoso en lugares con vientos fuertes. Además, es más duradero y menos propenso a doblarse o deformarse de manera permanente tras múltiples usos. Aunque la diferencia de costo suele ser mínima, optar por un alambre de alta calidad, recubierto de PVC y de mayor calibre es una de las formas más rentables de garantizar la seguridad a largo plazo de la cubierta de su invernadero tipo túnel.
Los cimientos: preparación minuciosa de la estructura del invernadero tipo túnel
El éxito de la instalación de un canal de cierre y alambre elástico se decide mucho antes de desenrollar la primera pieza de plástico. Al igual que un pintor prepara un lienzo, el agricultor debe preparar la estructura del túnel. Esta etapa preparatoria es un acto de previsión, cuyo objetivo es crear una base perfecta para el sistema de cubierta. Saltarse estos pasos es invitar a la fricción, la abrasión y el fallo prematuro. El objetivo es crear una superficie lisa, contigua y estructuralmente sólida sobre la que se montará el canal de fijación. Cada momento dedicado a la preparación se ve recompensado con creces por la longevidad del plástico del invernadero y la tranquilidad que proporciona una estructura segura.
Garantizar una superficie lisa y segura
El plástico de invernadero, a pesar de su resistencia, tiene un talón de Aquiles: los bordes afilados. Una pequeña rebaba metálica, una esquina afilada en un soporte o una costura de soldadura irregular pueden actuar como un cuchillo, cortando o desgastando el plástico bajo la tensión del viento y las inclemencias del tiempo. Antes de instalar cualquier canal, hay que realizar un examen táctil de todo el armazón donde se colocarán los canales. Pase una mano enguantada por cada pieza de tubo de acero o aluminio, cada unión y cada soporte.
Si se detectan puntas afiladas, salpicaduras de soldadura o rebabas, deben eliminarse. Para ello, lo ideal es utilizar una lima metálica o una amoladora con disco de láminas. El objetivo no es solo eliminar la punta, sino redondear y alisar la zona para que no suponga ningún peligro. Piensa en ello como una forma de «empatía estructural»: estás percibiendo el marco desde la perspectiva de la delicada película que pronto se tensará sobre él.
Además de eliminar las puntas afiladas, es recomendable aplicar una barrera protectora en ciertas zonas. La cinta de fieltro para invernaderos, una cinta de poliéster estabilizada contra los rayos UV, es un material excelente para ello. Debe aplicarse sobre cualquier soldadura, unión o zona donde se unan diferentes componentes del armazón. Sirve como amortiguador físico, separando el film del metal duro y potencialmente abrasivo. También actúa como barrera térmica. En un día caluroso, el armazón de metal puede alcanzar temperaturas extremadamente altas. Este calor puede transmitirse directamente al film, provocando su degradación. La cinta de fieltro proporciona una capa de aislamiento, moderando la temperatura en estos puntos críticos de contacto. Es una medida sencilla y económica que ofrece enormes beneficios al prolongar la vida útil de su cubierta.
Diseño de la disposición de su canal: zócalos, paneles de esquina y paredes de cabecera
Antes de taladrar el primer agujero, es fundamental tener un plan claro sobre dónde se colocará cada pieza del canal de fijación. El objetivo es crear un perímetro completamente cerrado para cada superficie que se vaya a cubrir. Recorre la estructura y visualiza el trazado del canal.
- Zócalos: El canal de sellado debe discurrir de forma continua a lo largo de la base del túnel de plástico por todos los lados. A menudo se fija a un zócalo de madera o metal que, a su vez, se sujeta a los postes del suelo. Esta es la base de tu sellado.
- Paredes de los extremos: Los arcos de los muros extremos requieren una línea continua de perfil de fijación. Aquí es donde cobra importancia la posibilidad de doblar el perfil para adaptarlo a una curva. El perfil perfilará los marcos de las puertas y cualquier abertura de ventilación.
- Lados enrollables: En los invernaderos con ventilación lateral enrollable, el canal de fijación se instala en un «listón de cumbrera». Este listón es un elemento estructural horizontal que recorre toda la longitud de la estructura, situado a la altura en la que se desea que termine el lateral enrollable. El plástico principal del techo se fijará en este canal. El plástico lateral enrollable independiente se unirá a la barra enrollable en la parte inferior y, a menudo, se fijará con un método diferente o simplemente se dejará colgado. El canal del tablero de cumbrera es lo que crea el sellado entre el techo fijo y la pared lateral móvil.
- Ridge: Aunque no siempre es necesario, algunos diseños pueden incorporar un canal de cierre en la parte más alta o en la cumbrera del invernadero, especialmente en estructuras más anchas conectadas mediante canaletas.
Crear este esquema mentalmente o en un simple boceto te garantiza disponer de suficiente material y de una secuencia clara de pasos. Esto evita que te encuentres en una situación en la que ya hayas fijado tres lados de una lámina de plástico y te des cuenta de que no tienes dónde sujetar el cuarto. Es un plano mental para construir un cerramiento resistente al viento y al agua.
Lista de herramientas y materiales: cómo reunir todo lo necesario antes de empezar
No hay nada más frustrante que estar a mitad de un proyecto, tal vez subido a una escalera, y descubrir que te falta una herramienta o un componente necesario. Una actitud profesional exige que se reúnan y revisen todos los materiales antes de comenzar el trabajo. Una lista de verificación típica para instalar el canal de cierre y la película incluiría:
-
Materiales:
- Canal de bloqueo (aluminio o acero)
- Alambre de resorte (se recomienda con recubrimiento de PVC)
- Lámina para invernadero (tamaño adecuado para su estructura)
- Tornillos autorroscantes (del tipo y la longitud adecuados para el material de su marco)
- Cinta de fieltro para invernaderos (opcional, pero muy recomendable)
-
Herramientas:
- Taladro inalámbrico con portabrocas magnético (el embrague del taladro resulta útil para evitar apretar demasiado los tornillos)
- Lima o amoladora para metal
- Cinta métrica
- Rotulador o lápiz
- Escaleras o andamios
- Cúter con cuchillas nuevas
- Guantes y gafas de seguridad
Tener todo organizado y a la mano transforma el proceso de un ajetreo caótico en un flujo de trabajo fluido y eficiente. Te permite centrarte en la calidad de la instalación en lugar de estar buscando una broca extraviada. Esta preparación metódica es el sello distintivo de un constructor experimentado y la base para lograr un resultado satisfactorio.
El arte de la instalación: fijación del canal de cierre
With the frame prepared and all materials at hand, the process of attaching the lock channel begins. This phase is about precision and consistency. The channel is the skeleton of your fastening system; if it is weak or poorly aligned, the entire system will be compromised. Each screw, each joint, and each curve contributes to the final strength of the seal. This is not a step to be rushed. It is methodical work that demands attention to detail, transforming the bare frame into a structure ready to receive its skin.
Establishing a Straight and Level Foundation: The Baseboard Channels
The installation should always begin with the baseboards. These are the long, straight runs at the bottom of the hoop house. Attaching the lock channel here first establishes a reference line for the rest of the installation.
Start at one corner. Place the first piece of lock channel against the baseboard, ensuring it is straight and properly aligned. The open side of the "U" or "C" channel should typically face outwards or upwards, in the direction that is most convenient for inserting the spring wire later. Using a cordless drill, drive a self-tapping screw through the pre-drilled hole in the channel (if available) or directly through the back of the channel into the frame.
When connecting two pieces of channel end-to-end, they should be butted together as tightly as possible to create a nearly seamless track. A small gap of 1/8 inch (3-4 mm) is acceptable to allow for thermal expansion, but larger gaps can create a weak spot or snag the film. Some installers prefer to slightly ream the inside edge of the cut ends to remove any burrs that could damage the wire or film. Continue this process, attaching the channels along the entire length of the baseboard on all sides of the structure. Maintaining a straight, consistent line is key.
Bending Channels to Fit Your Hoops: Techniques for a Perfect Curve
Attaching the channel to the curved end-wall bows is one of the more technique-sensitive parts of the job. The goal is to create a smooth, even curve that precisely follows the contour of the frame, without kinking or deforming the channel.
Aluminum channel is the preferred choice for curves due to its flexibility. The most effective technique is to "pre-bend" the channel before attaching it. Lay the channel on the ground and place your foot in the middle. Gently pull up on both ends to introduce a slight curve. Move your foot and repeat, slowly working a curve into the entire length. Do not try to create the full bend in one go. It is a gradual process.
Once it has a rough curve, you can begin attaching it to the end bow, starting from the center (the peak of the arch) and working your way down both sides. As you attach it, the act of screwing it to the frame will help to form the final, precise curve. Place a screw, then gently press the next section of channel against the bow and place the next screw. The channel should conform to the bow without being forced.
For galvanized steel channels, which are much more rigid, bending on-site is difficult. It is far better to order pre-bent channels from a supplier like a leading provider of greenhouse components who can manufacture them to the exact radius of your hoops. Attempting to bend a rigid steel channel without the proper equipment will almost certainly result in kinking, which destroys the integrity of the channel and creates a point where the spring wire will not lock correctly.
Screw Spacing and Type: A Detail That Defines Strength
The choice of screw and the spacing between them are not minor details; they are fundamental to the strength of the system. The screws are what transfer the load from the lock channel to the main frame of the greenhouse.
-
Screw Type: Self-tapping screws are the standard. For attaching to a metal frame, self-tapping screws with a drill-point tip are ideal, as they drill their own pilot hole. The screw material should be compatible with the frame to avoid galvanic corrosion; coated or stainless steel screws are a good choice. The length must be sufficient to get a secure purchase in the frame material without being so long that the tip protrudes and creates a hazard or a snag point for the film.
-
Distancia entre tornillos: A common recommendation is to place a screw every 18 to 24 inches (45 to 60 cm) along the straight runs of the channel. However, in areas known for high winds, it is prudent to decrease this spacing to every 12 inches (30 cm). On curved sections, the screws may need to be placed closer together to ensure the channel follows the curve smoothly. A screw should always be placed within a few inches of each end of every channel piece.
Think of each screw as a stitch holding the system together. Too few stitches, and the seam will tear apart under stress. By using the correct type of screw and appropriate spacing, you are ensuring that the immense forces exerted by wind on the large surface area of the film are safely and effectively transferred from the film, to the wire, to the channel, to the screws, and finally into the strong, grounded frame of the hoop house.
El evento principal: colocación y ajuste del plástico para invernadero
After the methodical work of preparing the frame and installing the lock channel, the moment arrives to introduce the greenhouse film. This stage transforms the bare skeleton into an enclosed space. It is a process that is part science, part art, and greatly influenced by the weather. The goal is to cover the structure with the film, ensuring it is centered, correctly oriented, and has just the right amount of slack to allow for tensioning. Success here depends on patience, teamwork, and an understanding of how the polyethylene material behaves.
Choosing the Right Day for Installation: The Wisdom of Patience
The single most important factor for a successful film installation is the weather. Attempting to install a large sheet of greenhouse plastic on a windy day is a recipe for frustration and failure. A 2,000-square-foot sheet of plastic becomes an uncontrollable sail in even a moderate breeze, making it impossible to position and dangerous for the installation crew. The ideal day for pulling plastic is calm, with little to no wind.
Temperature also plays a role. Polyethylene film expands when warm and contracts when cool. If you install the film and pull it drum-tight on a very hot, sunny day, it will contract as the temperature drops overnight. This contraction can put immense stress on the film and the lock channel system, potentially causing the wire to pop out or even tearing the film. Conversely, if you install it on a very cold day, it will become loose and sag when the weather warms up.
The perfect condition is a calm, overcast, mildly temperate day. This allows you to position the film easily and achieve a tension that will remain relatively stable through normal temperature fluctuations. If you must install on a sunny day, aim for early morning or late evening when the temperature is moderate. Resisting the urge to push ahead in poor conditions is a mark of experience. Waiting for the right day is not a delay; it is a critical part of the process.
The "Center-Out" Method for a Wrinkle-Free Finish
A smooth, wrinkle-free film is not just aesthetically pleasing; it is also structurally superior. Wrinkles can collect water, create shadows, and are points where the film can flap and abrade against the frame. The "center-out" method is the professional standard for achieving a taut, even finish.
-
Unroll and Position: With a team of people (two is the minimum, more is better for large structures), carefully unroll the film along one side of the hoop house. Identify the center of the film and a corresponding center point on the greenhouse structure (e.g., the center hoop).
-
Pull Over the Top: Using ropes attached to the corners or simply by hand, gently pull the film up and over the ridge of the hoop house. The goal is to drape it over the structure, ensuring it has roughly equal amounts of overhang on all sides.
-
Find the Center: Adjust the sheet so that it is centered both lengthwise and widthwise. You should have a similar amount of excess film hanging down past the baseboards on both sides, and past the end walls on both ends.
-
Make the First Attachment: The first point of attachment should be at the center of one of the end-wall arches. Secure a few feet of film in the lock channel at the very peak of the arch using a piece of spring wire. This acts as a central anchor.
-
Work Outwards: From this central anchor point, work outwards and downwards, securing the film in the lock channels. The pattern should be one of working from the center to the edges. For example, after anchoring the top-center, you might move to the center of one of the baseboards. Then, work your way from the center of the baseboard out towards the corners. This method gently pulls the slack out of the film, smoothing out wrinkles as you go, rather than trapping them in the middle.
Managing Single vs. Double Layers of Poly
Many commercial and cold-climate hoop houses utilize a double layer of polyethylene film. A small inflation fan is used to pump air between the two layers, creating an insulating air gap that can significantly reduce heating costs. Installing a double layer requires a slight modification of the technique.
The two layers of film are typically pulled over the structure together as a single unit. It is vital to ensure they are oriented correctly. Many greenhouse films have a designated "inside" and "outside." The outside is treated for maximum UV resistance, while the inside may have an anti-condensate coating that prevents water droplets from forming and dripping on plants. When using two layers, both sheets should have their "inside" surfaces facing inwards, towards the center of the air gap. The manufacturer's printing on the film will indicate the correct orientation.
When it comes to securing the film in the lock channel, both layers are treated as one. They are placed in the channel together, and a single spring wire is used to lock them both in place. The spring wire and channel system is strong enough to securely hold two layers of standard 6-mil film. This double-layer installation, combined with an inflation kit, is a hallmark of a four-season, energy-efficient greenhouse.
Dominar el «wiggle»: fijar la película con alambre elástico
This is the climactic moment of the installation process. The film is draped, the channels are waiting, and the spring wire is ready. The physical act of inserting the wire is what brings the whole system to life, locking the film in place and beginning the tensioning process. While the motion is simple, a correct technique is what separates a secure, long-lasting installation from one that is prone to failure. This step is about feel and rhythm, transforming potential energy stored in the spring wire into a powerful, static grip on the covering.
The Correct "Wiggling" Technique: An Angle for Success
The name "wiggle wire" is descriptive. The most effective way to insert the wire is not to push it straight down into the channel. Doing so requires immense force and can risk damaging the film. The proper technique involves a side-to-side "wiggling" motion.
-
Start at an Angle: Begin at one end of the channel. Hold the spring wire so that it is angled slightly, not perpendicular to the channel.
-
Push and Wiggle: Push the leading edge of the wire into the channel. As you push forward along the length of the channel, simultaneously move your hand back and forth in a short, wiggling motion. This action causes the zigzagging wire to "walk" its way into the channel, seating itself over the film. The motion should be fluid. One side of a wire "peak" goes in, then the other.
-
Feel the Lock: As the wire seats correctly, you will feel and often hear a satisfying click or snap as it settles into the channel. It should feel secure and require significant effort to pull back out. If it feels loose, it may not be seated properly. Remove it and try again.
This technique uses leverage and the wire's own shape to do the work, requiring far less brute force. It is also gentler on the film, as you are not creating a high-pressure point by trying to force the wire straight in. For a visual demonstration, many suppliers, such as Wigglewires.com, provide videos that clearly illustrate this wiggling motion.
Anchoring Corners and High-Stress Areas First
The sequence in which you install the wire is crucial for achieving even tension. As described in the "center-out" method, you are progressively stretching the film. A good general sequence is to anchor the key stress points first.
- Initial Anchors: Start with the initial center anchors on the end walls and perhaps the center of the long side walls.
- Esquinas: The corners of the greenhouse are high-stress areas. After the initial anchors are in, move to the corners. Pull the film taut diagonally and secure it in the corner sections of the lock channel. Securing the corners helps to define the overall shape and tension of the main surfaces.
- Fill in the Gaps: Once the center points and the corners are locked in, go back and fill in the long, straight sections in between. As you work along a baseboard, for example, you can gently pull the film downwards and outwards to remove any remaining wrinkles before wiggling the wire into place.
This sequence ensures that tension is applied evenly across the sheet, preventing the formation of large wrinkles or areas of sag. It is a systematic process of pulling the film taut and locking that tension in place, section by section.
Layering Materials: How to Secure Film and Shade Cloth Together
One of the great advantages of the lock channel and spring wire system is its ability to hold multiple layers. This is commonly used to add a layer of shade cloth over the primary greenhouse film during hot summer months. The process is remarkably simple and does not require disturbing the main film.
Let's say your 6-mil polyethylene film is already installed and secured with one spring wire. To add shade cloth:
- Drape the Shade Cloth: Pull the shade cloth over the structure, on top of the existing poly film.
- Insert a Second Wire: Position the edge of the shade cloth over the same lock channel that is holding the poly film.
- Wiggle It In: Take a second, separate piece of spring wire and, using the same wiggling technique, insert it into the channel alongside the first wire.
The channel is designed with enough space to accommodate two spring wires and the multiple layers of material. The second wire will lock the shade cloth in place without affecting the first wire or the seal on the primary greenhouse film. At the end of the season, the shade cloth can be removed by simply pulling out the second wire, leaving the main covering untouched. This versatility makes it easy to adapt the greenhouse to changing seasons and crop requirements, a feat that is difficult or impossible with older fastening methods.
Toques finales: inspección, tensado y mantenimiento a largo plazo
The installation of the lock channel and spring wire for hoop houses is not truly complete when the last wire is wiggled into place. The final phase involves a critical inspection, fine-tuning the film tension, and establishing a mindset of proactive maintenance. These concluding actions ensure the system performs optimally from day one and continues to protect your investment for years to come. This is the stage where craftsmanship is confirmed and the foundation for a long, reliable service life is laid.
The "Tap Test": Assessing and Adjusting Film Tension
Once the film is secured in all the channels, the next step is to assess its tension. The ideal tension is "drum-tight." The film should be taut enough that it does not sag or flap, but not so tight that it is under extreme stress.
A simple, effective way to check the tension is the "tap test." Tap the surface of the film with your fingers. It should produce a low, resonant, drum-like sound. It should feel tight and responsive, with very little give. If you tap it and it feels loose or produces a flaccid "thud," it needs to be tightened.
To tighten a section, you must remove the spring wire from that area. Pull gently but firmly on the edge of the film to remove the slack, and then reinstall the spring wire to lock in the new, higher tension. This is an iterative process. You may need to adjust several sections to achieve a uniform, drum-tight surface across the entire structure. It is better to have the film slightly too loose than excessively tight. An overtightened film has no give and is more susceptible to tearing or damage from hail, while a slightly loose film can be re-tensioned later.
Trimming Excess Film: The Finishing Touch
After the final tensioning, you will be left with excess film hanging down from the lock channels. This should be trimmed for a clean appearance and to prevent practical problems. Excess film can collect water, flap in the wind, and provide a habitat for pests.
Using a sharp utility knife, carefully trim the excess film. A good practice is to leave about 2-3 inches (5-8 cm) of film extending beyond the lock channel. Do not cut the film flush with the channel. This small flap of extra material provides some insurance. If the film were to ever pull slightly in the channel, this flap ensures a seal is maintained. It also provides something to grip if you ever need to remove and re-tension the film. Make a clean, straight cut along the entire perimeter of the greenhouse.
A Seasonal Checklist: Inspecting Your System for Wear and Tear
A lock channel and spring wire system is low-maintenance, but not zero-maintenance. Regular inspection is the key to catching small problems before they become catastrophic failures. A simple walkthrough, perhaps once at the beginning of each season and always after a major storm, can save you from a costly emergency repair.
- Check the Wires: Look for any sections of spring wire that may have popped out of the channel, especially in corners or on the windward side of the structure. If a wire is out, the film is not secure. Reinsert it immediately.
- Inspect the Film at the Channel: Look closely at the film where it enters the lock channel. Check for any signs of abrasion, tearing, or discoloration that might indicate excessive heat or friction.
- Examine the Channels and Screws: Look for any signs of rust on steel channels, particularly at cut ends or scratches. Check for any screws that may have loosened over time and tighten them as needed. s Assess Overall Tension: Perform the tap test again. Over time, the film can stretch slightly. If it has become noticeably loose, it may be time to re-tension it to prevent wind flap, which is a primary cause of film failure.
By treating the fastening system as a dynamic component of your greenhouse that requires occasional attention, you extend its life and the life of the covering it protects. This proactive stewardship ensures the hoop house remains a secure, stable, and productive environment for your crops, season after season.
Preguntas frecuentes
Can I reuse spring wire (wiggle wire)?
Yes, high-quality spring wire is designed to be reusable. PVC-coated, heavier-gauge wires are particularly durable and can typically be removed and reinstalled many times over several years without losing their spring tension. Lower-quality, plain galvanized wires may become bent or lose their shape more easily and may need to be replaced more frequently.
How do I connect two pieces of lock channel end-to-end?
To connect two pieces of lock channel, simply butt them up against each other as closely as possible. Ensure they are aligned to create a straight, continuous track. A very small gap (around 1/8 inch or 3 mm) is acceptable for thermal expansion. Make sure to place a mounting screw within 2-3 inches of the joint on both pieces of channel for maximum strength.
My spring wire keeps popping out in high winds. What am I doing wrong?
This issue usually stems from one of three causes. First, the film may not be tensioned properly and is too loose, allowing wind to get underneath it and create enough force to push the wire out. Second, the wire may not have been installed correctly with the "wiggling" motion, so it is not fully seated in the channel. Third, your screw spacing on the lock channel may be too far apart, allowing the channel to flex under wind load. Try re-tensioning the film, reinstalling the wire correctly, and consider adding more screws to the channel in the affected area.
Can I install two layers of material, like film and shade cloth, in the same channel?
Absolutely. One of the main benefits of this system is its ability to hold multiple layers. The standard procedure is to install the first layer (greenhouse film) with one spring wire. Then, place the second layer (shade cloth) over the top and secure it in the same channel using a second, separate spring wire.
What is the best way to repair a small tear in the film near the lock channel?
For small tears or punctures, the best solution is to use a specialized greenhouse repair tape. This is not ordinary tape; it is a UV-stabilized polyethylene tape with an aggressive acrylic adhesive. Clean the area around the tear thoroughly, ensure it is dry, and apply a piece of the repair tape to both the inside and outside of the film for a durable, weatherproof seal.
Conclusión
The integrity of a hoop house structure is not defined by its strongest arch or its thickest covering, but by the quality of the connection between them. The lock channel and spring wire system provides a method of attachment that is superior in its distribution of stress, its gentleness on the film, and its long-term reliability. By moving from point-based fasteners to a continuous grip, it mitigates the primary failure points of older systems. The selection of appropriate materials—aluminum for humid regions, steel for strength, and PVC-coated wire for film protection—is a nuanced decision that must be informed by local climate and operational goals. A successful, storm-proof seal is not the result of a single action, but the culmination of a series of deliberate steps: meticulous frame preparation, precise channel installation, patient film handling, and a correct "wiggling" technique. To invest in a quality lock channel and spring wire system, and in the knowledge to install it correctly, is to make a direct investment in the security of your crops, the energy efficiency of your operation, and the overall longevity of your greenhouse.
Referencias
AgTec. (2025). Greenhouse supplies. AgTec. Retrieved January 1, 2025, from
Hortitech Direct. (2025). Greenhouse covering basics. Hortitech Direct. Retrieved January 1, 2025, from
Innogreenhouse. (2025). The world's leading greenhouse manufacturer. Shandong Northern Greenhouse Co., Ltd. Retrieved January 1, 2025, from
Skyplan Greenhouse Technology Co., Ltd. (2025). Greenhouse wiggle wire. Jiangsu Skyplan Greenhouse Technology Co., Ltd. Retrieved January 1, 2025, from
Wigglewires. (2024). Greenhouse construction materials and equipment supplier. Beijing Fenglong Hitech Co., Ltd. Retrieved November 1, 2024, from https://www.wigglewires.com/
Wigglewires. (2024). Wiggle wire channel category. Beijing Fenglong Hitech Co., Ltd. Retrieved December 1, 2024, from https://www.wigglewires.com/wiggle-wire-channel-category/
Wigglewires. (2025). Video. Beijing Fenglong Hitech Co., Ltd. Retrieved February 21, 2025, from https://www.wigglewires.com/video/