
フープハウス用ロックチャンネルとスプリングワイヤーのエキスパートガイド:2025年、嵐に強い密閉のための7つのステップ
12月 23, 2025
要旨
フープハウスの構造的完全性は、基本的に被覆物取り付けシステムの有効性に依存する。本書では、ポリエチレンフィルムやその他の柔軟な被覆材を温室フレームに固定するための主要な方法である、ロックチャンネルとスプリングワイヤーシステムについて包括的に検討する。このシステムの仕組みを分析することで、連続的な高摩擦グリップが風荷重を均等に分散し、フィルムの早期破損につながるストレスポイントを軽減することが明らかになった。耐食性、強度、多様な世界的気候への適合性を考慮し、ロック・チャンネル用のアルミニウムと亜鉛メッキ鋼を比較しながら、コンポーネントの背後にある材料科学を評価する。同様に、ゲージの厚さやPVCコーティングの保護品質など、スプリングワイヤーのバリエーションについても精査している。本文では、フレームの準備からフィルムの最終的な張り方まで、設置のプロセスを系統的に概説し、耐久性と耐候性のあるシールを確実にする技術を強調している。その目的は、プロの栽培者や愛好家が、適切な選択と実施に必要な微妙な理解を身につけることで、温室カバーの寿命を最大限に延ばし、中の作物を守ることである。
要点
- 沿岸部や湿度の高い地域では、腐食を防ぐためにアルミニウム製のロック・チャンネルを選択する。
- 温室用フィルムを破れや熱によるダメージから守るため、PVCコーティングされたスプリングワイヤーを使用する。
- チャンネルを取り付ける前に、フレームの溶接部や鋭角部にフェルトテープを貼る。
- 穏やかで穏やかな日にフィルムを施工することで、シワのないプロフェッショナルな仕上がりを実現する。
- フープハウスのロック・チャンネルとスプリング・ワイヤーを適切に設置し、暴風雨に耐えられる密閉性を確保する。
- スプリングワイヤーを斜めに挿入し、"くねらせる "ような動きでしっかりとフィットさせる。
- 特に嵐の後は、ワイヤーが緩んでいないか、破損していないか、定期的に点検する。
目次
- 基本的パートナーシップを理解するロック・チャンネルとスプリング・ワイヤー
- 賢く選ぶ:気候と目標に合った素材を選ぶ
- 下地作りフープハウスのフレームの入念な準備
- 取り付けの技術ロックチャンネルの取り付け
- メインイベント温室用フィルムのドレープと位置決め
- くねくね」をマスターするスプリングワイヤーでフィルムを固定する
- 最後の仕上げ:点検、張り、長期ケア
- よくある質問
- 結論
- 参考文献
基本的パートナーシップを理解するロック・チャンネルとスプリング・ワイヤー
フープハウスの建設やメンテナンスに着手するには、一連の決断が必要であり、そのひとつひとつが栽培スペースの将来の成功にとって重要な意味を持つ。その中でも、フレキシブルな温室の被覆を剛性の高いフレームに固定する方法は、最も重要である。ロック・チャンネルとスプリング・ワイヤー・システムは、しばしば「ウィグル・ワイヤー」システムと呼ばれ、温室技術の重要な進化を象徴しています。このシステムが広く採用されたのは偶然ではなく、被覆材を連続的かつ確実に、そして優しくグリップする優れた性能の直接的な結果です。その価値を理解するには、まずそのエレガントでシンプルな仕組みと、構造の寿命と保護する植物の健康に与える大きな影響を把握する必要があります。
システムのメカニズム強力なグリップのためのシンプルなコンセプト
このシステムの中核は、2つの連結部品から構成されている。1つ目はロック・チャンネルで、通常アルミニウムか亜鉛メッキ鋼で製造されるベース・プロファイルです。このチャネルは、特に設計された「U」または「C」形状を示します。温室フレームの構造部材(幅木、腰板、巻き上げ側面、端壁アーチ)に直接取り付けます。これは、カバーされる各セクションの外周に、連続したトラックまたはレシーバーを作るものと考えてください。
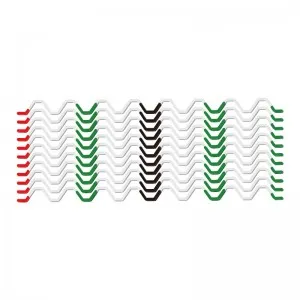
2つ目の部品はスプリング・ワイヤーで、ジグザグまたは「くねくね」パターンに曲げられた高張力鋼線です。このワイヤーは、ロック・チャンネル内にぴったりと収まるように設計されています。魔法は設置時に起こる。温室用フィルムがフレームにかけられ、ロック・チャンネルの上に引っ張られると、スプリング・ワイヤーがフィルムの上のチャンネルに押し込まれます。ワイヤーがバネのような性質を持つため、外側に膨らみ、フィルムをチャネルの内壁に押し付けます。ジグザグの形状が複数の接触点を生み出し、全長にわたって大きな摩擦を発生させる。この作用は、フィルムを貫通させるのではなく、しっかりとつかむことでしっかりと固定する。同じチャンネルに2本のスプリングワイヤーを使用することで、一次フィルム層と二次遮光布のように、1本のランで1層、あるいは複数層の素材を保持することができます。その結果、連続的で均一なシールが得られ、風によるバタつきや引き抜きの力に対して驚くほど強くなります。
なぜステープルやバテンではないのか?寿命と張力のレッスン
ロック・チャンネルやスプリング・ワイヤーのようなシステムが登場する前は、生産者はもっと初歩的な方法に頼っていた。一般的な方法は木製バテンシステムで、薄い帯状の木材をフィルムの上に置き、木製の温室フレームに釘やネジで固定するものでした。また、特に趣味的な構造では、単にホッチキスガンを使う方法もあった。これらの方法が、プロや本格的な用途で使われなくなったのはなぜでしょう?
その答えは、応力の分布にある。ステープルやスクリューは、局所的に強い応力を発生させる。それぞれのファスナーがフィルムを貫通し、小さな穴ができる。風が吹くと、フィルムはなびく。このひらひらとした動きによって、小さな穴が開いた部分に莫大な力が集中する。旗が風になびくのを想像してほしい。同じように、ホッチキスで留めた温室用フィルムは、最初の大きな嵐で必ずホッチキスから裂けてしまいます。
木製のバテンは、力を線に沿って分散させることで若干の改善をもたらす。しかし、それでも問題は残る。木材は湿気によって膨張・収縮し、張力が不均一になる可能性がある。また、ファスナーは点式であり、木材自体に破片や粗い角があるため、時間の経過とともにフィルムが摩耗する可能性がある。さらに、ステープルとバテンの両方がフィルムの交換を手間のかかる作業にしている。
ロック・チャンネルとスプリング・ワイヤー・システムは、これらの欠点を克服している。連続したグリップを作ることで、風荷重を周囲全体に均等に分散させる。パンクの心配もない。チャネルの滑らかな表面とPVCコーティングされたワイヤーはフィルムに優しい。このシステムは、簡単に取り外しと再設置ができるため、季節ごとのフィルムの交換やシェードクロスの追加も簡単です。要するに、「穴をあける」から「つかむ」という哲学への転換であり、この転換によってフープハウスの被覆の信頼性と寿命が劇的に向上したのである。
温室環境と作物の健康への影響
しっかりと固定された被覆は、単に構造上の問題ではなく、園芸上必要なものです。温室の主な機能は、外界よりも植物の生育に有利な、制御された修正された環境を作り出すことです。この制御は、構造体のシールの完全性に完全に依存しています。
フィルムが緩んでいたり隙間があると、空気が大量に漏れる。ロシアの寒い冬には、貴重な熱が逃げることになり、暖房設備が常に稼働して莫大な費用がかかる。東南アジアのような高温多湿の気候では、熱気が構造内に侵入し、冷房努力を無駄にし、菌類による病気を促進することになる。無秩序な空気交換は、植物の健全な発育と高収量の収穫の基礎となる温度と湿度のレベルを一定に保つことを不可能にする。
さらに、被覆の隙間は害虫の侵入口となる。昆虫やその他の小動物は、フィルムが破れたり、密閉が不十分な部分から簡単に侵入することができ、病気や作物被害の媒介となる。ロック・チャンネルとスプリング・ワイヤー・システムは、適切に設置されれば、ほとんど密閉状態になります。無秩序な空気交換を止め、内部気候の正確な管理を可能にする。また、害虫に対する物理的な障壁にもなります。温室のフィルムに張りを持たせ、完全に無傷な状態にすることで、このファスナーシステムは作物の静かな守護者となり、風雨だけでなく、微妙な環境変動や生物学的脅威からも作物を守り、生産者の努力を台無しにします。したがって、高品質のファスニングシステムへの投資は、温室経営の生産性と収益性そのものへの投資なのです。
賢く選ぶ:気候と目標に合った素材を選ぶ
ロック・チャンネルとスプリング・ワイヤー・システムの決定プロセスは、システムそのものを選択するだけでは終わりません。コンポーネントの素材によって、その性能、寿命、特定の環境への適合性が決まります。南アフリカの海岸沿いで塩分を含んだ空気にさらされる栽培農家と、温暖な地域で重い積雪に直面する栽培農家とでは、優先順位が異なるでしょう。アルミニウムとスチールの特性や、ワイヤーコーティングの違いを理解することが、本当に丈夫で長持ちするフープハウスを作るための第一歩です。
大論争:アルミニウム対亜鉛メッキスチール ロックチャンネル
システムの基礎となるロック・チャンネルは、頑丈で耐久性がなければならない。最も一般的な材料はアルミニウムと亜鉛メッキスチールです。それぞれに異なる特徴があり、用途によって適したものとそうでないものがあります。地域の条件を考えることが最も重要です。
| 特徴 | アルミニウム・ロック・チャンネル | 亜鉛めっきスチール・ロック・チャンネル |
|---|---|---|
| 耐食性 | 素晴らしい。アルミニウムは自然に保護酸化被膜を形成するので、高湿度、海岸、塩分の多い環境に最適です。錆びることはありません。 | 良いことだが、限りがある。亜鉛コーティング(亜鉛メッキ)は鋼鉄を保護するために犠牲的に腐食する。傷や切り口は錆の原因になる。湿った環境や塩分の多い環境では寿命が短くなる。 |
| 強度と剛性 | 良い。ほとんどの用途に十分な強度を持つが、スチールよりも柔軟性がある。フープハウスのアーチのカーブに沿うように曲げることも容易。 | 優れている。スチールはより強く、剛性が高いため、強風や雪などの大きな負荷がかかったときの曲げや変形に対する抵抗力に優れている。 |
| 重量 | 非常に軽い。重量が軽いため、特に頭上での作業や長い区間での作業において、扱いやすく、取り付けやすい。 | 重い。スチールはかなり密度が高く重いため、設置には肉体的な負担がかかる。 |
| コスト | 初期コストが高い。アルミニウムは一般的に、スチールに比べて高価な原材料です。 | 初期コストの低減。亜鉛メッキ鋼板は一般的に、より予算に見合った選択肢であるため、コスト重視の大規模プロジェクトに人気があります。 |
| 熱伝導率 | 高い。アルミニウムは熱の伝導が速いため、晴れた日には温室用フィルムにホットスポットができ、接触面でフィルムの劣化を早める可能性がある。 | より低い。スチールはアルミニウムよりも熱の伝わりが遅いため、プラスチックフィルムに有害なホットスポットができるリスクが低い。 |
では、どうやって選べばいいのか?素材の立場になって考える、共感的なアプローチが役に立つ。あなたがロック・チャンネルだと想像してみてください。ブラジルの湿度の高い沿岸地域にあるフープハウスに設置されているとしたら、アルミニウムを選ぶだろう。空気中の絶え間ない湿気と塩分は、スチールチャンネル'の亜鉛コーティングを容赦なく攻撃するだろうが、アルミニウムとして、あなたは傷つくことなく残るだろう。逆に、降雪量の多い地域の構造物に設置する場合は、スチール製が望ましいでしょう。あなたの固有の剛性は、重量によって押しつぶされたり、変形されることに抵抗するために必要なバックボーンを提供するであろう。
強烈な日差しと暑さが主な課題である中東の多くの生産者にとって、スチールの熱伝導率の低さは利点かもしれませんが、特に蒸発冷却システムを使用する場合は、アルミニウムの優れた耐食性も強力な論拠となります。DIYビルダーや一人で作業する人にとっては、アルミの軽量性は実用上大きなメリットです。最終的には、長寿命、強度、予算のバランスを、お住まいの地域の環境に合わせて選択することになります。
スプリングワイヤーの解体:コーティング、ゲージ、寿命
スプリング・ワイヤーは、システムのアクティブ・コンポーネントであり、「くねくね」と動いてロックする部分である。一見単純な曲げられた金属片のように見えますが、その設計と構成は非常に重要です。ワイヤーの品質は、グリップの安全性と温室用フィルムの健全性に直接影響します。
ワイヤー自体は、ほとんどの場合、高炭素、高張力ばね鋼で、取り付け時にたわみ、その後、長年にわたってその形状と外圧を保持する能力から選ばれます。主な違いは、保護コーティングと直径(ゲージ)です。
| ワイヤータイプ | 説明 | メリット | デメリット | 最適 |
|---|---|---|---|---|
| 亜鉛メッキ | 標準的なバネ鋼に防錆のための亜鉛コーティング。 | 最低コスト。 | 亜鉛コーティングは皮膜を研磨します。錆は時間の経過とともに発生し、皮膜を汚し、ワイヤーを弱めます。 | 乾燥した温暖な気候での予算重視のプロジェクト。 |
| PVCコーティング | 亜鉛メッキを施したスプリング・スチール・ワイヤーを、柔軟性のあるUV安定PVCプラスチックでコーティング。 | 被膜に優しく、滑らかで摩擦を軽減する表面を提供する。コーティングは錆に対する第二のバリアとして機能する。金属からフィルムへの熱伝導を抑えます。長寿命。 | 普通の亜鉛メッキワイヤーより初期コストが高い。 | あらゆる気候、特に紫外線の強い場所、極端な温度や湿度の高い場所。フィルムの寿命を最大限に延ばすためのプロフェッショナル・スタンダードです。 |
PVCコーティングは、特に考え抜かれた技術革新である。炎天下の温室フィルムを想像してみてほしい。太陽によって熱せられたむき出しの金属ワイヤーがフィルムを圧迫し、伸びたり、弱くなったり、劣化を早めたりします。PVCコーティングは絶縁体として機能し、このような集中的な熱ストレスからフィルムを保護します。また、より滑らかな表面を作ることも重要です。6ミルのポリエチレン・シートを引っ張るとき、最も避けたいことは、微小な裂け目を引き起こす可能性のある、ざらざらした研磨面の上を引っ張ることです。滑らかなPVCコーティングにより、フィルムは傷つくことなく所定の位置に滑り込むことができる。詳しくは 実践バイヤーガイド これらの素材の選択について、より深い洞察を提供することができる。
ワイヤーのゲージ(直径)も重要です。太いワイヤー(例:2.3mm vs 2.0mm)の方が、一般的に外側に力がかかり、より確実なグリップが得られるため、強風の場所では有利です。また、耐久性が高く、何度も使用した後に永久的に曲がったり変形したりすることが少ない。コストの差はわずかであることが多いのですが、高品質でPVCコーティングが施された、より太いゲージのワイヤーを選ぶことは、フープハウスの被覆を長期的に安全に保つための最も費用対効果の高い方法のひとつです。
下地作りフープハウスのフレームの入念な準備
ロックチャンネルとスプリングワイヤーの設置が成功するかどうかは、最初のプラスチック片が広げられるずっと前に決まる。画家がキャンバスを準備するように、生産者はフープハウスのフレームを準備しなければならない。この準備段階は、被覆システムの完璧な土台を作るための先見性のある行為である。この段階を省略することは、摩擦や摩耗、早期故障を招くことになる。目標は、ロック・チャンネルを取り付けるための、滑らかで連続した、構造的に健全な表面を作ることである。準備に費やした時間は、温室用フィルムの長寿命と、安全な構造によってもたらされる安心感という形で、10倍になって返ってきます。
滑らかで安全な路面の確保
温室用フィルムには、鋭利なエッジというアキレス腱があります。小さな金属のバリ、ブラケットの鋭い角、粗い溶接の継ぎ目などがナイフのように作用し、風雨の張力でフィルムを切り裂いたり、すりむいたりする。チャンネルを取り付ける前に、チャンネルが設置されるフレーム全体を触覚的に調査しなければならない。手袋をはめた手で、スチールやアルミのチューブ、継ぎ目、ブラケットをすべて確認する。
鋭利な点、溶接の飛び散り、バリなどが見つかれば、それらを取り除かなければならない。この作業には、金属ヤスリかフラップ・ディスク付きグラインダーが適している。その目的は、単に尖った部分を取り除くことではなく、その部分が脅威とならないように丸く滑らかにすることである。これは構造的な共感の一種だと考えてほしい。もうすぐその上に張られるデリケートなフィルムの視点からフレームを感じるのだ。
鋭利な部分を取り除くだけでなく、ある部分には保護バリアを貼るのが賢明だ。温室用フェルトテープ(紫外線安定化ポリエステルテープ)は、このための優れた素材である。溶接部や継ぎ目、異なるフレーム部品が接する部分に貼る。これは物理的なクッションの役割を果たし、フィルムを硬くて摩耗しやすい金属から分離します。また、熱遮断の役割も果たす。暑い日、金属フレームは非常に熱くなります。この熱はフィルムに直接伝導し、劣化の原因となります。フェルトテープは断熱層を提供し、これらの重要な接触点の温度を緩和する。これは、カバーリングの寿命を延ばすという大きな利益をもたらす、小さくて安価なステップなのです。
チャンネルレイアウトのマッピング幅木、腰板、端壁
最初の穴をあける前に、ロック・チャンネルの各パーツがどこに配置されるかを明確に計画しておくことが重要です。目標は、カバーされるすべての表面を完全に囲むことです。構造物の周囲を歩き、チャネルの経路をイメージしてください。
- 幅木: ロック・チャンネルは、フープハウスの底面に沿って四方を連続させる。多くの場合、地面の支柱に固定された木製または金属製の幅木に取り付けられています。これがシールの基礎となる。
- エンドウォール: 端壁のアーチは、連続したロック・チャンネルを必要とする。そこで、チャンネルをカーブに曲げる能力が重要になる。チャンネルはドア枠と換気口の輪郭を描く。
- ロールアップ・サイド: ロールアップ・サイド換気機能付き温室の場合、ロック・チャンネルは "ヒップボード "に取り付けます。このボードは、構造体の長さ方向に走る水平フレーム部材で、巻き上げ側面の端になる高さに配置します。メインのルーフ・プラスチックはこの溝に固定します。ロールアップ側のプラスチックは、下部のロールバーに取り付けられ、別の方法で固定されるか、単に吊るされます。ヒップボードチャンネルは、固定ルーフと可動側壁の間のシールを作るものです。
- リッジ 常に必要というわけではないが、特に幅が広く、雨樋で連結された構造では、温室の頂上や尾根にロックチャンネルを組み込む設計もある。
この地図を頭の中や簡単な図面に描いておくと、十分な材料と明確な作業順序が確保できる。ビニールシートの3辺を固定したら、4辺目を取り付ける場所がないことに気づいた、というシナリオを防ぐのに役立つ。これは、風を通さず防水性のある囲いを作るための、頭の中の設計図なのだ。
道具と材料のチェックリスト始める前にすべてを集める
プロジェクトの途中で、おそらくはしごに腰掛けているときに、必要な道具や部品が足りないことに気づくほど、いらいらすることはない。プロフェッショナルなアプローチでは、作業開始前にすべての材料を集め、チェックすることが求められます。ロック・チャンネルとフィルムを取り付ける際の典型的なチェックリストには、以下のようなものがあります:
-
素材:
- ロック・チャンネル(アルミニウムまたはスチール)
- スプリングワイヤー(PVCコーティングを推奨)
- 温室用フィルム(構造物に適したサイズ)
- セルフ・タッピング・スクリュー(フレームの素材に適したタイプと長さ)
- 温室用フェルトテープ(オプションだが、強く推奨する)
-
道具だ:
- 磁気ビットホルダー付きコードレスドリル(ネジの締めすぎを防ぐため、ドリルにクラッチが付いていると便利です)
- 金属ヤスリまたはグラインダー
- 測定テープ
- マーカーまたは鉛筆
- はしごまたは足場
- 刃が新しいカッターナイフ
- 手袋と安全眼鏡
すべてが整理され、手元にあることで、混沌とした慌ただしい作業から、スムーズで効率的なワークフローに変わります。ドリルビットの置き忘れを探すよりも、施工の品質に集中することができます。この規律正しい準備こそが、経験豊富なビルダーの特徴であり、成功の土台となるのです。
取り付けの技術ロックチャンネルの取り付け
フレームの準備が整い、すべての材料が手元に揃ったところで、ロック・チャンネルを取り付ける工程に入る。この段階は、精度と一貫性が重要です。チャンネルはファスナー・システムの骨格であり、これが弱かったり、位置が悪かったりすると、システム全体が損なわれてしまいます。各ネジ、各接合部、各カーブは、シールの最終的な強度に貢献します。これは急ぐステップではありません。細部にまで注意を払うことが要求され、むき出しのフレームを表皮を受ける準備が整った構造体へと変化させる、几帳面な作業なのだ。
まっすぐで水平な基礎の確立幅木チャンネル
設置は必ず幅木から始める。フープハウスの底にある長くまっすぐな部分です。まずここにロック・チャンネルを取り付けることで、その後の取り付けの基準線ができます。
片隅から始めます。ロック・チャンネルの最初のピースを幅木に当て、まっすぐであることと、きちんと位置が合っていることを確認します。U "または "C "チャンネルの開いている側は、通常、外向きまたは上向きにしてください。コードレスドリルを使用し、セルフタッピングネジをチャンネルの下穴に通すか(可能な場合)、チャンネルの裏側から直接フレームに通します。
2枚のチャンネルを端から端まで接続する場合、継ぎ目のほとんどないトラックを作るために、できるだけきつく突き合わせる必要があります。熱膨張を考慮すると、1/8インチ(3~4mm)の隙間は許容範囲ですが、隙間が大きいと弱点ができたり、フィルムが引っ掛かったりします。施工業者によっては、ワイヤーやフィルムを傷つける可能性のあるバリを取り除くため、切断した端の内側をわずかにリームすることを好みます。この作業を続け、巾木の全長に沿って、躯体の全面にチャンネルを取り付けます。まっすぐな一貫したラインを維持することが重要です。
フープに合わせてチャンネルを曲げる:完璧なカーブのためのテクニック
湾曲した端壁の弓にチャンネルを取り付けるのは、この作業で最もテクニックが必要な部分のひとつである。目標は、チャンネルをよじったり変形させたりすることなく、フレームの輪郭に正確に沿った滑らかで均一なカーブを作ることだ。
アルミ・チャンネルは柔軟性があるため、カーブに適している。最も効果的なテクニックは、チャンネルを取り付ける前に「あらかじめ曲げておく」ことです。チャンネルを地面に置き、中央に足を置く。両端をゆっくりと引き上げ、わずかにカーブをつける。足を動かして繰り返し、全長にゆっくりとカーブをつける。一度に全部のカーブを作ろうとしないでください。徐々に曲げていく。
大まかなカーブができたら、中央(アーチの頂点)から左右に向かって、エンド・ボウに取り付けていきます。取り付ける際、ネジでフレームに固定することで、最終的な正確なカーブが形成されます。ビスを打ち、次のチャンネルを弓にそっと押し当て、次のビスを打ちます。チャンネルが無理なく弓に沿うようにします。
より剛性の高い亜鉛メッキ・スチール・チャンネルの場合、現場での曲げ加工は難しい。のような業者から曲げ加工済みのチャンネルを注文する方がはるかに良い。 温室用部品のリーディング・プロバイダー フープの正確な半径に合わせて製作することができます。適切な器具を使わずに硬いスチール・チャンネルを曲げようとすると、ほぼ間違いなくキンクが発生し、チャンネルの完全性が失われ、スプリング・ワイヤーが正しくロックされない箇所ができてしまいます。
ネジの間隔と種類:強さを決めるディテール
ビスの選択と間隔は、細かいことではなく、システムの強度の基本です。スクリューは、ロックチャンネルから温室のメインフレームに荷重を伝えるものです。
-
スクリュータイプ: セルフタッピング・スクリューが標準である。金属フレームに取り付ける場合は、下穴を開けることができる先端がドリルになっているセルフタッピング・スクリューが理想的である。ネジの材質は、ガルバニック腐食を避けるため、フレームに適合するものでなければならない。長さは、先端が突出して危険やフィルムの引っ掛かりを生じない程度に、フレーム素材に確実に固定できる長さでなければならない。
-
ネジの間隔: 一般的に推奨されているのは、水路の直線に沿って、45~60cm(18~24インチ)ごとにスクリューを設置することである。しかし、強風が吹き荒れる地域では、この間隔を12インチ(30cm)ごとにするのが賢明である。カーブした部分については、水路がスムーズにカーブに沿うようにするため、スクリューをより近くに配置する必要があるかもしれない。各チャンネルの両端から数インチ以内には、必ずビスを配置する。
各ネジは、システムをつなぎ合わせる縫い目だと考えてください。縫い目が少なすぎると、ストレスで縫い目が裂けてしまいます。正しい種類のネジを適切な間隔で使用することで、風によってフィルムの大きな表面積にかかる莫大な力が、フィルムからワイヤー、チャンネル、ネジ、そして最後にフープハウスの強固で接地したフレームへと、安全かつ効果的に伝達されるのです。
メインイベント温室用フィルムのドレープと位置決め
フレームを準備し、ロック・チャンネルを取り付ける几帳面な作業の後、温室用フィルムを導入する瞬間が訪れる。この段階で、むき出しの骨組みが密閉された空間に生まれ変わる。これは科学でもあり、芸術でもあり、天候に大きく左右されるプロセスでもある。目標は、構造物をフィルムで覆い、フィルムの中心を確認し、向きを正しくし、張りができるように適度なたるみを持たせることだ。ここでの成功は、忍耐とチームワーク、そしてポリエチレン素材の挙動を理解することにかかっている。
適切な工事日を選ぶ忍耐の知恵
フィルムの施工を成功させるために最も重要な要素は、天候です。風の強い日に大きな温室用ビニールシートを設置しようとするのは、挫折と失敗のもとです。2,000平方フィートのビニールシートは、たとえそよ風でも制御不能な帆となり、位置決めが不可能になり、設置作業員にとって危険なものとなります。プラスチック引き上げに理想的なのは、風がほとんどなく、穏やかな日だ。
温度も一役買っている。ポリエチレン・フィルムは暖かくなると膨張し、涼しくなると収縮します。とても暑い晴れた日にフィルムを設置し、ドラムタイトに引っ張った場合、一晩中気温が下がるとフィルムは収縮します。この収縮がフィルムとロック・チャンネル・システムに大きなストレスを与え、ワイヤーが飛び出したり、フィルムが破れたりする可能性があります。逆に、とても寒い日に設置すると、暖かくなったときに緩んでたるんでしまいます。
完璧な条件は、穏やかな曇り空で、穏やかな気温の日である。これならフィルムの位置決めがしやすく、通常の気温の変化にも比較的安定したテンションを保つことができます。どうしても晴れた日に施工したい場合は、気温が穏やかな早朝か夕方以降にしましょう。コンディションが悪いときに無理に進めようとする衝動を抑えるのは、経験の証です。適切な日を待つことは、遅れをとることではなく、プロセスの重要な一部なのです。
しわのない仕上がりのための「センターアウト」メソッド
滑らかでシワのないフィルムは、単に美しいだけでなく、構造的にも優れています。シワは水を溜め込み、影を作り、フィルムがバタバタとフレームと擦れ合ってしまうポイントになります。センター出し」方式は、張りのある均一な仕上がりを実現するためのプロの標準です。
-
展開と位置決め: 2人1組で(最低2人、大型の場合は多いほうがよい)、フープハウスの片側に沿って慎重にフィルムを広げる。フィルムの中心と、温室構造の対応する中心点(例えば、中央のフープ)を確認する。
-
プル・オーバー・ザ・トップ: 四隅に取り付けたロープを使うか、手で軽く引っ張り、フープハウスの棟の上にフィルムをかぶせる。目標は、四方の張り出しがほぼ均等になるように、フープハウスの上にフィルムを垂らすことだ。
-
センターを探す: シートが縦横ともに中央にくるように調整する。両側の幅木と両端の壁を越えて、同程度の量の余分なフィルムが垂れ下がっているはずです。
-
最初のアタッチメントを作る: 最初の取り付け位置は、端壁のアーチの中央にする。アーチの頂点にあるロック・チャンネルに、スプリング・ワイヤーを使って数フィートのフィルムを固定する。これが中央のアンカーの役割を果たす。
-
外で働く: この中央のアンカー・ポイントから、フィルムをロック・チャンネルに固定しながら、外側と下側に向かって作業する。中央から端に向かって作業するパターンにする。例えば、中央上部を固定した後、幅木の中央に移動します。そして、幅木の中央からコーナーに向かって作業を進める。この方法は、フィルムのたるみを優しく引っ張り出し、シワを真ん中に閉じ込めるのではなく、シワをなめらかにしながら進めていく。
ポリのシングルレイヤーとダブルレイヤーの管理
業務用や寒冷地用のフープハウスの多くは、ポリエチレンフィルムの二重構造になっている。小型の膨張ファンを使って2つの層の間に空気を送り込み、断熱エアギャップを作ることで暖房費を大幅に削減することができる。二重構造のフープハウスの設置には、少し工夫が必要です。
2層のフィルムは通常、1つのユニットとして構造体の上に引っ張られる。2枚のフィルムが正しい方向に向いていることを確認することが重要です。多くの温室用フィルムには「内側」と「外側」があります。外側にはUVカット加工が施され、内側には水滴の発生を防ぐ結露防止加工が施されています。2枚重ねで使用する場合は、2枚とも「内側」の面を内側に向け、エアギャップの中心に向けてください。正しい向きは、フィルムに印刷されている製造元の表示で確認できます。
ロック・チャンネルでフィルムを固定する際、両層は1つのものとして扱われる。両層を一緒にチャンネルに入れ、1本のスプリングワイヤーで両層を固定します。スプリング・ワイヤーとチャンネル・システムは、標準的な6フィルムの2層をしっかりと固定するのに十分な強度があります。この2層設置は、インフレーション・キットと組み合わされ、4シーズン使用可能なエネルギー効率の高い温室の特徴となっています。
くねくね」をマスターするスプリングワイヤーでフィルムを固定する
This is the climactic moment of the installation process. The film is draped, the channels are waiting, and the spring wire is ready. The physical act of inserting the wire is what brings the whole system to life, locking the film in place and beginning the tensioning process. While the motion is simple, a correct technique is what separates a secure, long-lasting installation from one that is prone to failure. This step is about feel and rhythm, transforming potential energy stored in the spring wire into a powerful, static grip on the covering.
The Correct "Wiggling" Technique: An Angle for Success
The name "wiggle wire" is descriptive. The most effective way to insert the wire is not to push it straight down into the channel. Doing so requires immense force and can risk damaging the film. The proper technique involves a side-to-side "wiggling" motion.
-
Start at an Angle: Begin at one end of the channel. Hold the spring wire so that it is angled slightly, not perpendicular to the channel.
-
Push and Wiggle: Push the leading edge of the wire into the channel. As you push forward along the length of the channel, simultaneously move your hand back and forth in a short, wiggling motion. This action causes the zigzagging wire to "walk" its way into the channel, seating itself over the film. The motion should be fluid. One side of a wire "peak" goes in, then the other.
-
Feel the Lock: As the wire seats correctly, you will feel and often hear a satisfying click or snap as it settles into the channel. It should feel secure and require significant effort to pull back out. If it feels loose, it may not be seated properly. Remove it and try again.
This technique uses leverage and the wire's own shape to do the work, requiring far less brute force. It is also gentler on the film, as you are not creating a high-pressure point by trying to force the wire straight in. For a visual demonstration, many suppliers, such as Wigglewires.com, provide videos that clearly illustrate this wiggling motion.
Anchoring Corners and High-Stress Areas First
The sequence in which you install the wire is crucial for achieving even tension. As described in the "center-out" method, you are progressively stretching the film. A good general sequence is to anchor the key stress points first.
- Initial Anchors: Start with the initial center anchors on the end walls and perhaps the center of the long side walls.
- Corners: The corners of the greenhouse are high-stress areas. After the initial anchors are in, move to the corners. Pull the film taut diagonally and secure it in the corner sections of the lock channel. Securing the corners helps to define the overall shape and tension of the main surfaces.
- Fill in the Gaps: Once the center points and the corners are locked in, go back and fill in the long, straight sections in between. As you work along a baseboard, for example, you can gently pull the film downwards and outwards to remove any remaining wrinkles before wiggling the wire into place.
This sequence ensures that tension is applied evenly across the sheet, preventing the formation of large wrinkles or areas of sag. It is a systematic process of pulling the film taut and locking that tension in place, section by section.
Layering Materials: How to Secure Film and Shade Cloth Together
One of the great advantages of the lock channel and spring wire system is its ability to hold multiple layers. This is commonly used to add a layer of shade cloth over the primary greenhouse film during hot summer months. The process is remarkably simple and does not require disturbing the main film.
Let's say your 6-mil polyethylene film is already installed and secured with one spring wire. To add shade cloth:
- Drape the Shade Cloth: Pull the shade cloth over the structure, on top of the existing poly film.
- Insert a Second Wire: Position the edge of the shade cloth over the same lock channel that is holding the poly film.
- Wiggle It In: Take a second, separate piece of spring wire and, using the same wiggling technique, insert it into the channel alongside the first wire.
The channel is designed with enough space to accommodate two spring wires and the multiple layers of material. The second wire will lock the shade cloth in place without affecting the first wire or the seal on the primary greenhouse film. At the end of the season, the shade cloth can be removed by simply pulling out the second wire, leaving the main covering untouched. This versatility makes it easy to adapt the greenhouse to changing seasons and crop requirements, a feat that is difficult or impossible with older fastening methods.
最後の仕上げ:点検、張り、長期ケア
The installation of the lock channel and spring wire for hoop houses is not truly complete when the last wire is wiggled into place. The final phase involves a critical inspection, fine-tuning the film tension, and establishing a mindset of proactive maintenance. These concluding actions ensure the system performs optimally from day one and continues to protect your investment for years to come. This is the stage where craftsmanship is confirmed and the foundation for a long, reliable service life is laid.
The "Tap Test": Assessing and Adjusting Film Tension
Once the film is secured in all the channels, the next step is to assess its tension. The ideal tension is "drum-tight." The film should be taut enough that it does not sag or flap, but not so tight that it is under extreme stress.
A simple, effective way to check the tension is the "tap test." Tap the surface of the film with your fingers. It should produce a low, resonant, drum-like sound. It should feel tight and responsive, with very little give. If you tap it and it feels loose or produces a flaccid "thud," it needs to be tightened.
To tighten a section, you must remove the spring wire from that area. Pull gently but firmly on the edge of the film to remove the slack, and then reinstall the spring wire to lock in the new, higher tension. This is an iterative process. You may need to adjust several sections to achieve a uniform, drum-tight surface across the entire structure. It is better to have the film slightly too loose than excessively tight. An overtightened film has no give and is more susceptible to tearing or damage from hail, while a slightly loose film can be re-tensioned later.
Trimming Excess Film: The Finishing Touch
After the final tensioning, you will be left with excess film hanging down from the lock channels. This should be trimmed for a clean appearance and to prevent practical problems. Excess film can collect water, flap in the wind, and provide a habitat for pests.
Using a sharp utility knife, carefully trim the excess film. A good practice is to leave about 2-3 inches (5-8 cm) of film extending beyond the lock channel. Do not cut the film flush with the channel. This small flap of extra material provides some insurance. If the film were to ever pull slightly in the channel, this flap ensures a seal is maintained. It also provides something to grip if you ever need to remove and re-tension the film. Make a clean, straight cut along the entire perimeter of the greenhouse.
A Seasonal Checklist: Inspecting Your System for Wear and Tear
A lock channel and spring wire system is low-maintenance, but not zero-maintenance. Regular inspection is the key to catching small problems before they become catastrophic failures. A simple walkthrough, perhaps once at the beginning of each season and always after a major storm, can save you from a costly emergency repair.
- Check the Wires: Look for any sections of spring wire that may have popped out of the channel, especially in corners or on the windward side of the structure. If a wire is out, the film is not secure. Reinsert it immediately.
- Inspect the Film at the Channel: Look closely at the film where it enters the lock channel. Check for any signs of abrasion, tearing, or discoloration that might indicate excessive heat or friction.
- Examine the Channels and Screws: Look for any signs of rust on steel channels, particularly at cut ends or scratches. Check for any screws that may have loosened over time and tighten them as needed. s Assess Overall Tension: Perform the tap test again. Over time, the film can stretch slightly. If it has become noticeably loose, it may be time to re-tension it to prevent wind flap, which is a primary cause of film failure.
By treating the fastening system as a dynamic component of your greenhouse that requires occasional attention, you extend its life and the life of the covering it protects. This proactive stewardship ensures the hoop house remains a secure, stable, and productive environment for your crops, season after season.
よくある質問
Can I reuse spring wire (wiggle wire)?
Yes, high-quality spring wire is designed to be reusable. PVC-coated, heavier-gauge wires are particularly durable and can typically be removed and reinstalled many times over several years without losing their spring tension. Lower-quality, plain galvanized wires may become bent or lose their shape more easily and may need to be replaced more frequently.
How do I connect two pieces of lock channel end-to-end?
To connect two pieces of lock channel, simply butt them up against each other as closely as possible. Ensure they are aligned to create a straight, continuous track. A very small gap (around 1/8 inch or 3 mm) is acceptable for thermal expansion. Make sure to place a mounting screw within 2-3 inches of the joint on both pieces of channel for maximum strength.
My spring wire keeps popping out in high winds. What am I doing wrong?
This issue usually stems from one of three causes. First, the film may not be tensioned properly and is too loose, allowing wind to get underneath it and create enough force to push the wire out. Second, the wire may not have been installed correctly with the "wiggling" motion, so it is not fully seated in the channel. Third, your screw spacing on the lock channel may be too far apart, allowing the channel to flex under wind load. Try re-tensioning the film, reinstalling the wire correctly, and consider adding more screws to the channel in the affected area.
Can I install two layers of material, like film and shade cloth, in the same channel?
Absolutely. One of the main benefits of this system is its ability to hold multiple layers. The standard procedure is to install the first layer (greenhouse film) with one spring wire. Then, place the second layer (shade cloth) over the top and secure it in the same channel using a second, separate spring wire.
What is the best way to repair a small tear in the film near the lock channel?
For small tears or punctures, the best solution is to use a specialized greenhouse repair tape. This is not ordinary tape; it is a UV-stabilized polyethylene tape with an aggressive acrylic adhesive. Clean the area around the tear thoroughly, ensure it is dry, and apply a piece of the repair tape to both the inside and outside of the film for a durable, weatherproof seal.
結論
The integrity of a hoop house structure is not defined by its strongest arch or its thickest covering, but by the quality of the connection between them. The lock channel and spring wire system provides a method of attachment that is superior in its distribution of stress, its gentleness on the film, and its long-term reliability. By moving from point-based fasteners to a continuous grip, it mitigates the primary failure points of older systems. The selection of appropriate materials—aluminum for humid regions, steel for strength, and PVC-coated wire for film protection—is a nuanced decision that must be informed by local climate and operational goals. A successful, storm-proof seal is not the result of a single action, but the culmination of a series of deliberate steps: meticulous frame preparation, precise channel installation, patient film handling, and a correct "wiggling" technique. To invest in a quality lock channel and spring wire system, and in the knowledge to install it correctly, is to make a direct investment in the security of your crops, the energy efficiency of your operation, and the overall longevity of your greenhouse.
参考文献
AgTec. (2025). Greenhouse supplies. AgTec. Retrieved January 1, 2025, from
Hortitech Direct. (2025). Greenhouse covering basics. Hortitech Direct. Retrieved January 1, 2025, from
Innogreenhouse. (2025). The world's leading greenhouse manufacturer. Shandong Northern Greenhouse Co., Ltd. Retrieved January 1, 2025, from
Skyplan Greenhouse Technology Co., Ltd. (2025). Greenhouse wiggle wire. Jiangsu Skyplan Greenhouse Technology Co., Ltd. Retrieved January 1, 2025, from
Wigglewires. (2024). Greenhouse construction materials and equipment supplier. Beijing Fenglong Hitech Co., Ltd. Retrieved November 1, 2024, from https://www.wigglewires.com/
Wigglewires. (2024). Wiggle wire channel category. Beijing Fenglong Hitech Co., Ltd. Retrieved December 1, 2024, from https://www.wigglewires.com/wiggle-wire-channel-category/
Wigglewires. (2025). Video. Beijing Fenglong Hitech Co., Ltd. Retrieved February 21, 2025, from https://www.wigglewires.com/video/